Deploy
The Deploy tab is where you configure your agent's chat widget and publish it to your website.
Navigating to Deploy
Open an agent, then click the Deploy tab, or click the Deploy button in the agent's header (shown while the agent isn't Live yet).
Widget Settings
- Mode — a floating Bubble (small icon that expands) or an always-visible Fixed panel.
- Primary color and position (bottom-left or bottom-right).
- Welcome bubble text — a short prompt shown before the visitor opens the chat.
- Tabs — Home is always on; you can optionally add Chat, News, and Offers tabs (up to 4 total).
- Consent banner text — shown for GDPR-style consent before the widget collects any data.
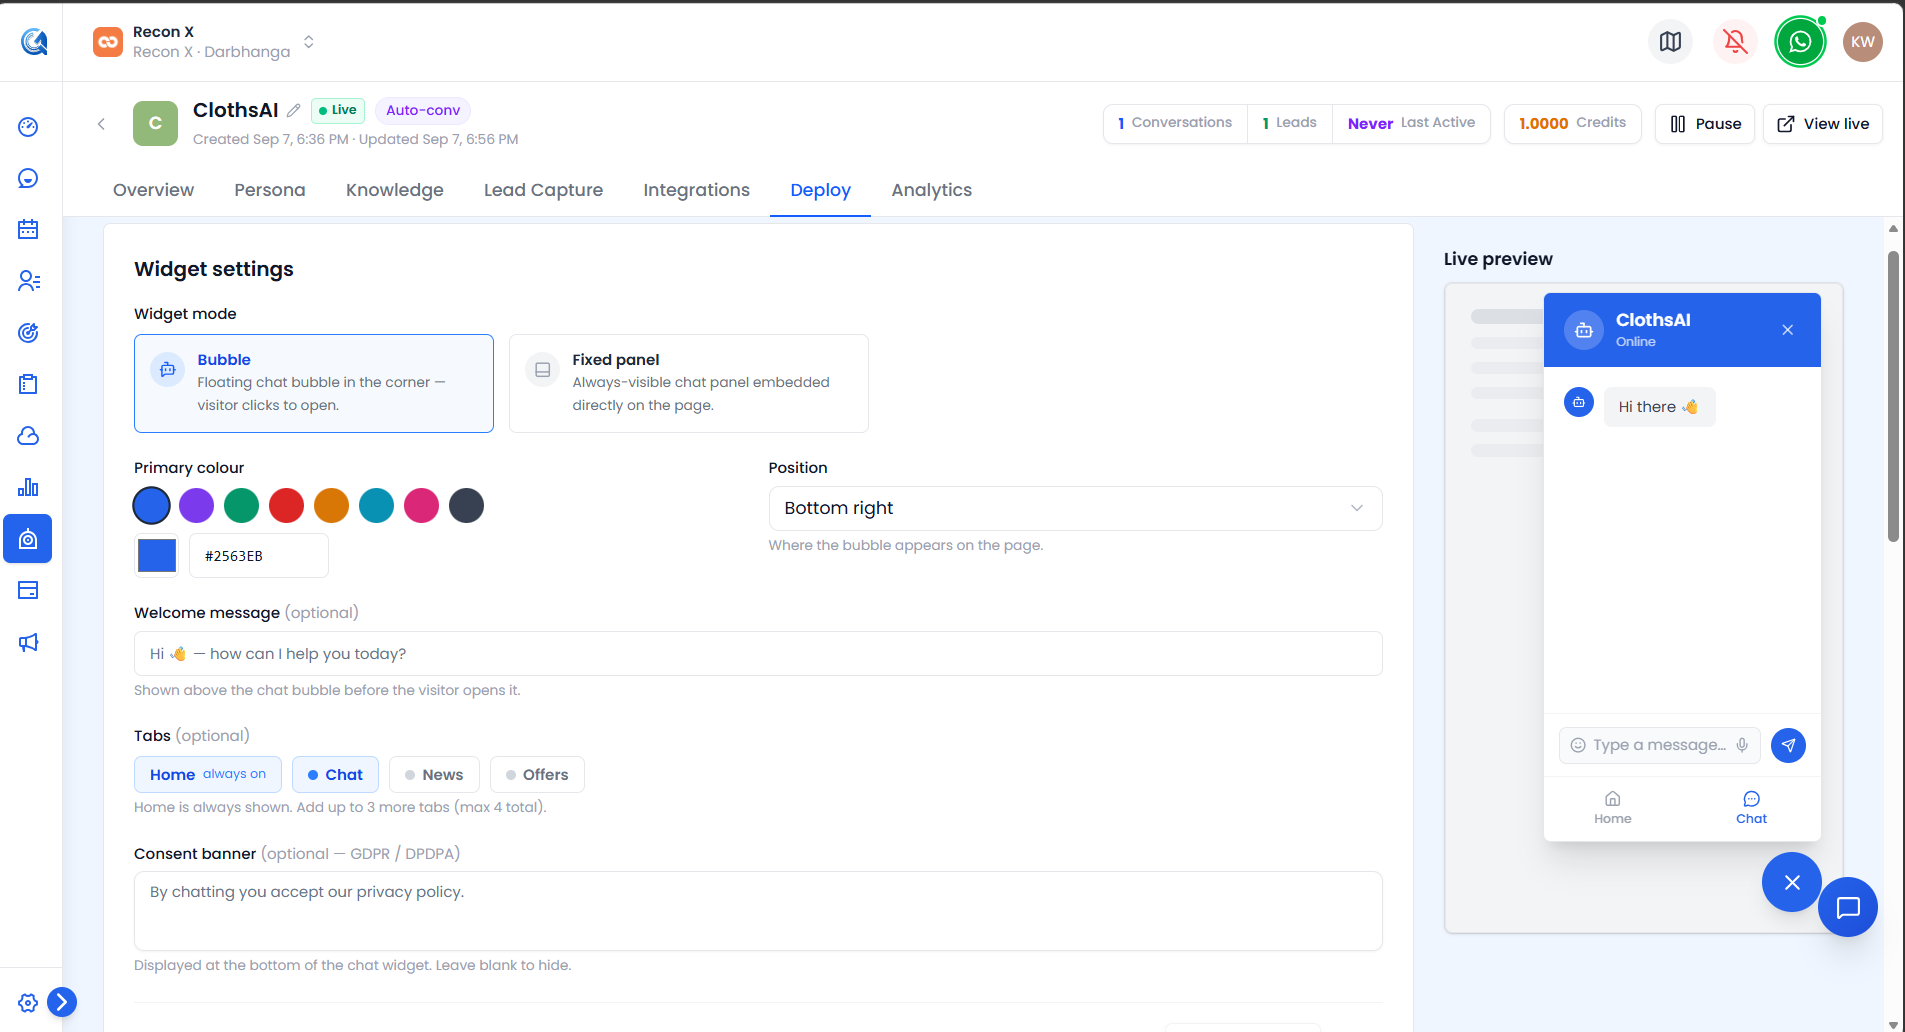 Mode, color, position, welcome text, tabs, and consent banner settings.
Widget Content
Configure what appears inside the optional tabs: a home greeting headline, up to 3 News items, and up to 2 Offer items — each editable inline.
Allowed Domains
A domain allowlist (wildcards supported) restricting which websites the embed is permitted to run on, tied to the agent's embed token. You can regenerate/rotate the embed token, with a confirmation step since it invalidates the old one.
Embed Snippets
Deploy generates ready-to-paste embed code for HTML, React, Vue, Angular, Webflow, and WordPress, plus a View live link that opens a preview of the widget exactly as visitors will see it.
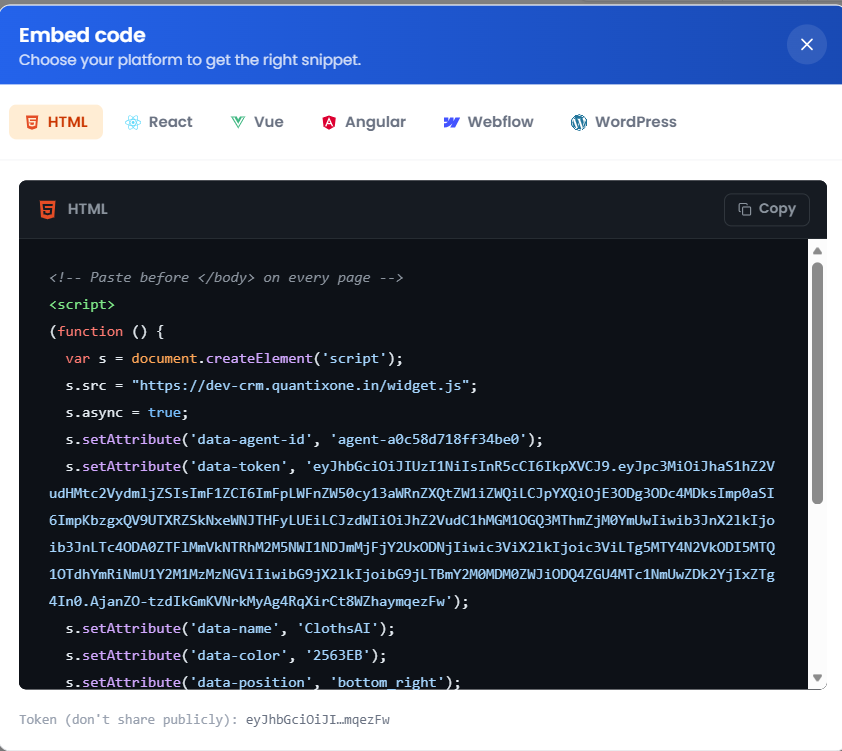 Framework tabs across the top, ready-to-paste code below, and a copy button.
Going Live
Click Go live to publish the agent — this is what actually moves it from Draft to Live status (see Managing Agents for the full status lifecycle). Once Live, the header's Deploy button is replaced with View live.
Video Walkthrough
Watch the complete walkthrough below.