Lead Capture
The Lead Capture tab controls what contact information your agent collects during a conversation, and shows you the leads it has already captured.
Navigating to Lead Capture
Open an agent, then click the Lead Capture tab. It has two sub-tabs: Form Fields and Captured Leads.
Form Fields
Capture mode controls when the agent asks for contact info:
| Mode | Description |
|---|---|
| Auto | The agent captures contact info automatically once the visitor signals readiness. |
| Manual | The agent only captures contact info when the conversation flow explicitly requests it. |
Capture-form fields define what's collected. Click Add Fields to open the field picker — it lists your account's contact fields (standard and custom), grouped by category: Basic Info, Contact Info, Professional, Location, Social & Web, Other, and Custom Fields. Selected fields appear in a table where you can mark any field Required; it's recommended to require an Email or Phone field (these are locked as required once selected).
| Column | Description |
|---|---|
| # | Row number |
| Display Name | The label shown for the field |
| Field Key | The underlying contact field reference |
| Type | The field's data type (Text, Phone, Date, etc.) |
| Required | Whether the agent must collect this field before completing capture |
| (icon) | Removes the field from the form |
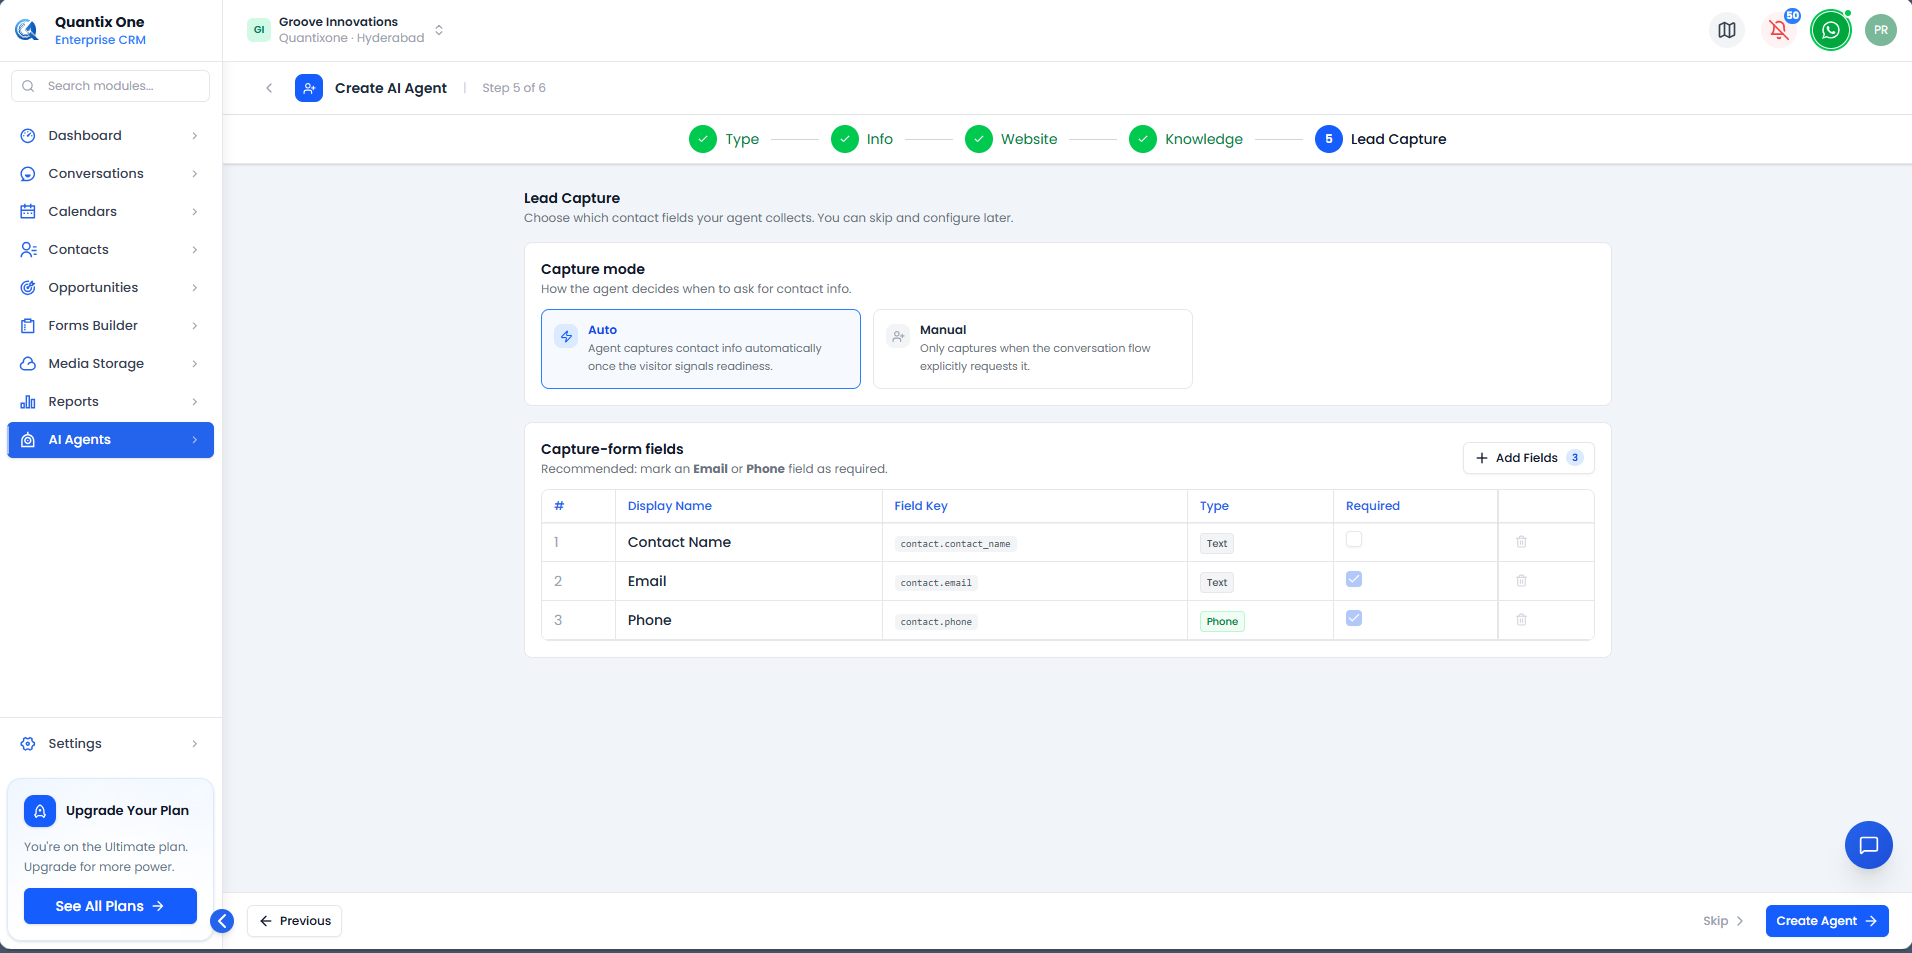 Capture mode and the capture-form fields table, with Email and Phone marked required.
Captured Leads
The second sub-tab lists every lead this agent has captured, linking out to the full record in the Contacts module.
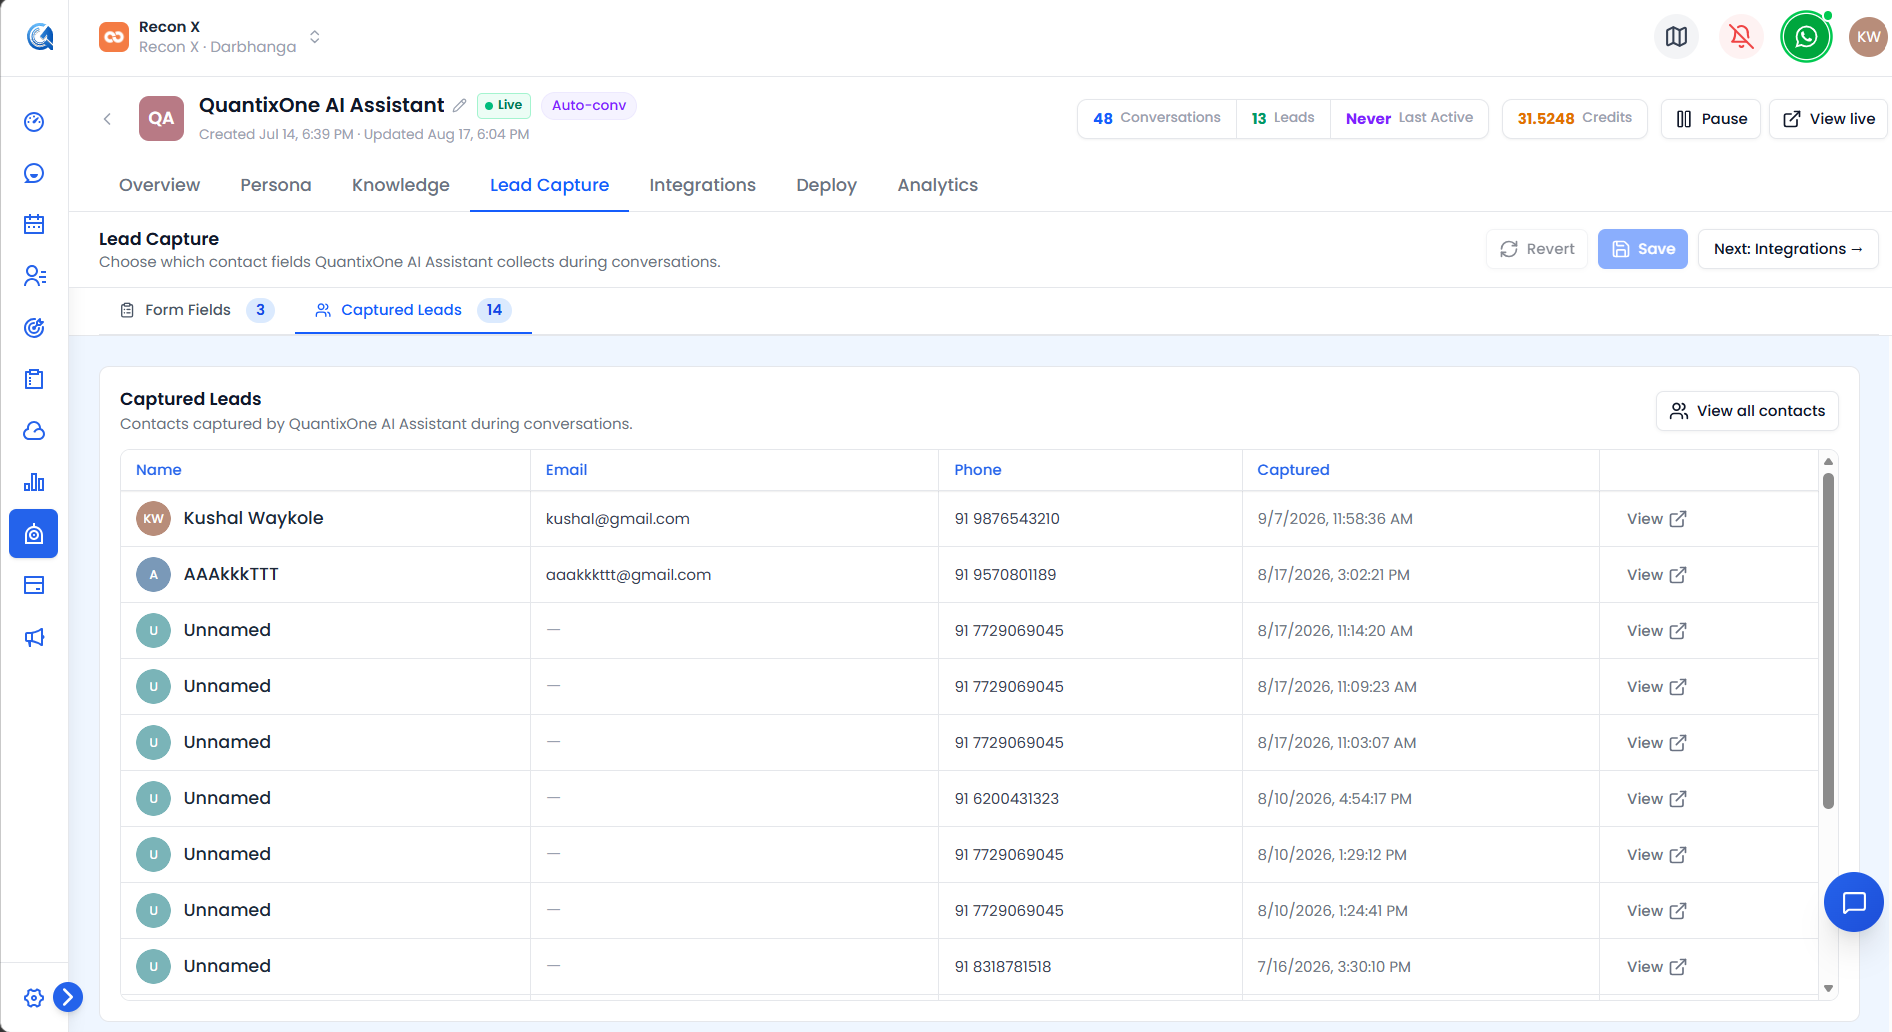 Every lead this agent has captured, with a link out to its full record in Contacts.
Video Walkthrough
Watch the complete walkthrough below.