Creating an AI Agent
Deploy AI agents that qualify leads, handle support, and re-engage contacts around the clock. This guide walks through the AI Agents overview and the step-by-step agent creation wizard.
Step 1 — Open AI Agents
Go to AI Agents from the left sidebar. This opens the AI Agents overview, showing every agent created for your account along with performance stats.
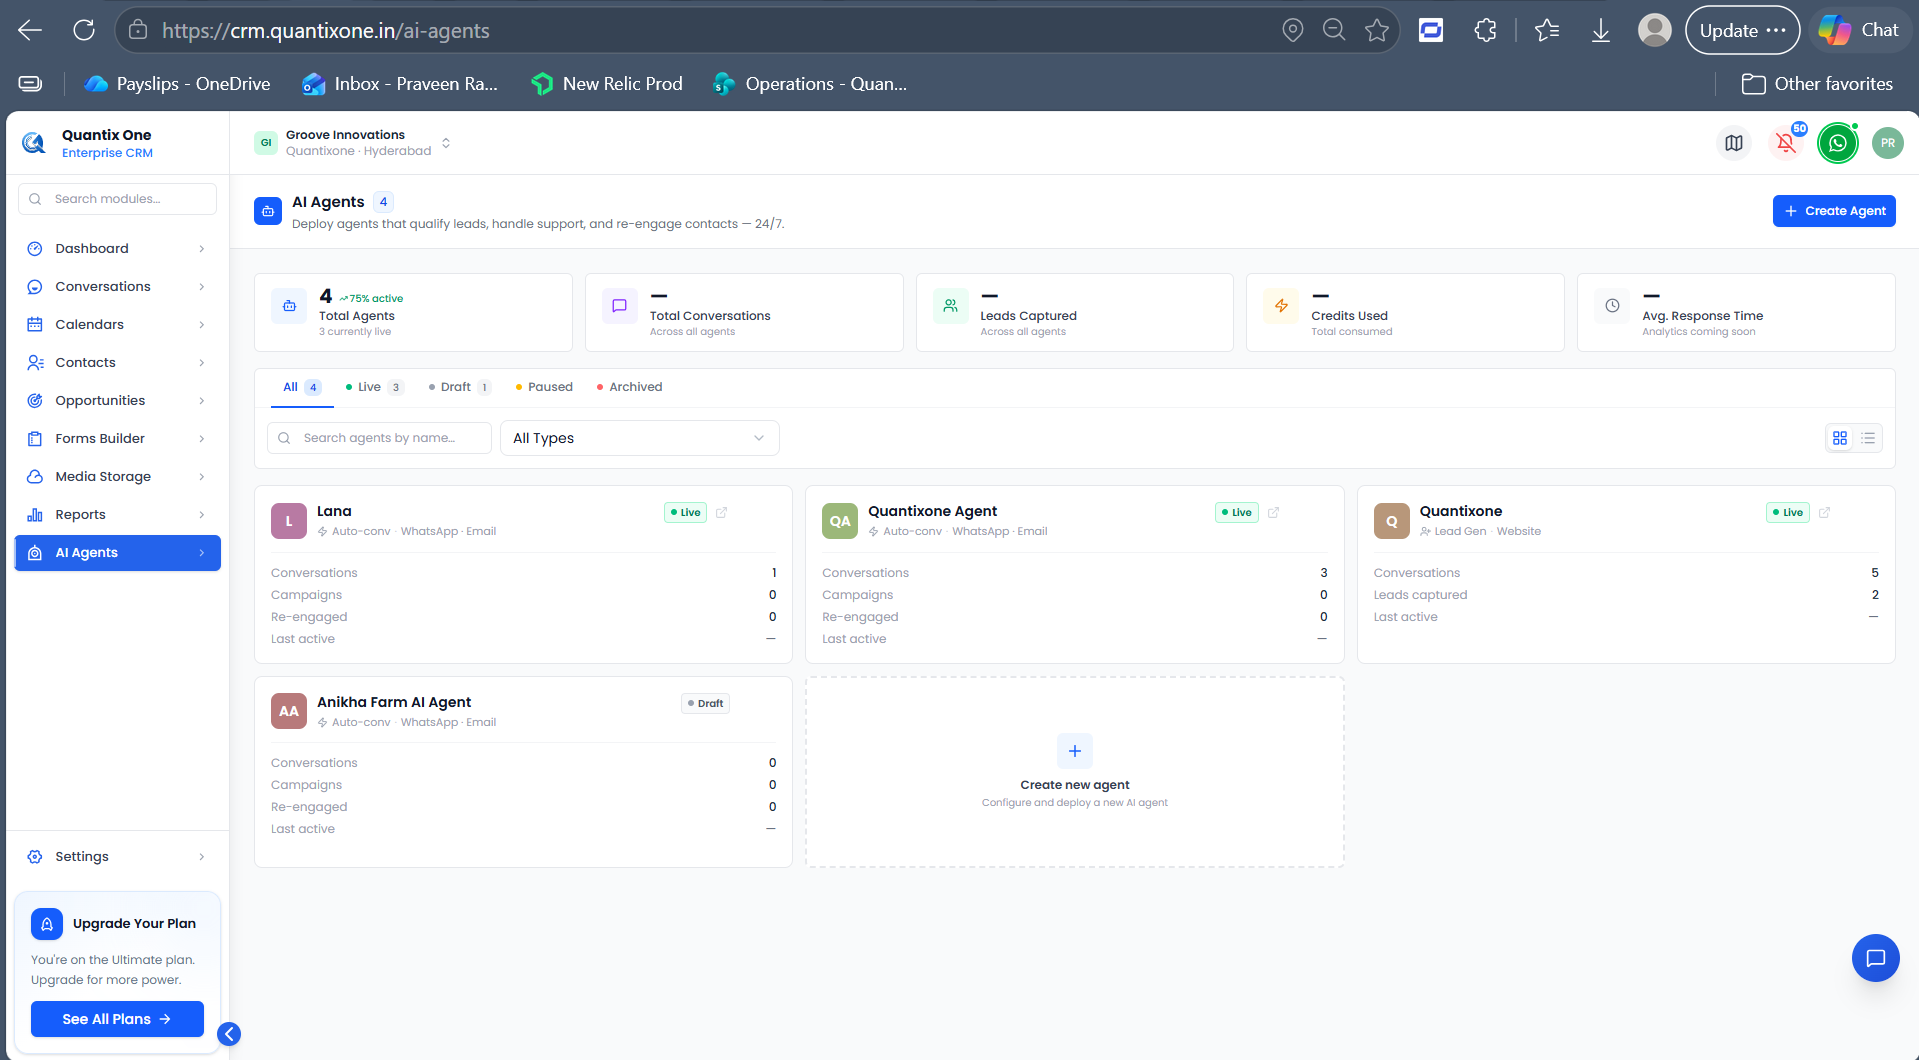 The AI Agents page shows total agents, conversations, leads captured, credits used, and average response time across all agents. Use the All / Live / Draft / Paused / Archived tabs to filter, and search or filter by agent type.
Each agent card displays its name, channels (e.g. Auto-conv · WhatsApp · Email), status (Live/Draft), and quick stats — for Auto-Conversation agents this includes Conversations, Campaigns, and Re-engaged; other agent types (Lead Generation, Support) show Leads Captured instead. Every card also shows Last Active.
To create a new agent, click + Create Agent at the top right, or use the Create new agent card in the grid.
Step 2 — Choose Agent Type
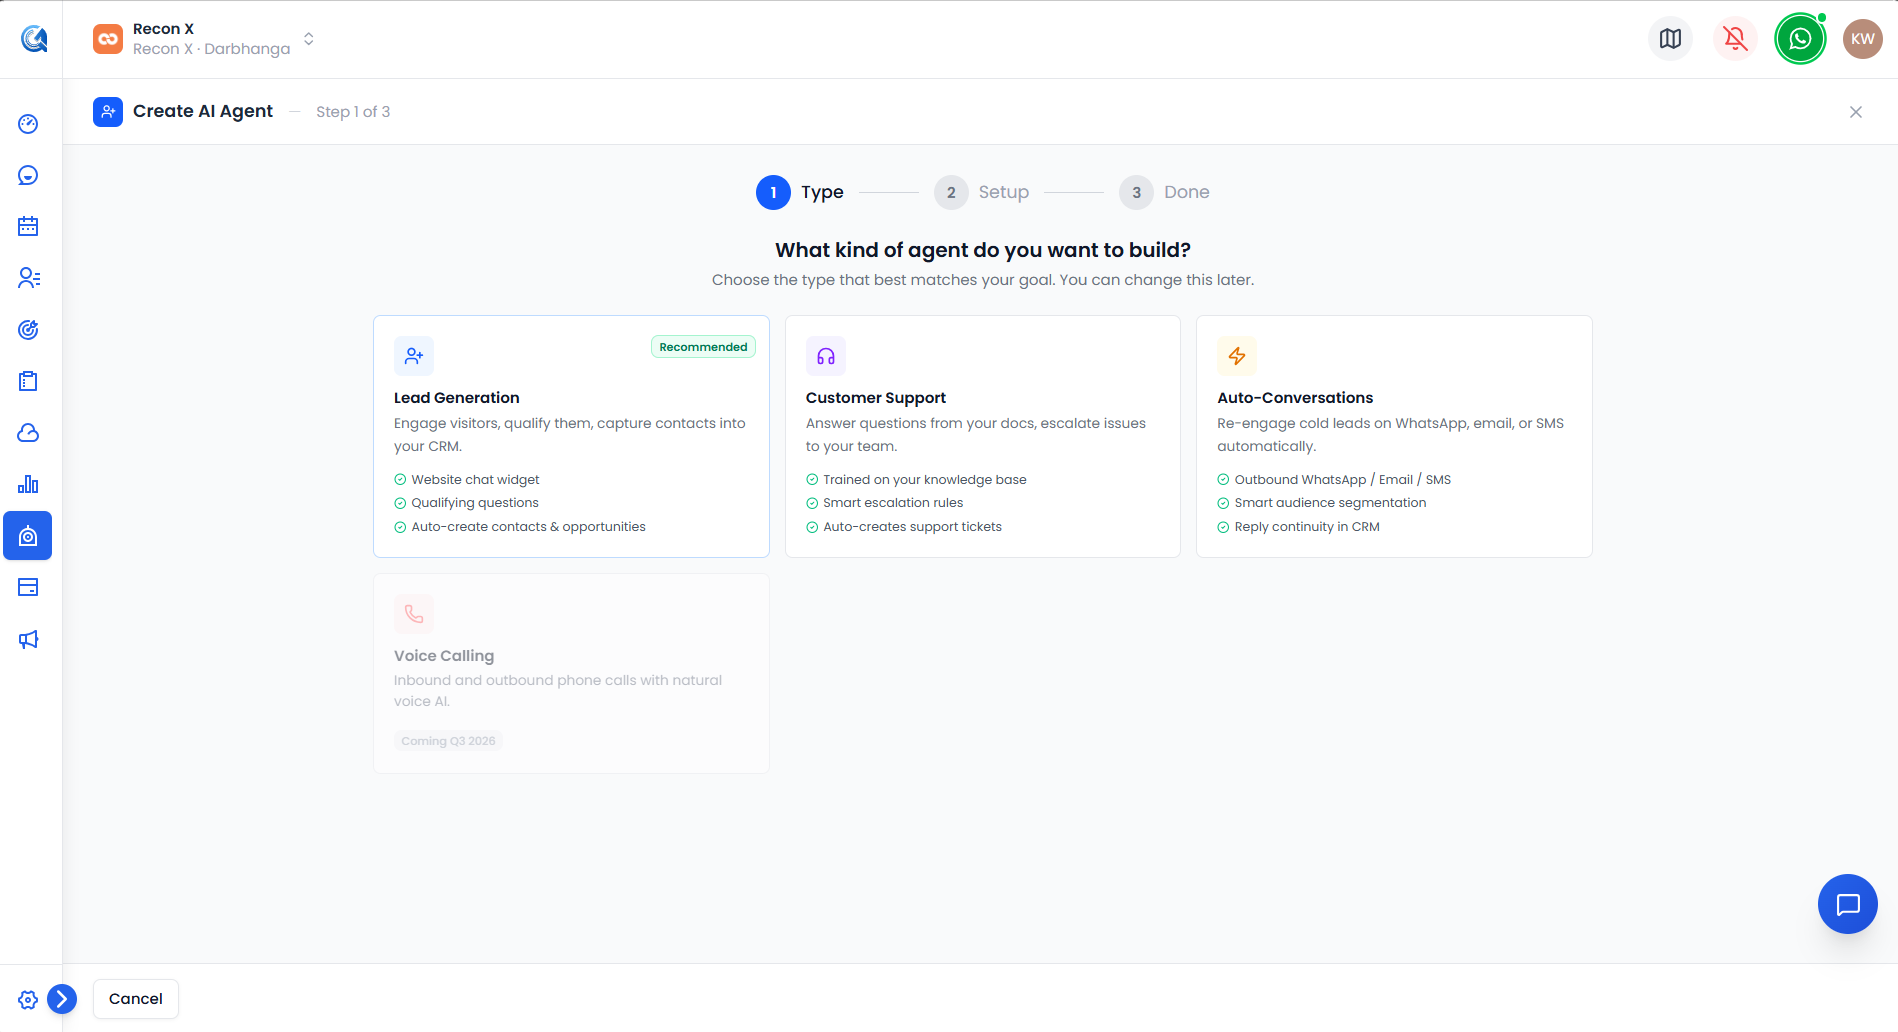 Pick Lead Generation, Customer Support, or Auto-Conversations. Voice Calling is shown greyed out, marked "Coming Q3 2026" — it can't be selected yet.
The first step of the wizard asks you to choose the type of agent you want to create. Click Next to continue.
Step 3 — Add Agent Info
On the Info step, give your agent an identity and conversational behavior.
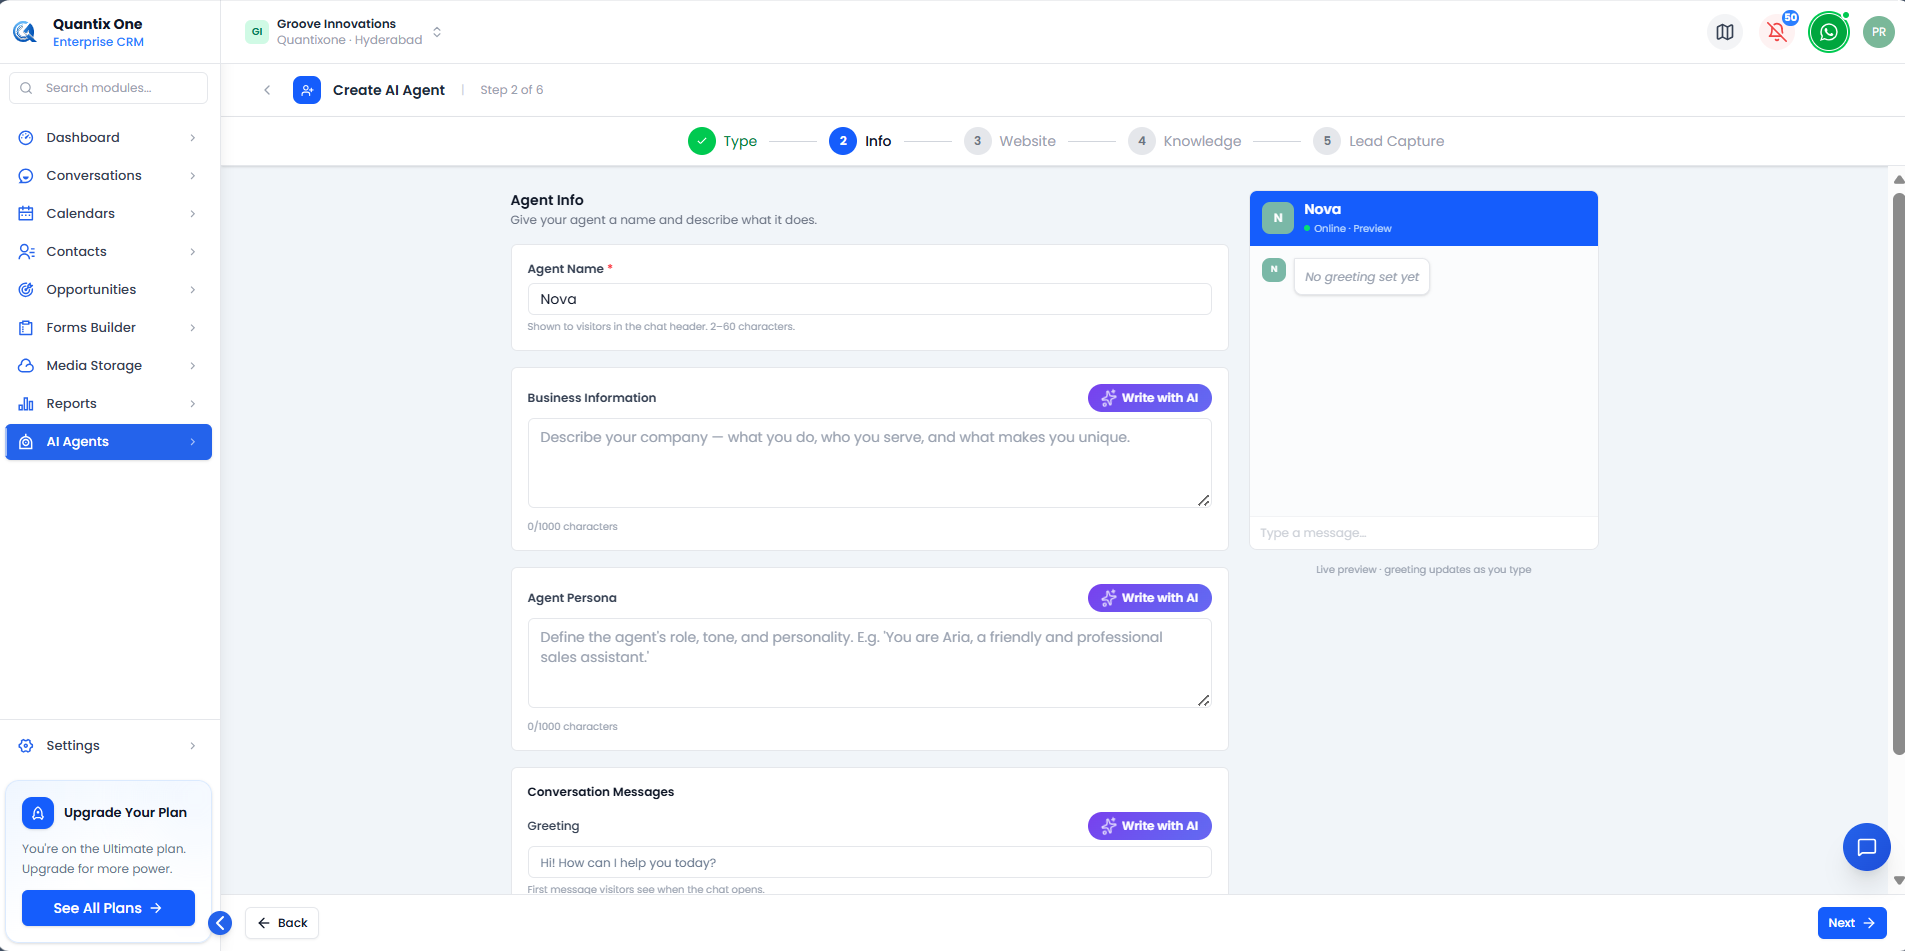 Fill in the agent's name, business information, persona, and greeting message. A live chat preview on the right updates as you type.
| Field | Description |
|---|---|
| Agent Name | Shown to visitors in the chat header (2–60 characters) |
| Business Information | Describe your company — what you do, who you serve, and what makes you unique (up to 1000 characters) |
| Agent Persona | Define the agent's role, tone, and personality — for example, "You are Aria, a friendly and professional sales assistant." (up to 1000 characters) |
| Greeting | The first message visitors see when the chat opens (up to 500 characters) |
| Fallback Message | What the agent says when it can't answer or understand a visitor's question (up to 500 characters) |
Each field includes a Write with AI option to auto-generate content based on your inputs.
Click Next to continue.
Step 4 — Add Website Sources
On the Website step, add the URLs you want the agent to learn from.
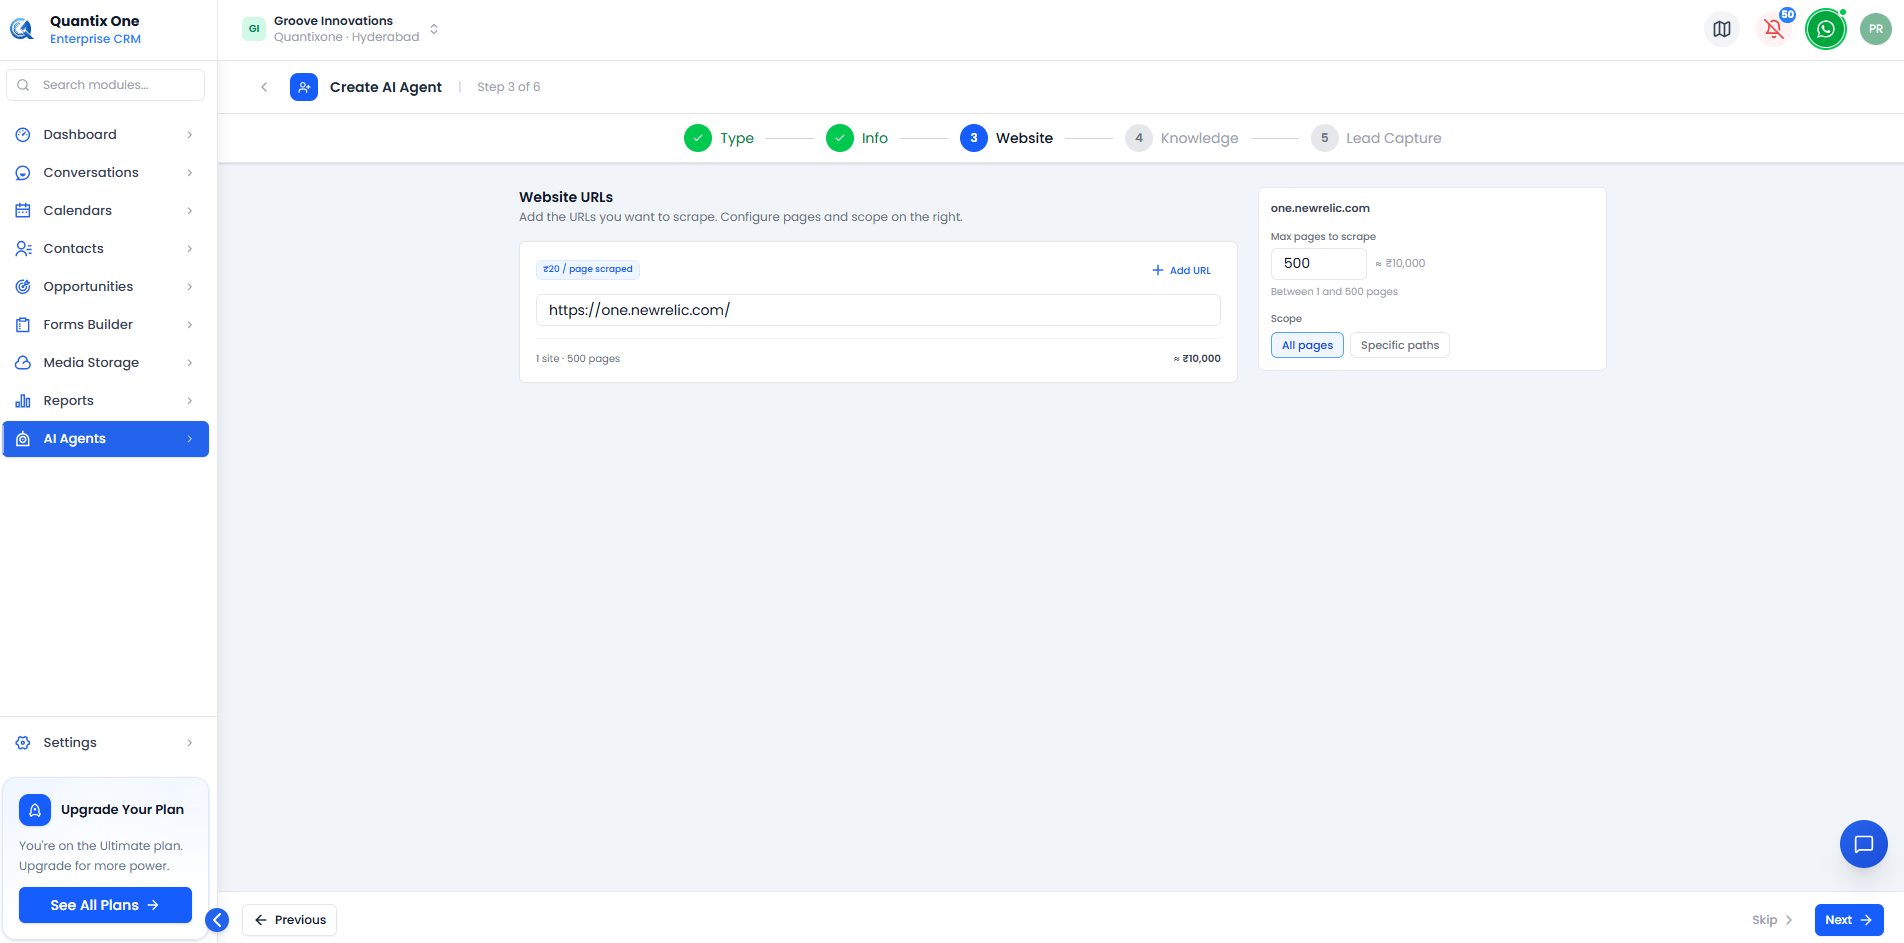 Add one or more website URLs to scrape. Configure the maximum pages to scrape and the scope — All pages or Specific paths — for each site.
| Field | Description |
|---|---|
| Website URLs | The URL(s) to scrape; click + Add URL to add more sites |
| Max pages to scrape | Number of pages to crawl per site (between 1 and 500) |
| Scope | Choose All pages, or restrict to Specific paths |
Note: Scraping is billed per page scraped (₹20/page in the example shown). The estimated cost updates as you adjust the page limit.
Click Skip if you don't want to add website sources, or Next to continue.
Step 5 — Add Knowledge
On the Knowledge step, add sources so your agent can answer accurately. You can skip this step and add more sources later.
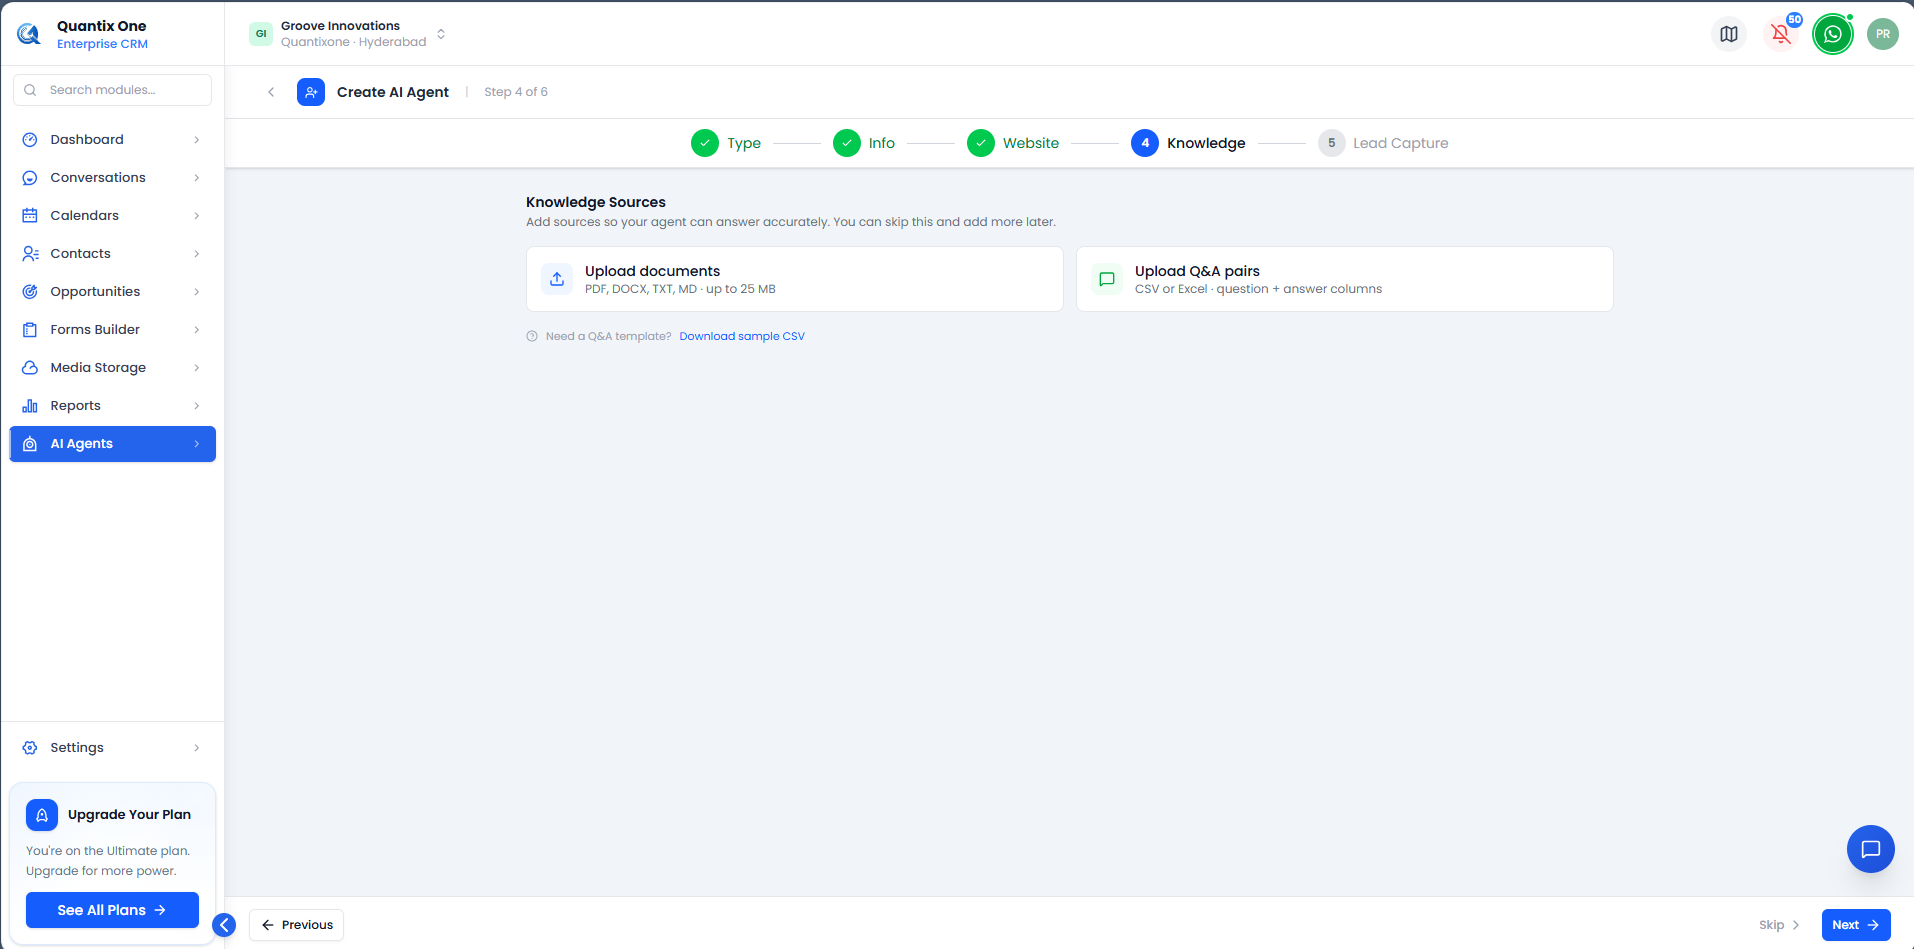 Choose to upload documents or Q&A pairs as knowledge sources for your agent.
There are two ways to add knowledge:
Upload documents
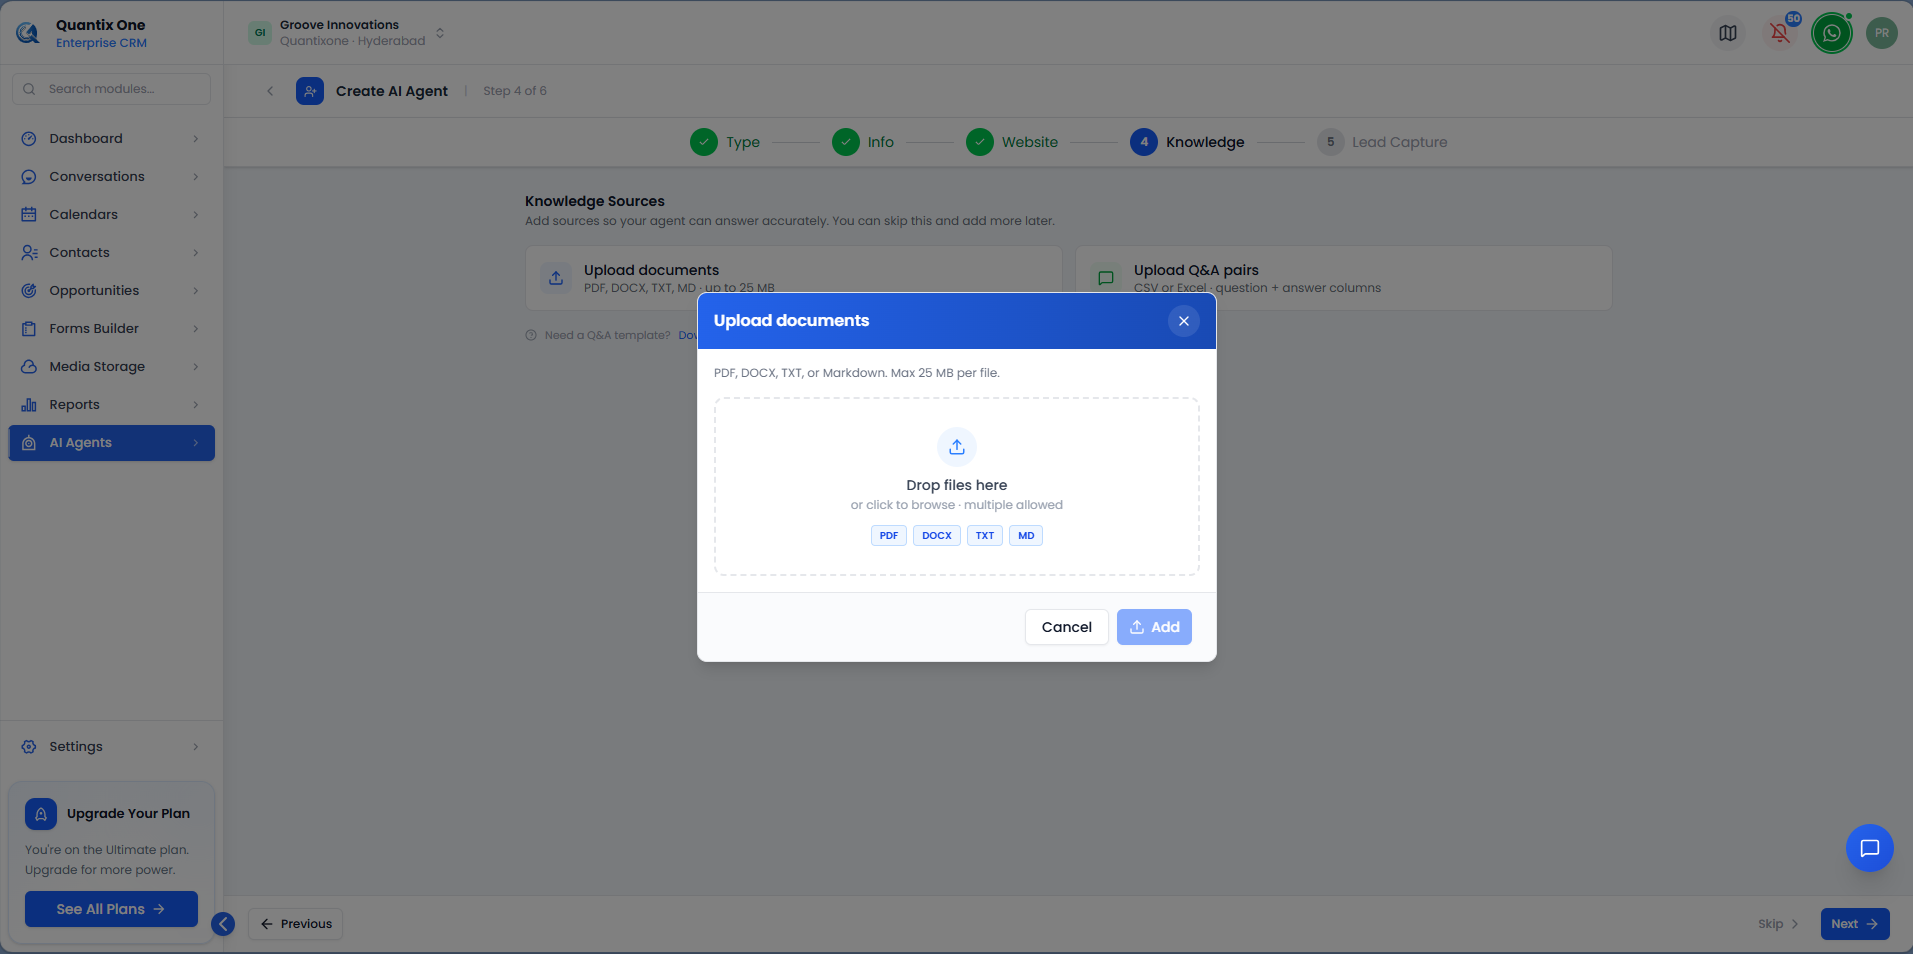 Upload PDF, DOCX, TXT, or MD files — up to 25 MB per file. Multiple files are allowed. Drag and drop, or click to browse.
Note: Document uploads are billed per MB (₹10/MB) — the running cost updates as you add files. Q&A pair uploads are free.
Upload Q&A pairs
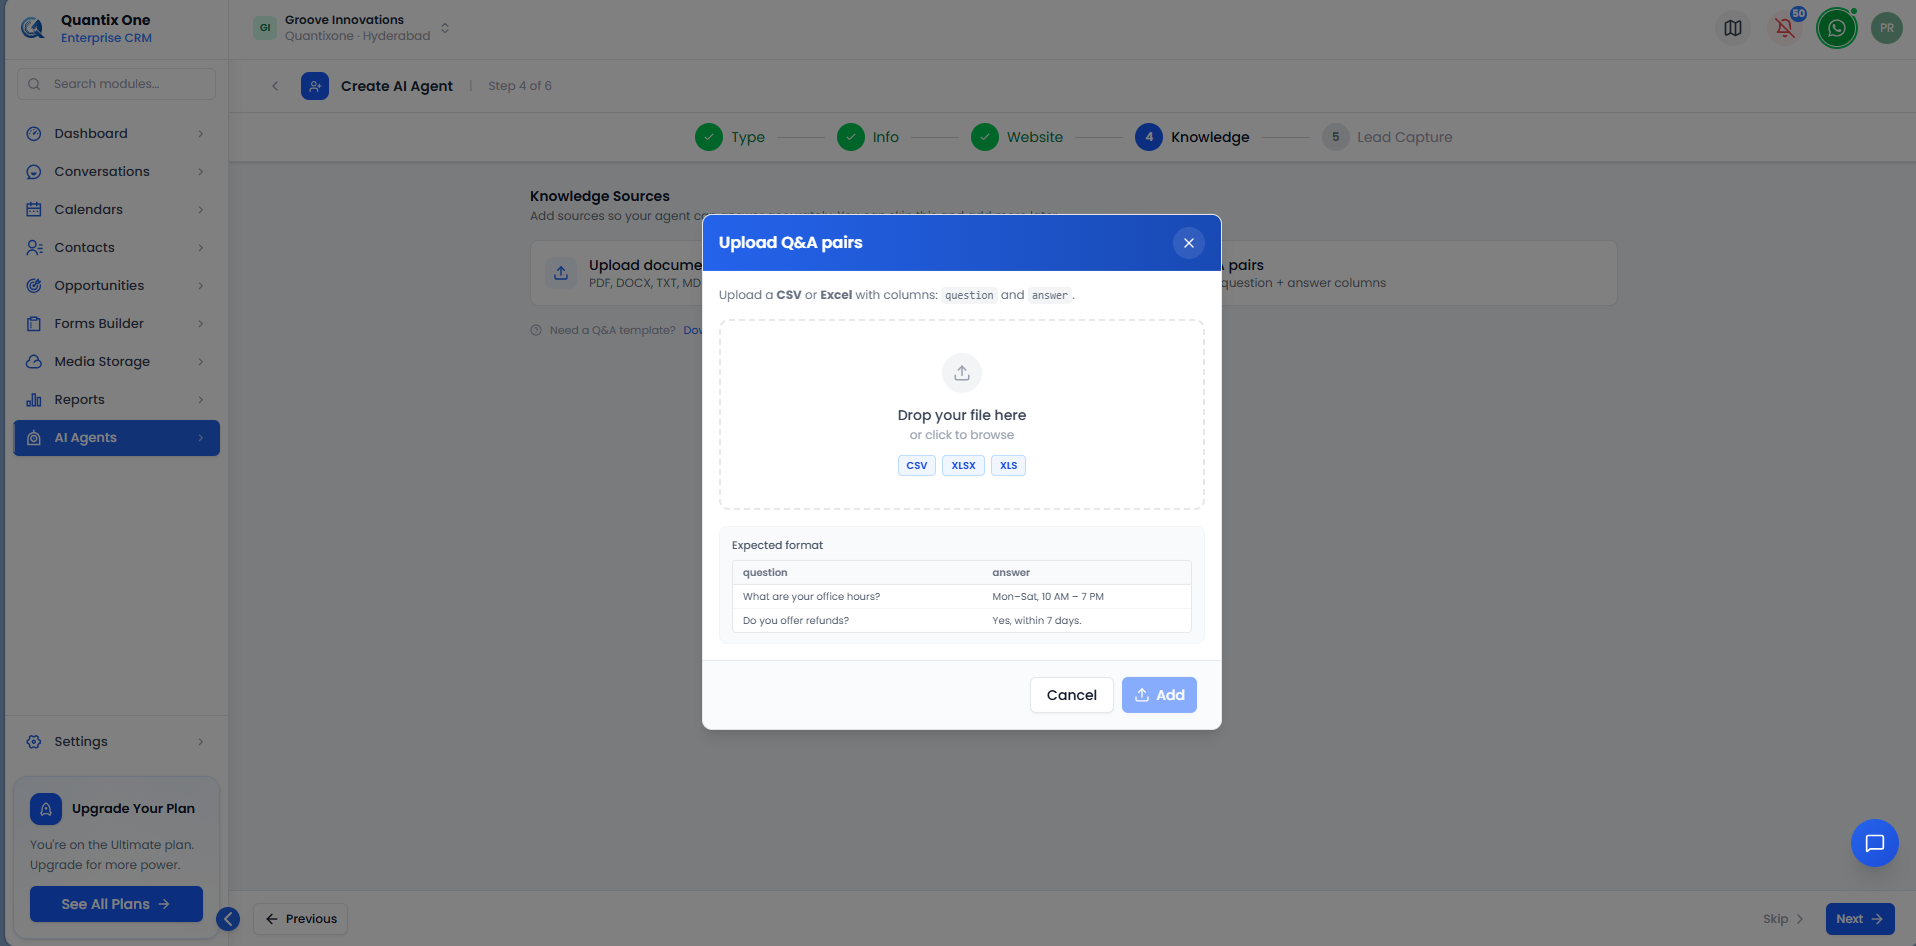 Upload a CSV or Excel file with
 question and answer columns. Click Download sample CSV on the Knowledge step for a ready-made template.
| Field | Description |
|---|---|
| question | The question a visitor might ask |
| answer | The response the agent should give for that question |
Click Add to attach the uploaded file(s) to the agent, then Next to continue — or Skip to configure knowledge sources later.
Step 6 — Configure Lead Capture
On the Lead Capture step, choose which contact fields your agent collects during a conversation. You can skip this step and configure it later.
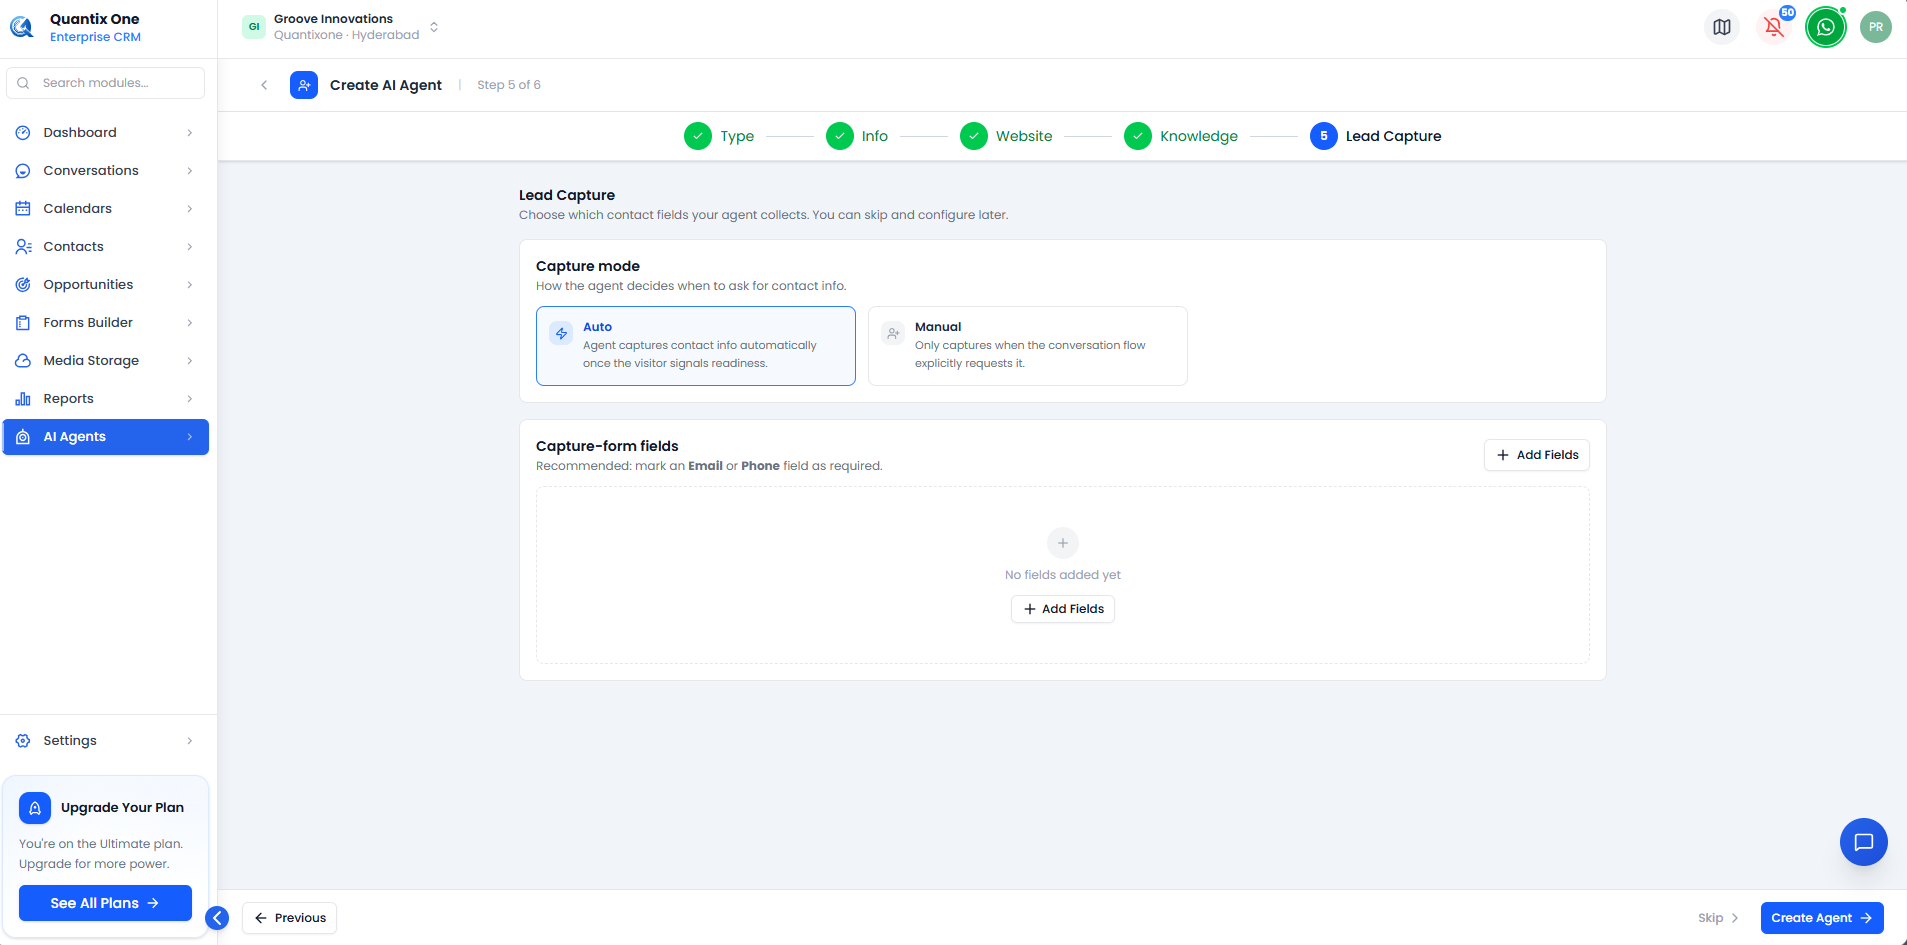 Select a capture mode and add the contact fields your agent should collect.
Capture mode controls when the agent asks for contact info:
| Mode | Description |
|---|---|
| Auto | The agent captures contact info automatically once the visitor signals readiness |
| Manual | The agent only captures contact info when the conversation flow explicitly requests it |
Capture-form fields define what information is collected. Click + Add Fields to open the Add Contact Fields picker.
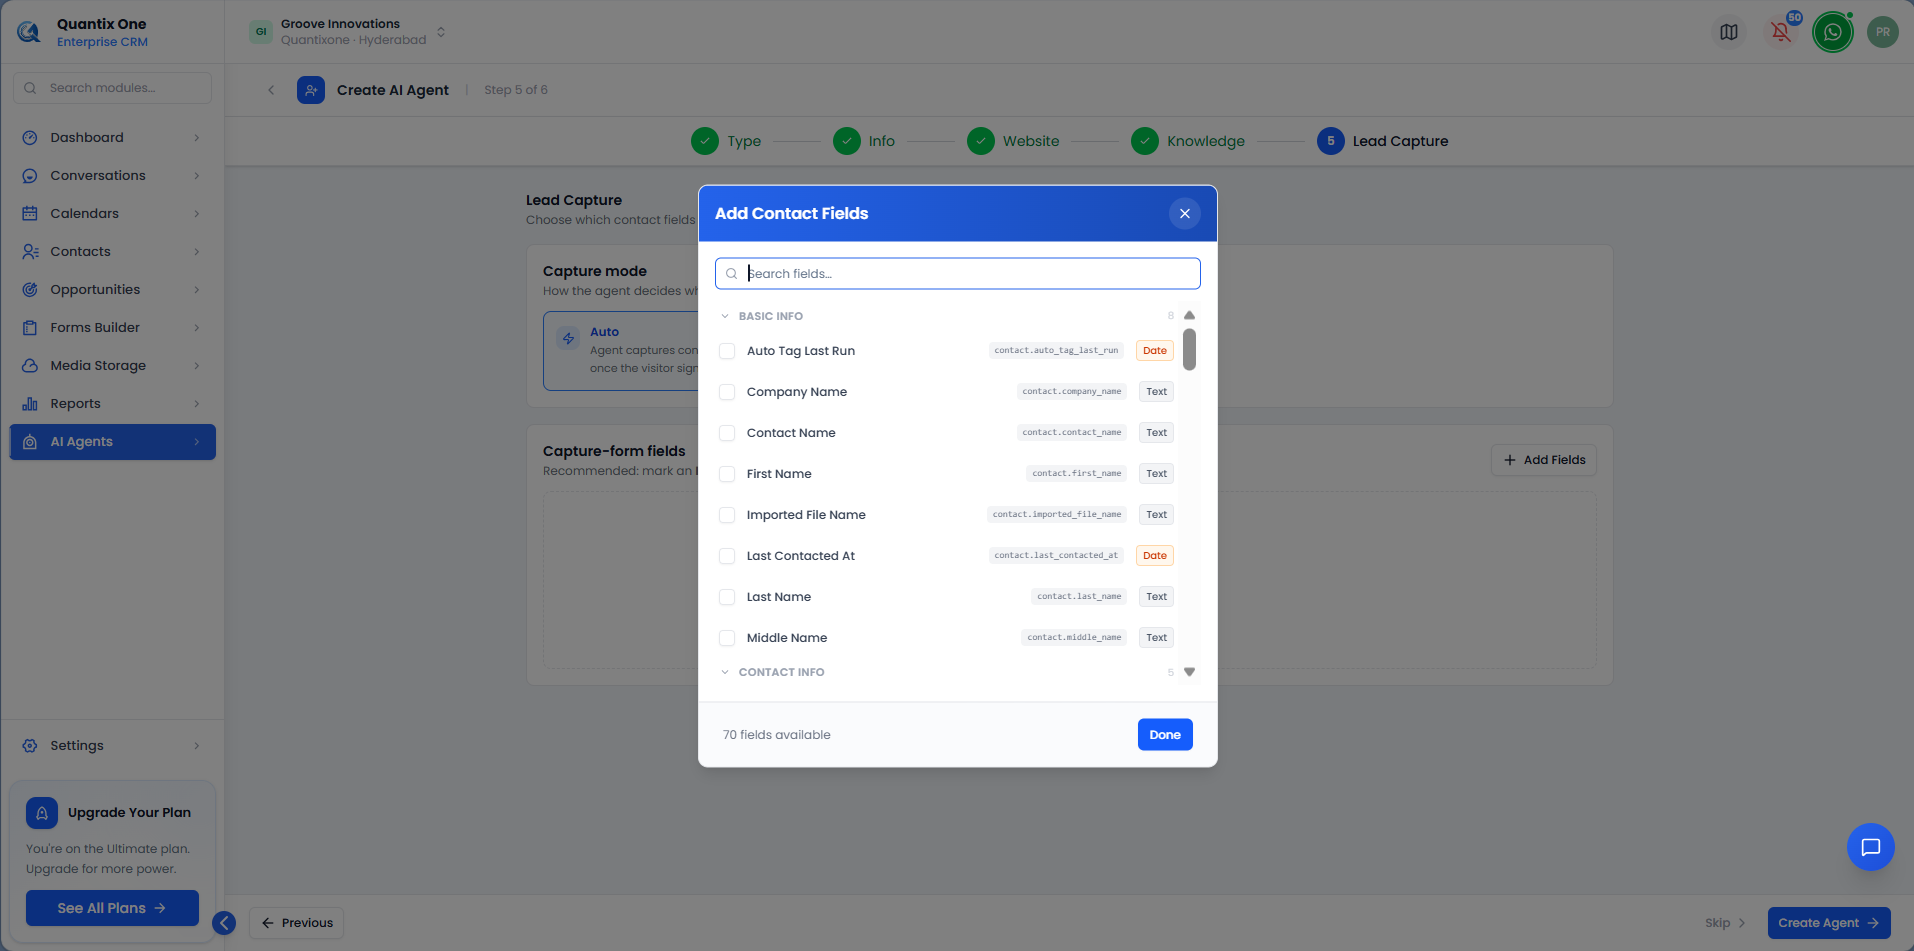 Search and select from your account's contact fields, grouped by category (e.g. Basic Info, Contact Info). The picker footer shows how many fields are available for your account — this includes both standard and any custom fields you've defined.
Selected fields appear in the capture-form table, where you can mark any field as Required — it's recommended to mark an Email or Phone field as required.
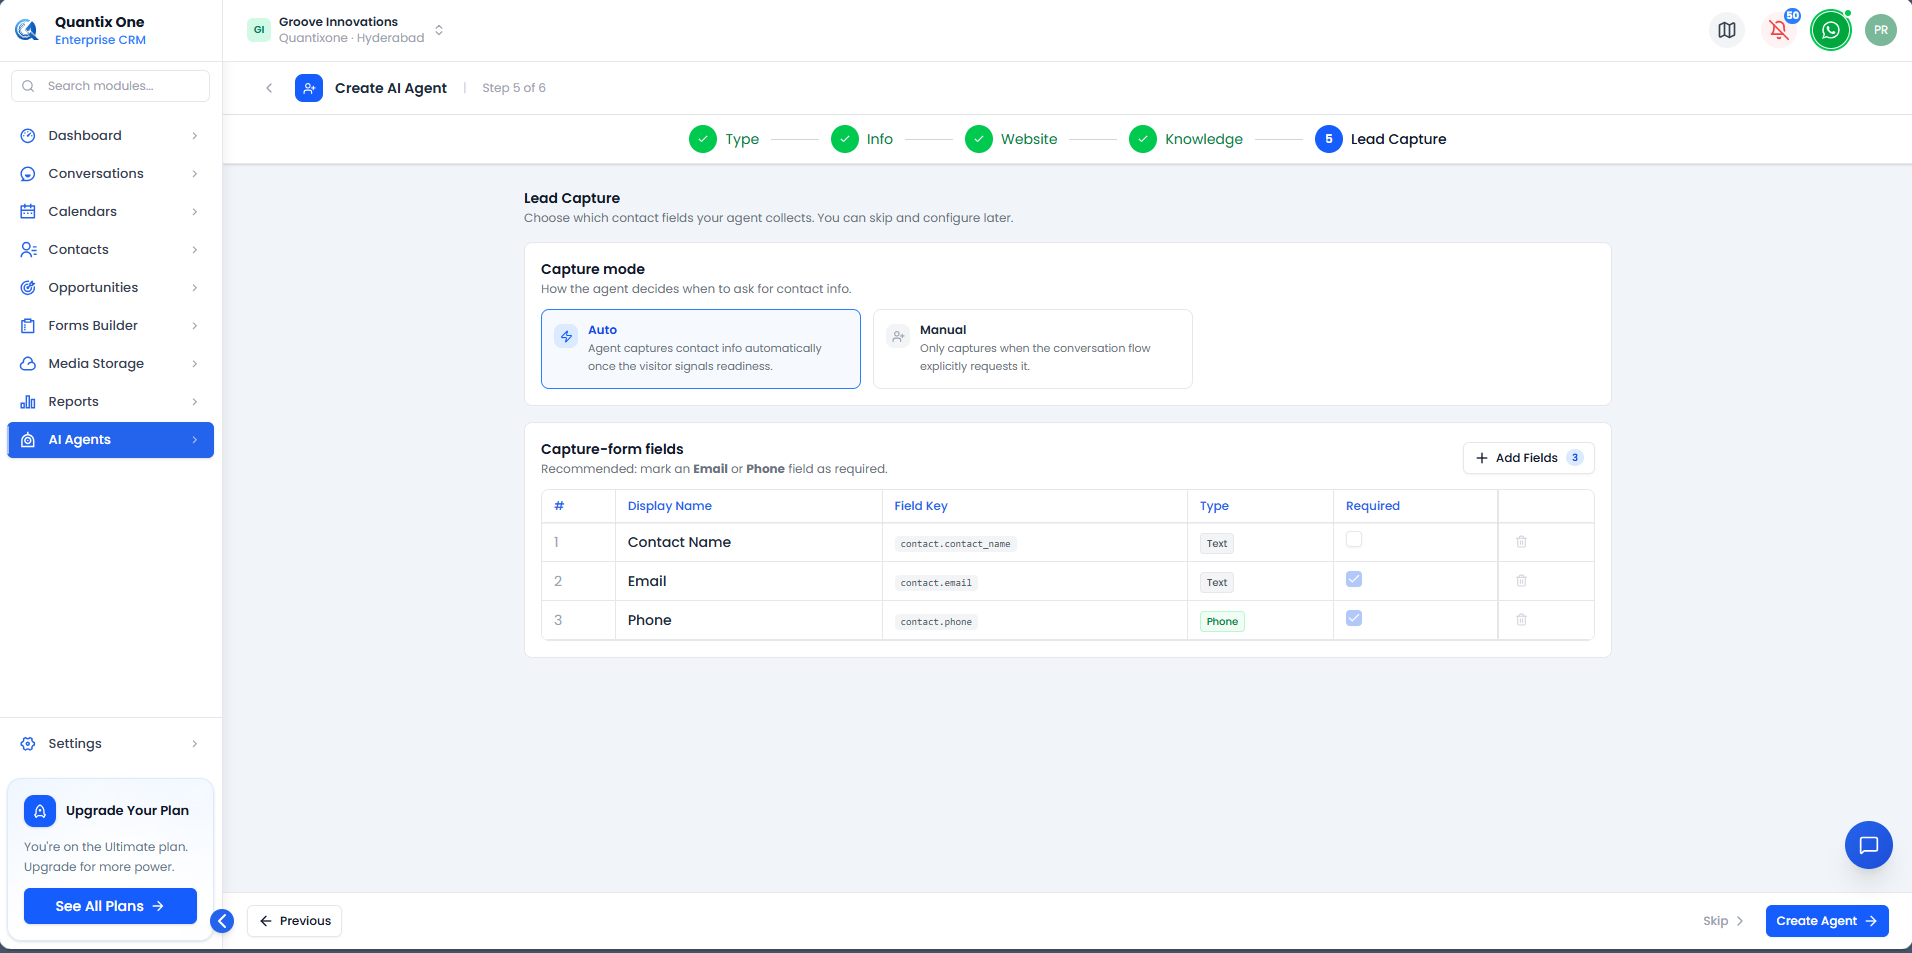 Example configuration with Contact Name, Email, and Phone fields added — Email and Phone marked as required.
| Column | Description |
|---|---|
| Display Name | The label shown for the field |
| Field Key | The underlying contact field reference (e.g. contact.email) |
| Type | The field's data type (Text, Phone, Date, etc.) |
| Required | Whether the agent must collect this field before completing capture |
Once configured, click Create Agent to finish and launch your agent.
Video Walkthrough
Watch the complete walkthrough below.
What's Next
Once your agent is live, monitor its conversations, leads, and performance from the AI Agents overview page (Step 1 above) — open any agent card to see its stats or make further changes.