Appointments
Appointments are the scheduled meetings between your team and your contacts. You can view, create, reschedule, confirm, and cancel appointments directly from QuantixOne — without leaving the platform.
Viewing Appointments
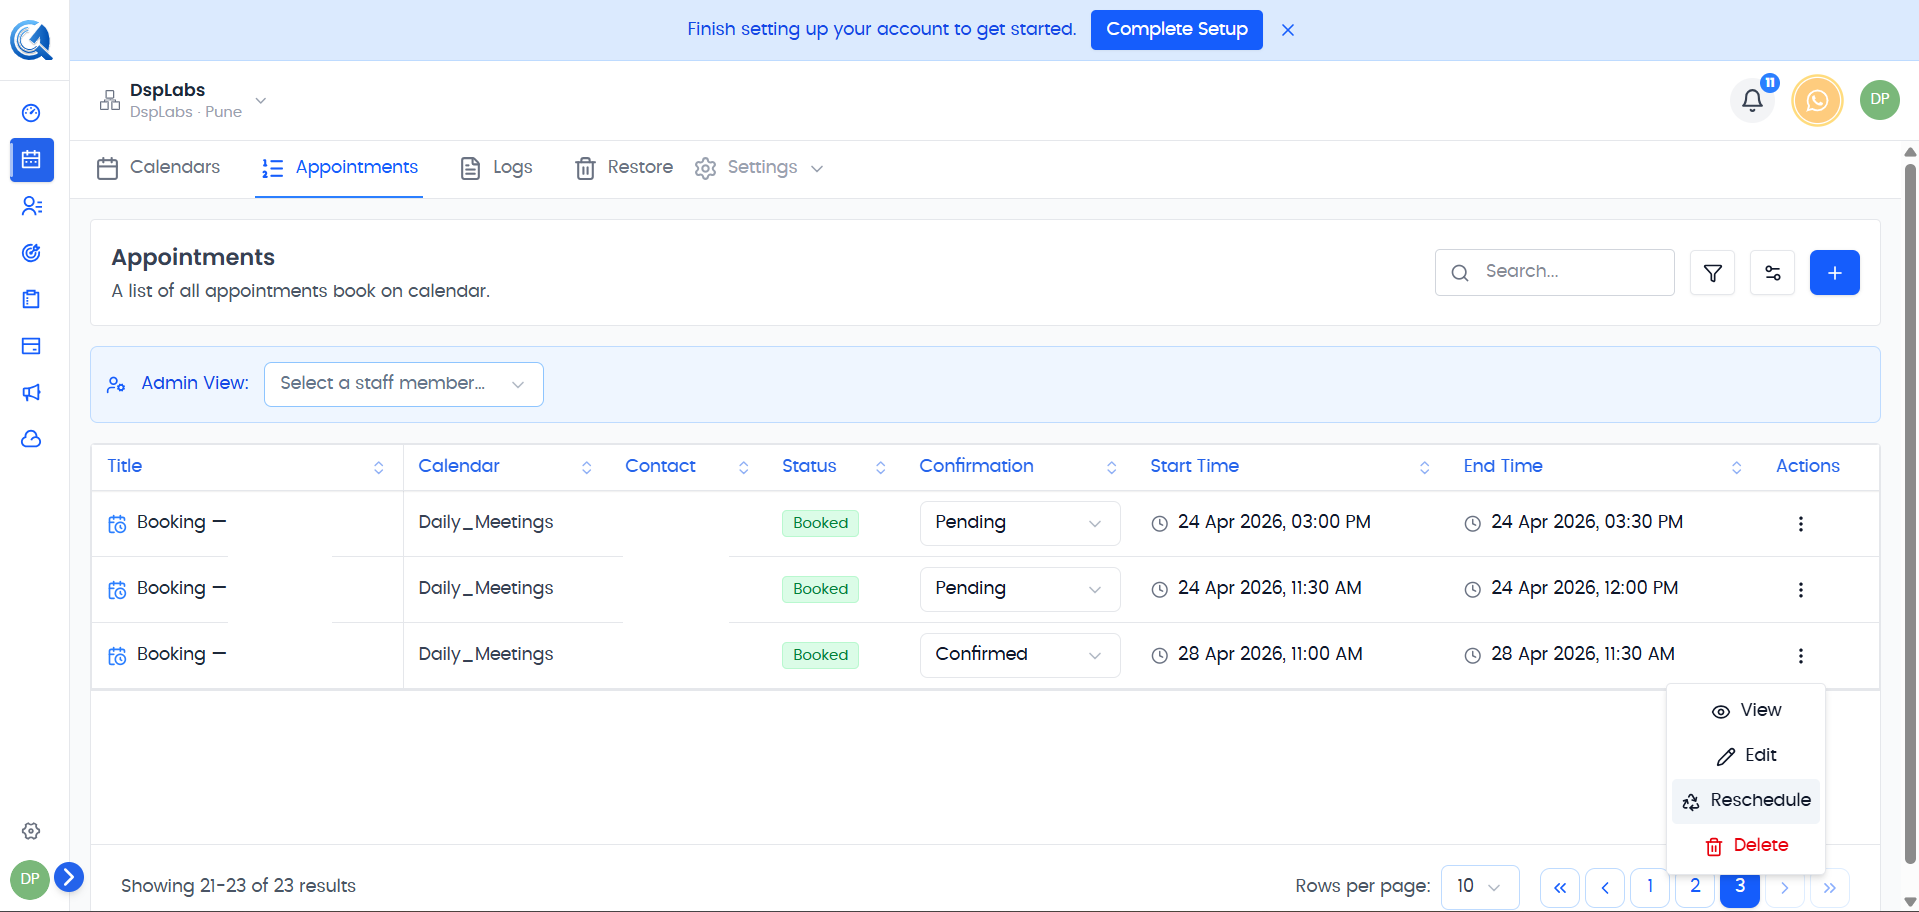
Open the Calendar section from the left sidebar, then click the Appointments tab. All appointments appear in a table with columns for title, calendar, contact, assigned user, start and end time, status, confirmation status, and timezone.
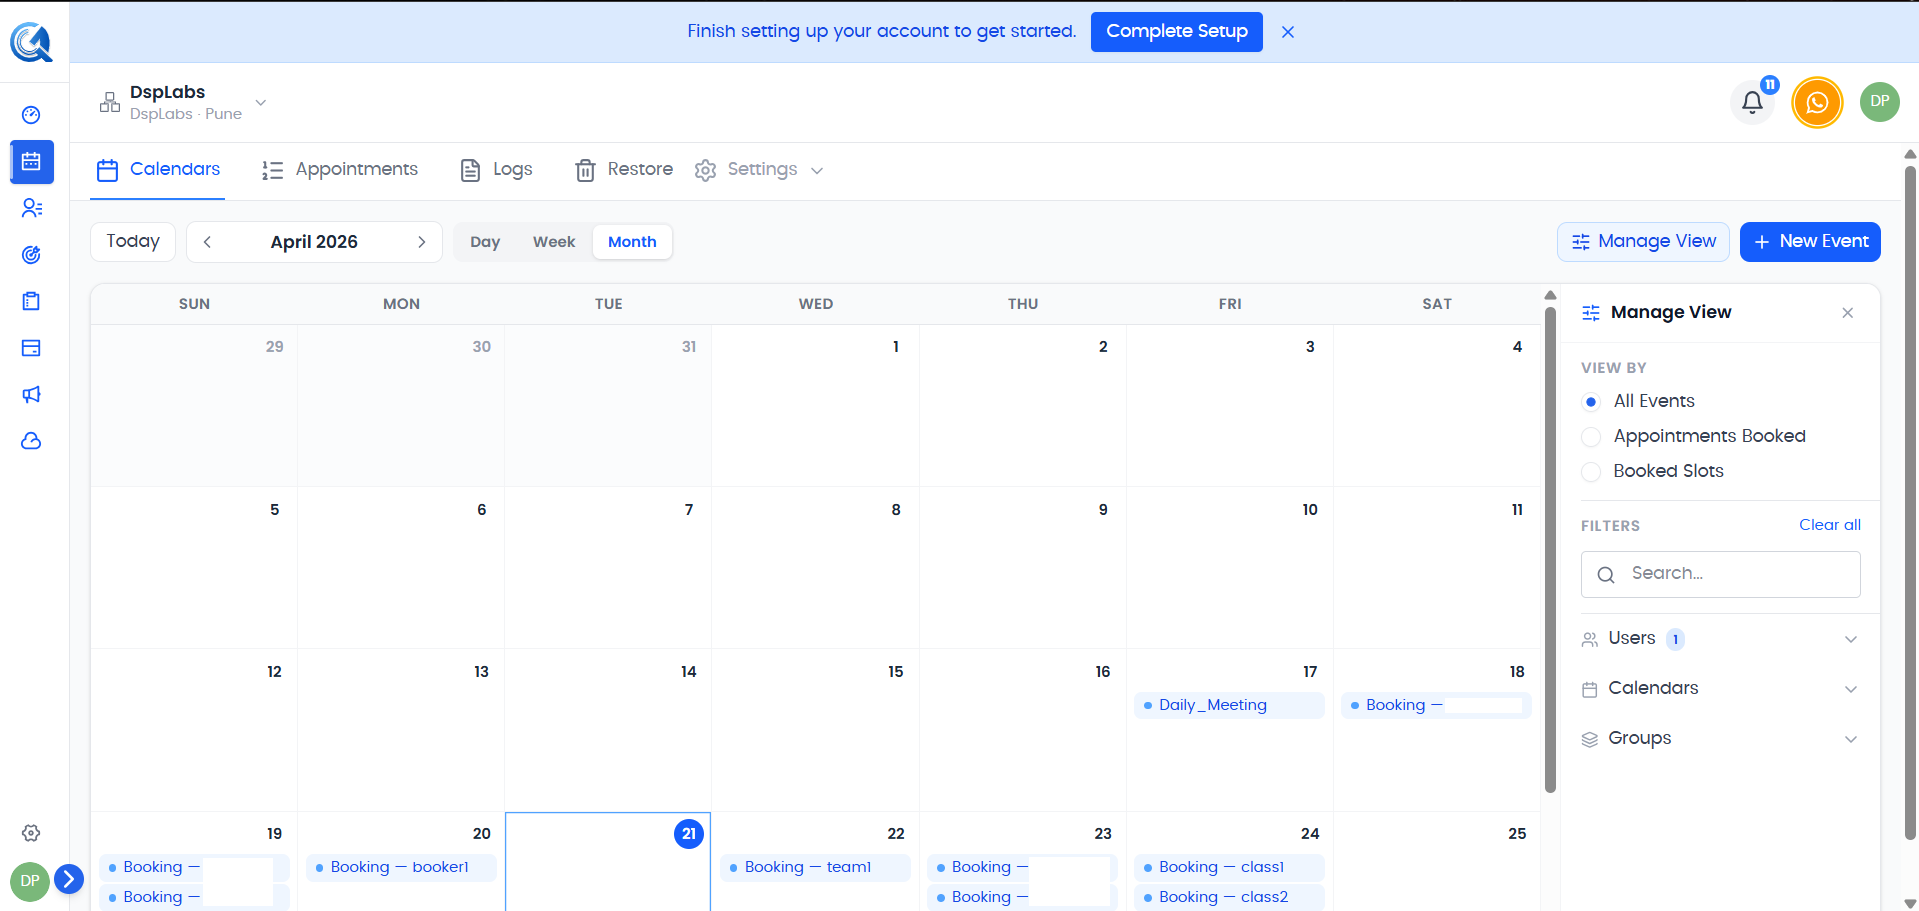 Each row shows the key details of an appointment. Click the eye icon or the title to open the full details.
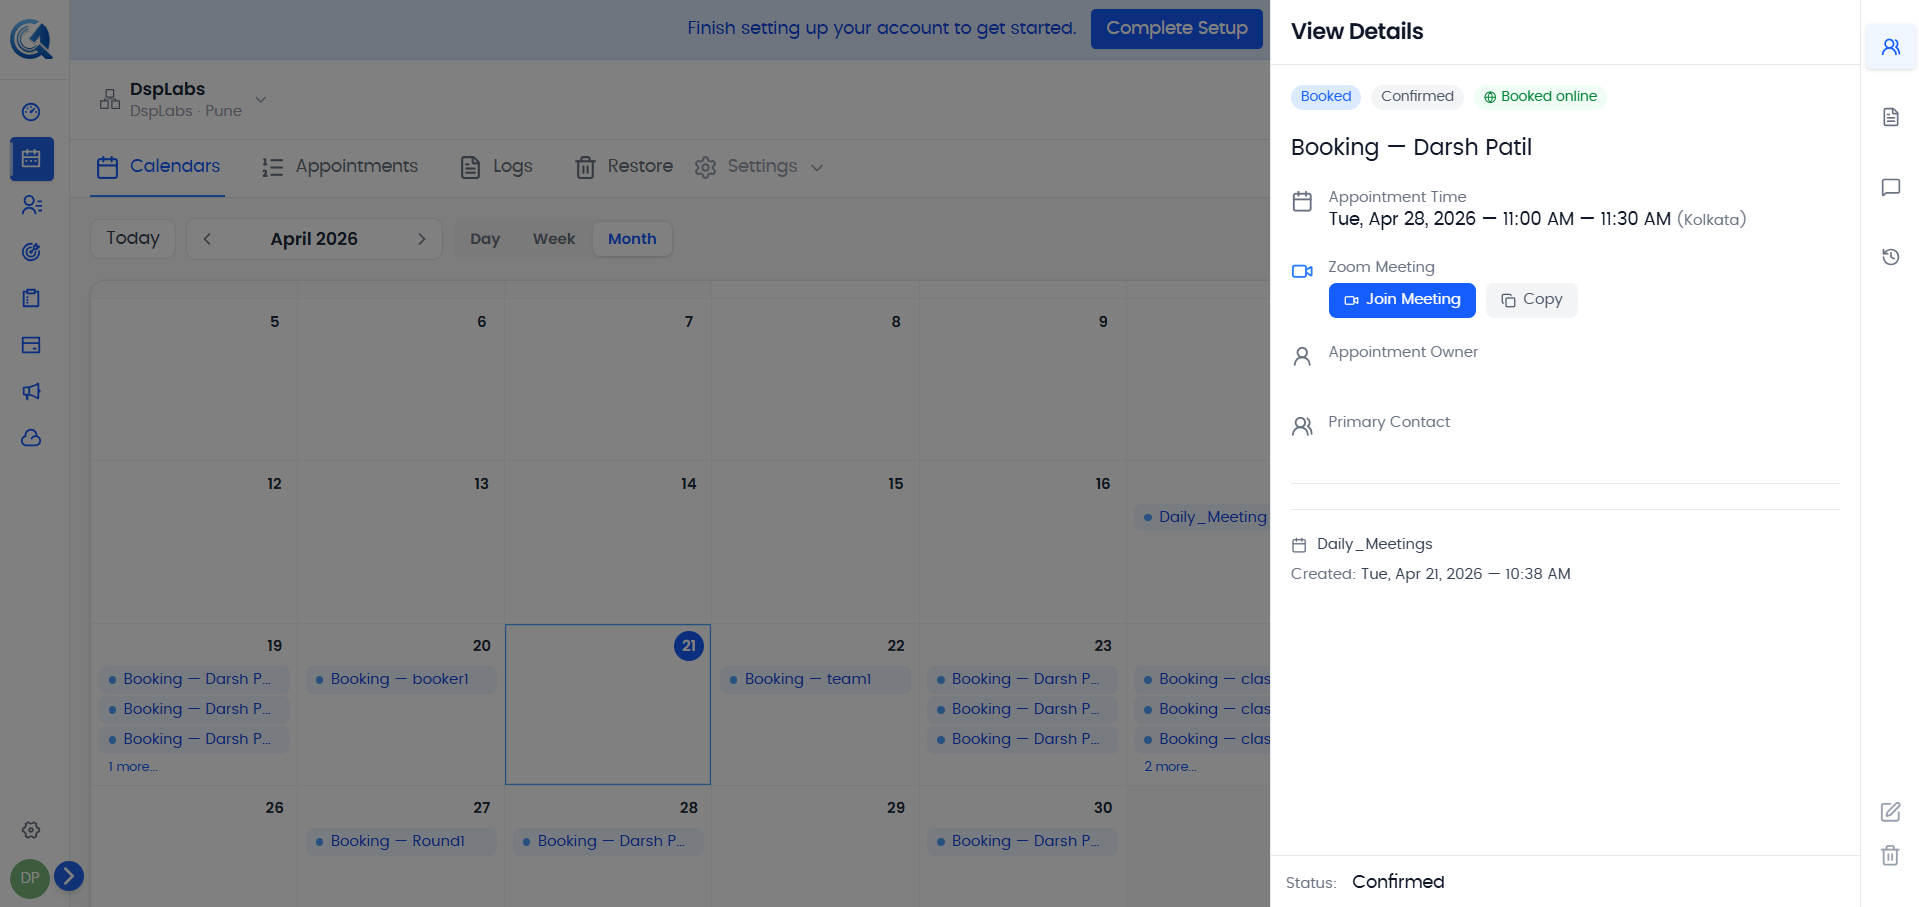
Click the eye icon on any row to open the Details drawer on the right side. The drawer has four tabs:
- Details — Shows the appointment time, contact, calendar, assigned user, conference link (if any), and status badges. You can also edit or delete from here.
- Form — Shows any custom form fields captured at booking. These are the fields you configured on the calendar's booking form — see Creating a Calendar → Custom Booking Form Fields.
- Notes — Shows the appointment description or notes.
- Activity — Shows the audit trail for the appointment.
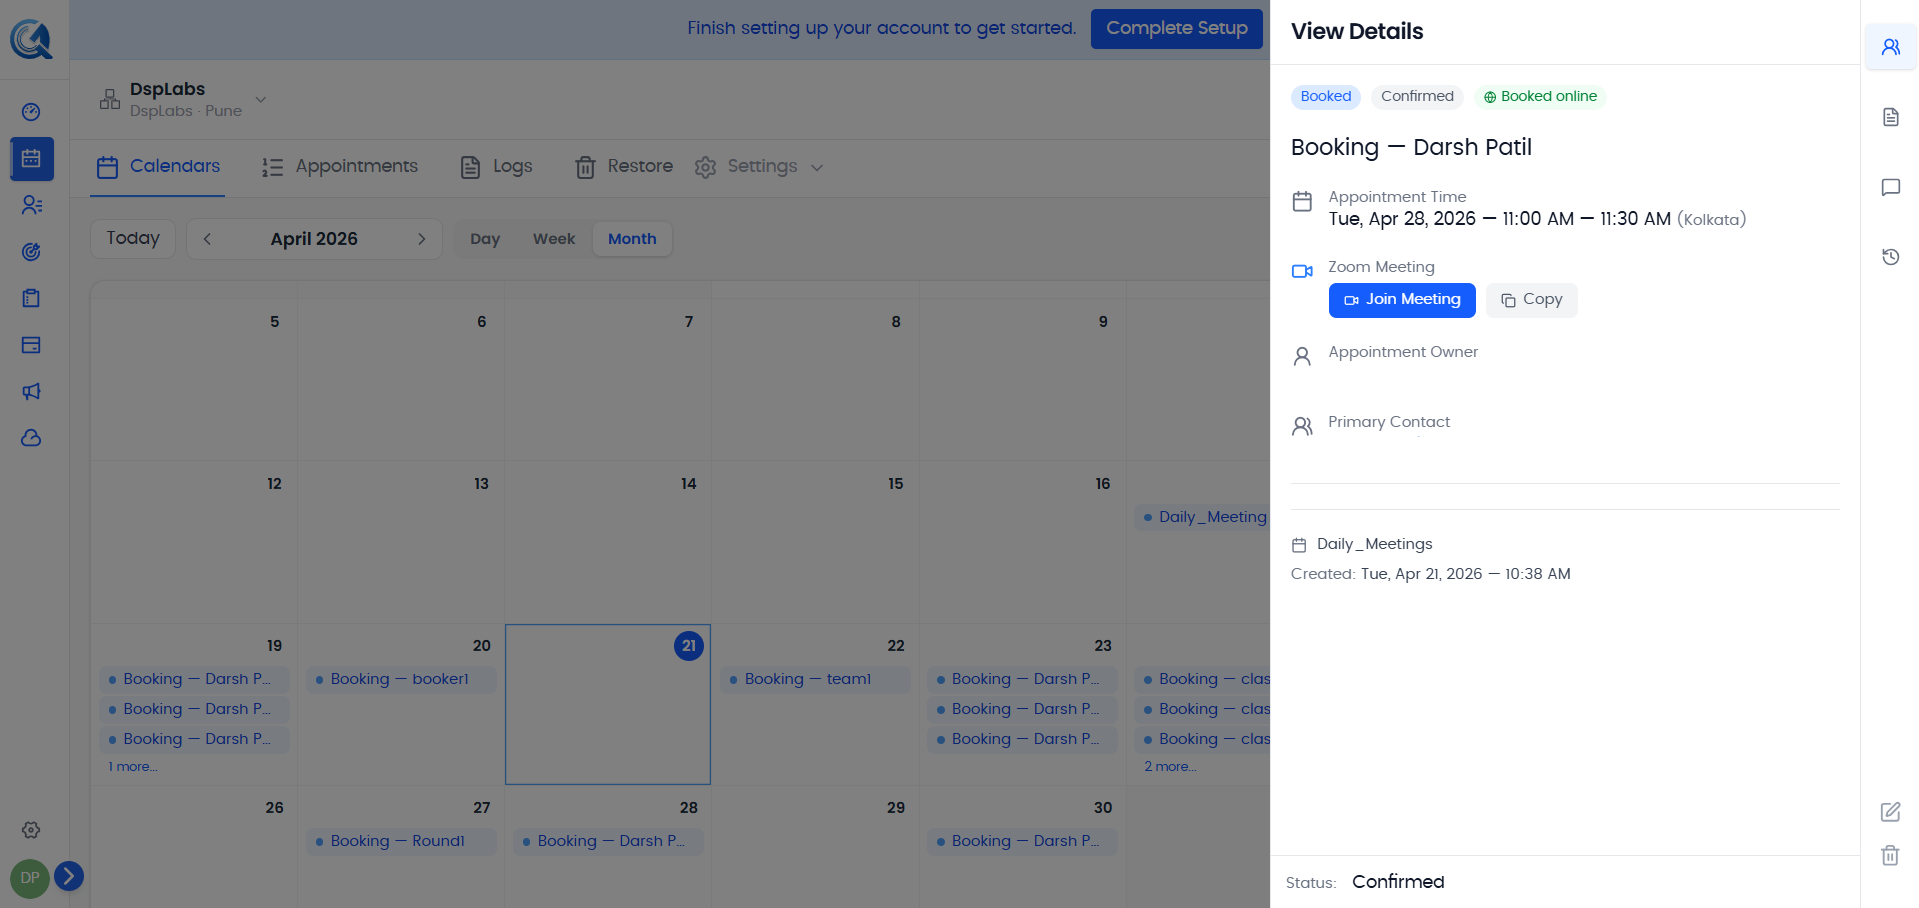 The details drawer gives you a full view of the appointment without leaving the table.
Creating an Appointment
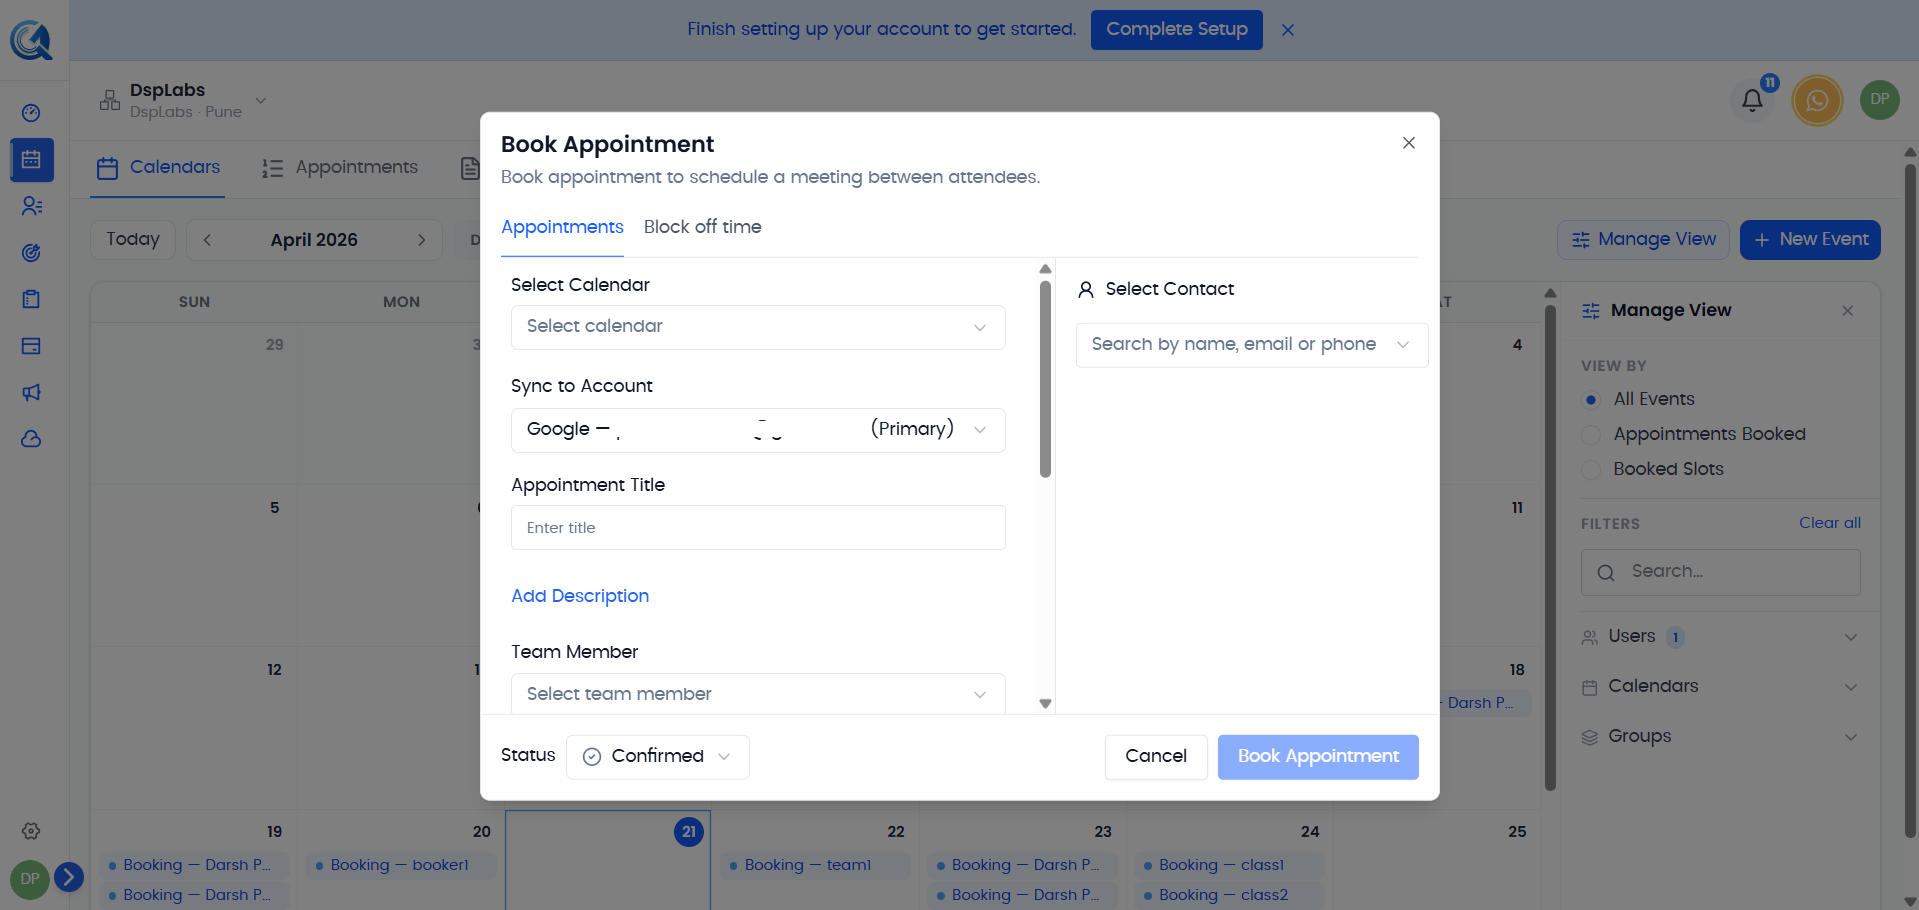
Click the + button in the top-right corner of the Appointments page to open the create modal.
The modal has two tabs:
Appointments Tab
Book a standard appointment for a contact. Fill in:
- Select Calendar — Choose which calendar to book on.
- Appointment Title — A short label for the appointment.
- Description — Optional. Add context for the meeting.
- Team Member — The team member to assign.
- Date & Time — The meeting date, start time, and end time.
- Meeting Location — Use the calendar default or set a custom location.
- Select Contact — Search and select the contact being booked.
- Status — Set to Confirmed or Unconfirmed.
- Sync to Account — If you have a Google or Microsoft account connected, choose which account to sync the appointment to.
Click Book Appointment to save.
 Fill in the appointment details and click Book Appointment to schedule it.
Block Off Time Tab
Reserve a block of time on a calendar without linking it to a contact. Fill in the calendar, title, timezone, and start and end date/time, then click Book Appointment.
Appointment Status
Every appointment has two status types:
Booking Status
Reflects the lifecycle state of the appointment:
| Status | Meaning |
|---|---|
| Booked | The appointment is scheduled and upcoming. |
| Cancelled | The appointment has been cancelled. |
| Rescheduled | The appointment was moved to a new time. |
| Pending | The booking is awaiting confirmation. |
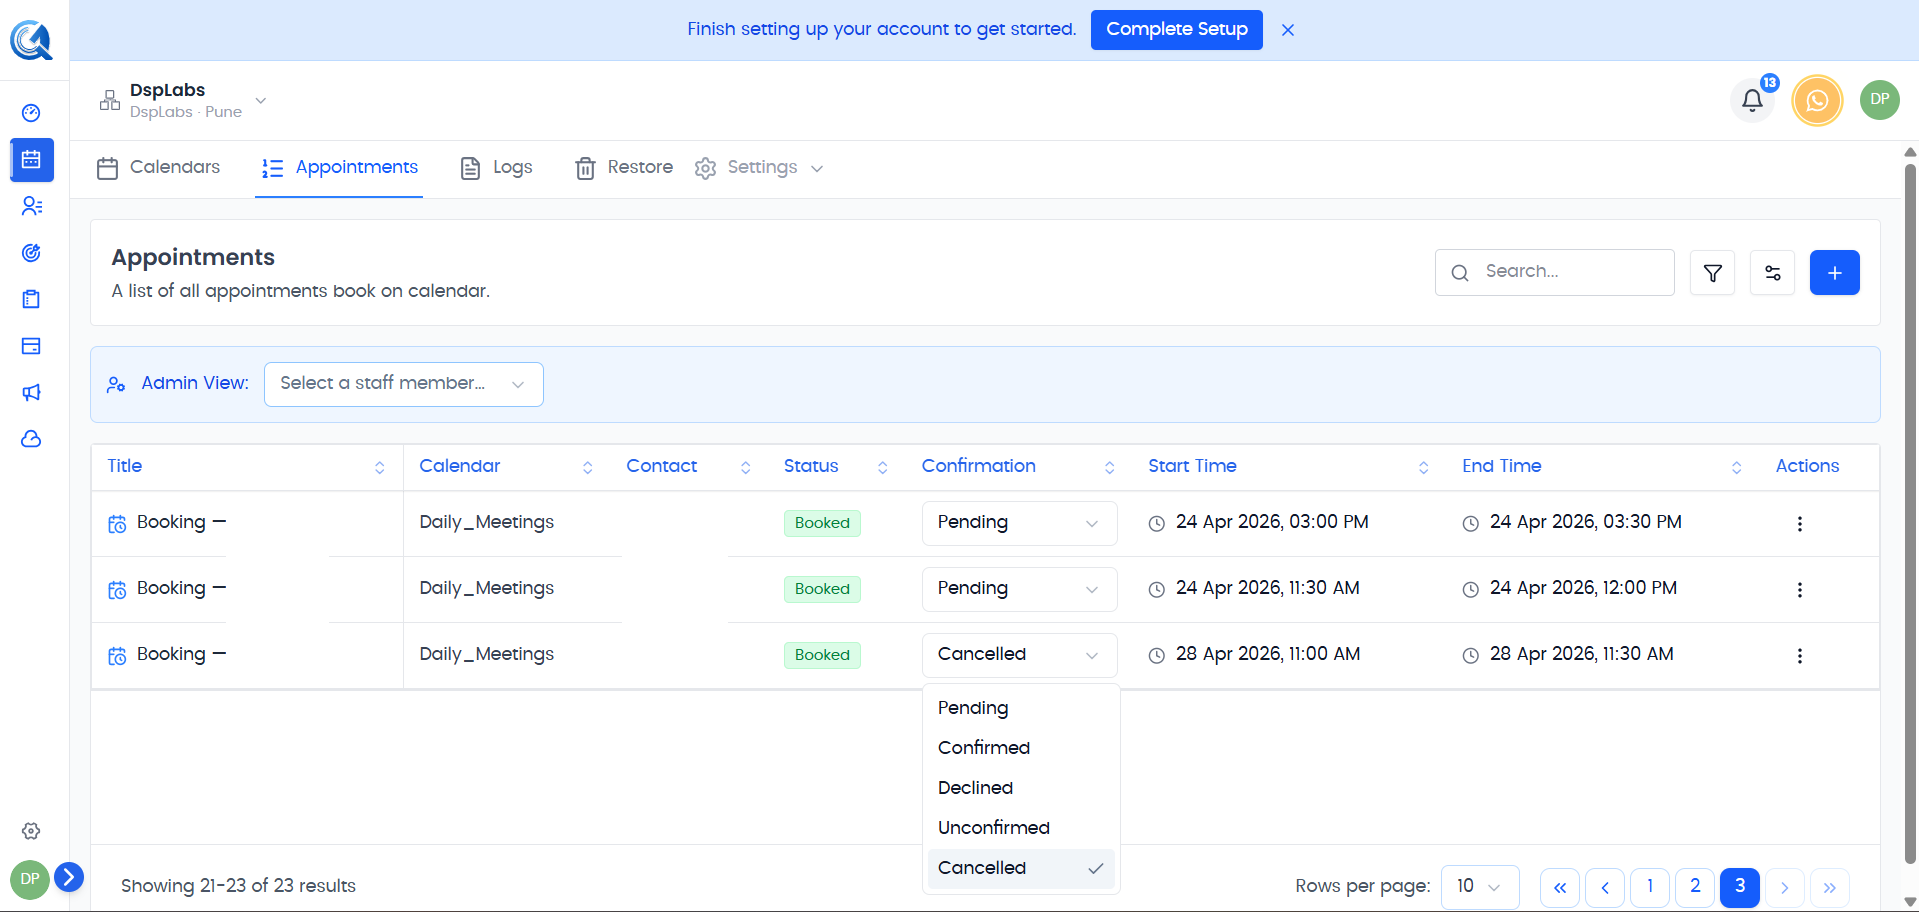
Confirmation Status
Reflects explicit confirmation by you or your team:
| Status | Meaning |
|---|---|
| Confirmed | Attendance has been explicitly confirmed. |
| Unconfirmed | Not yet confirmed. |
| Pending | Confirmation is pending a response. |
| Declined | The appointment was declined. |
| Cancelled | Marked as cancelled at the confirmation level. |
 Both booking status and confirmation status are shown as badges on the appointment detail.
Editing an Appointment
Click the pencil icon on a row, or click Edit inside the details drawer, to open the edit modal.
You can update:
- Title
- Description
- Start and End date/time
- Timezone
- Confirmation Status
- Assigned Team Member
Click Save Changes to apply.
 Update any field and click Save Changes to apply the edit.
Rescheduling an Appointment
To move an appointment to a different time, open the edit modal, update the Start and End fields to the new date and time, then click Save Changes.
 Change the start and end times in the edit modal, then click Save Changes to reschedule.
Cancelling an Appointment
To cancel an appointment:
- Click the trash icon on the appointment row, or click Delete inside the details drawer.
- Confirm the deletion in the dialog that appears.
 Confirm the deletion. Cancelled appointments are removed from the active list.
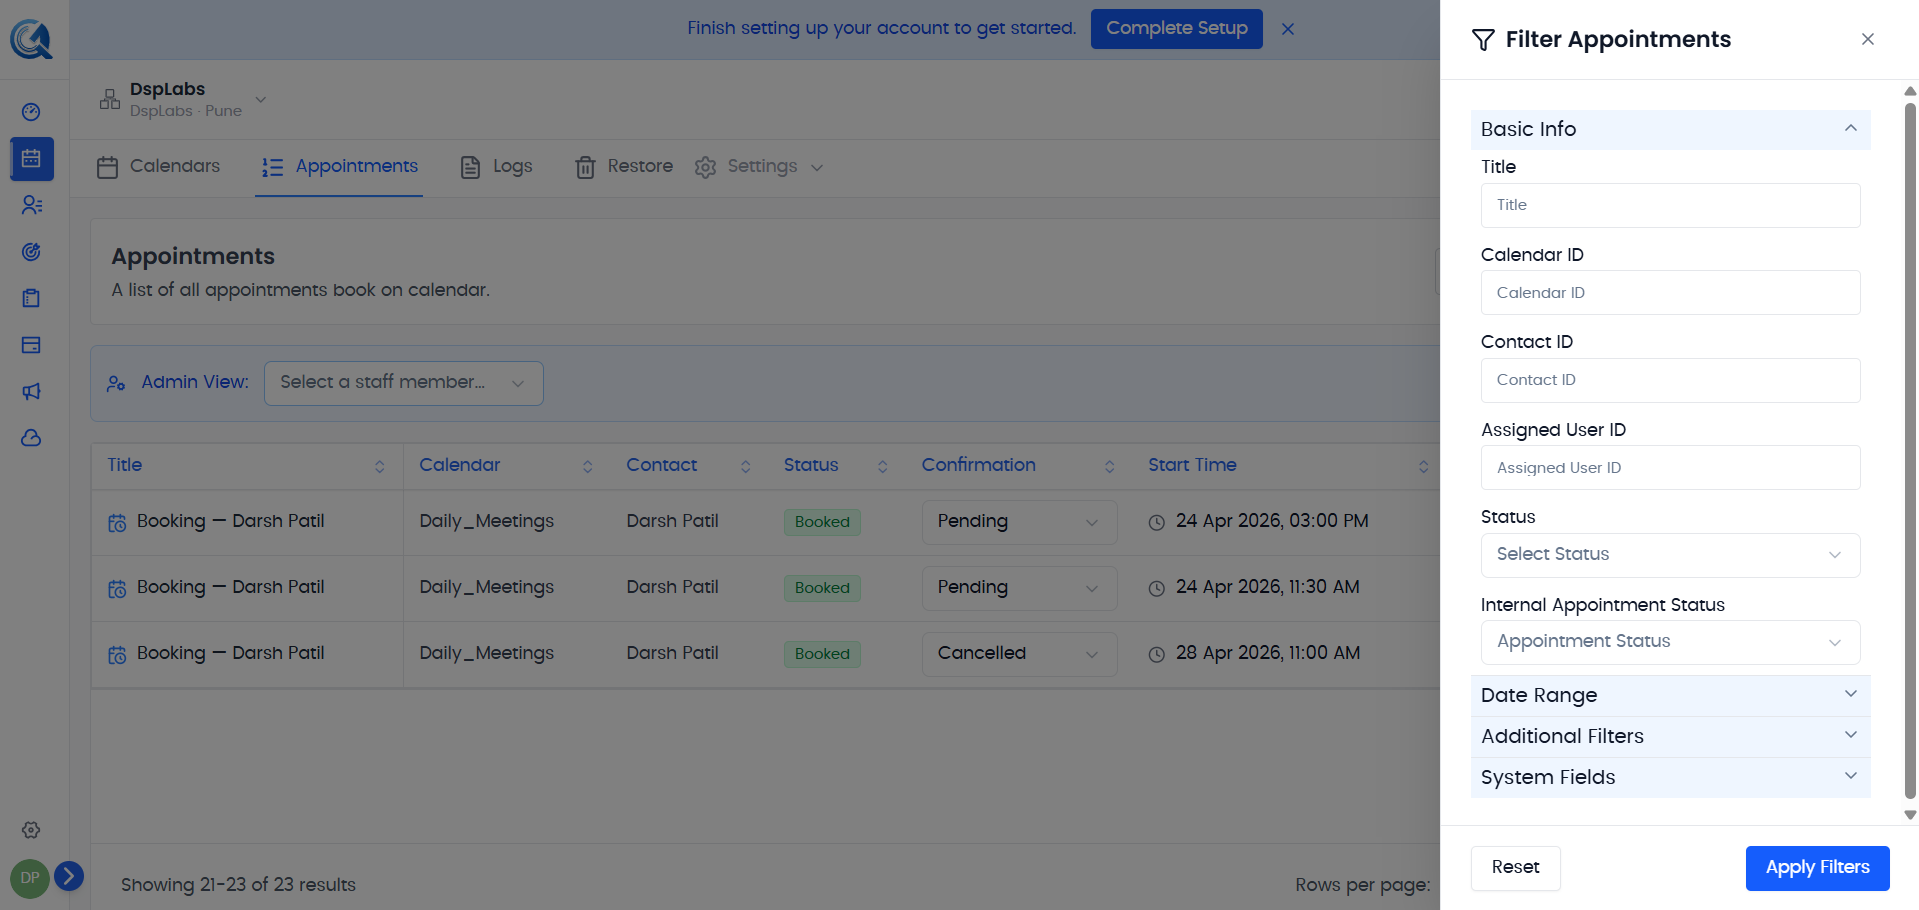
Filtering Appointments
Click the Filter icon to open the filter panel. You can filter by:
- Calendar
- Contact
- Assigned User
- Date Range
- Booking Status — Booked, Cancelled, Rescheduled, Pending
- Confirmation Status — Confirmed, Unconfirmed, Pending, Declined, Cancelled
- Source and Channel
- Is Recurring
Click Apply to apply the filters, or Reset to clear them.
 Use the filter panel to narrow down the appointments list.
Managing Columns
Click the Manage Fields icon to show, hide, or reorder the table columns. Your column preferences are saved automatically.
Video Walkthrough
Watch the walkthrough below to see how to create, edit, and manage appointments in QuantixOne.