Settings
The Settings section is your central control hub in QuantixOne CRM — where you configure your business identity, manage staff, set communication preferences, connect channels, and handle billing. Everything about how your organization runs on the platform is managed from here.
Go to Settings from the bottom-left of the left navigation sidebar to get started.
Business Profile
The Business Profile tab is where you maintain your organization's official identity on the platform. It has four sub-tabs.
Company Profile
Set your core business identity — name, logo, contact details, domain, and industry.
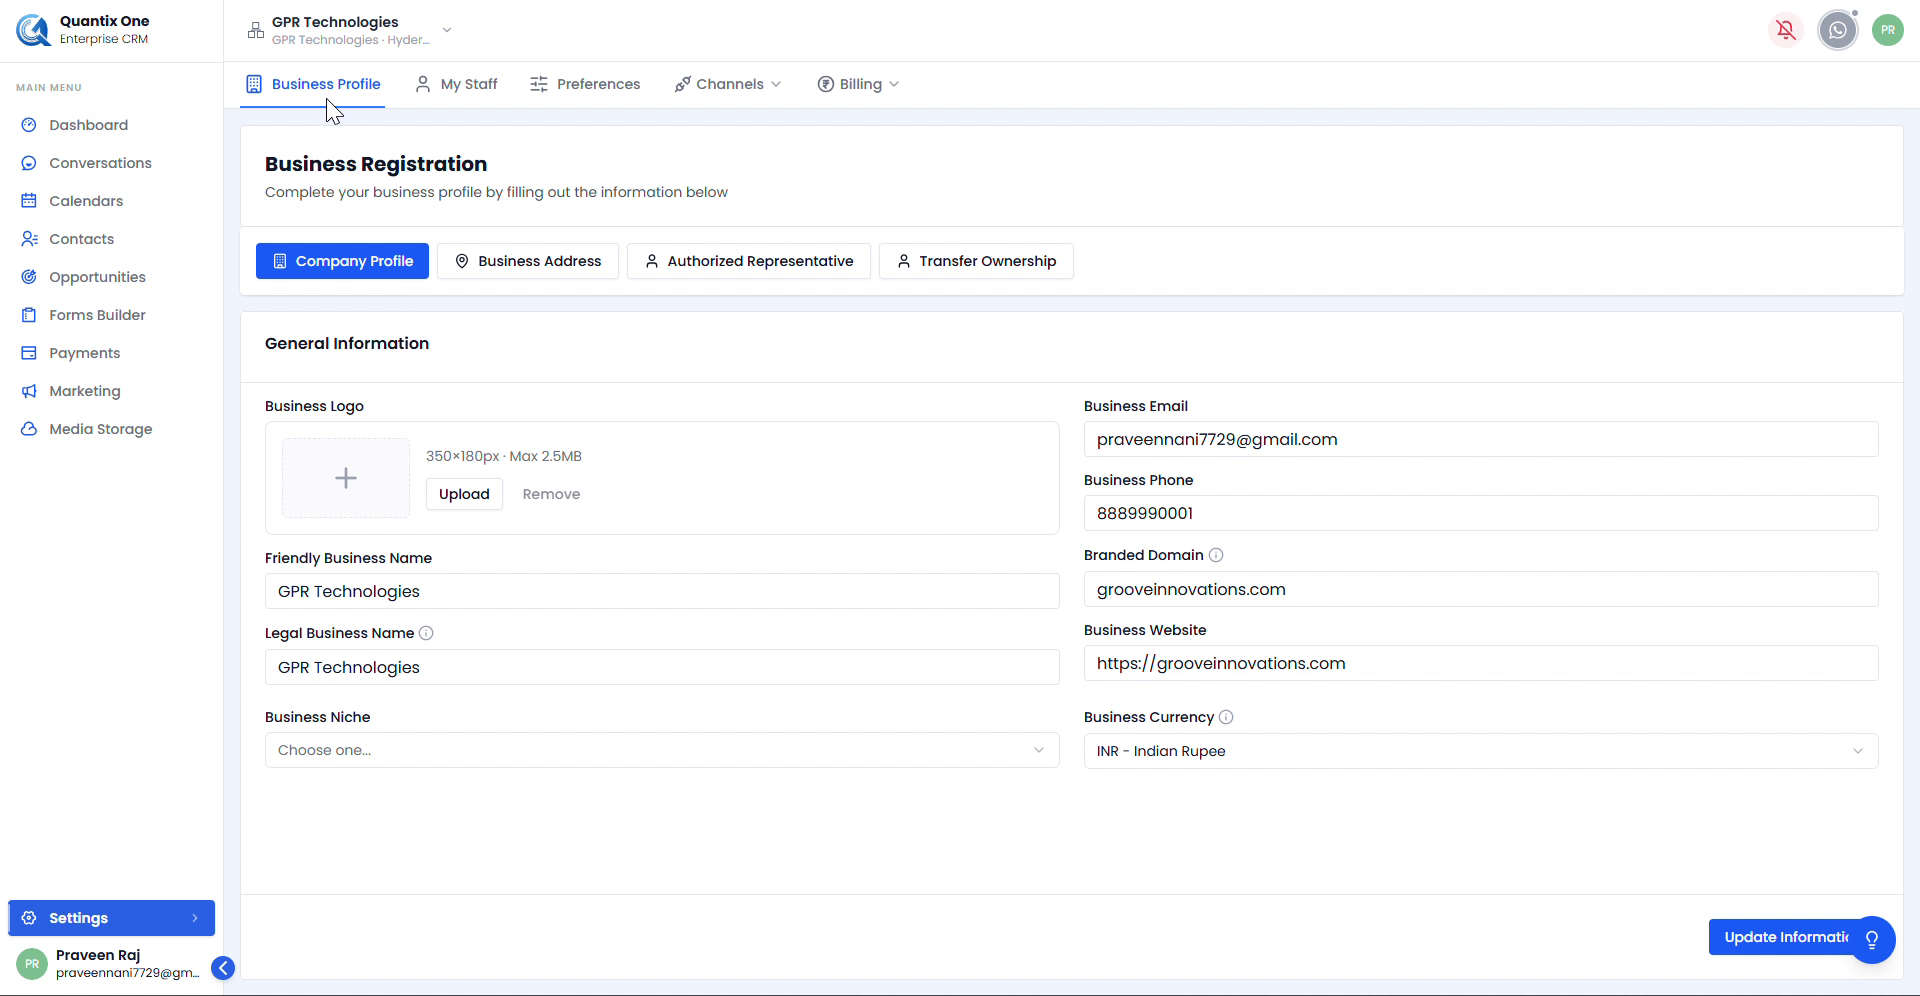 The Company Profile page showing General Information fields. Click Update Information to save any changes.
| Field | Description |
|---|---|
| Business Logo | Upload your logo (recommended: 350×180px, max 2.5MB) |
| Friendly Business Name | Display name used within the platform |
| Legal Business Name | Officially registered company name |
| Business Email | Official email address of the organization |
| Business Phone | Primary contact number |
| Branded Domain | Custom domain associated with the organization |
| Business Website | Public website URL |
| Business Niche | Industry or sector your business operates in |
| Business Currency | Default currency (e.g. INR – Indian Rupee) |
Business Address
Enter your organization's physical location and regional settings.
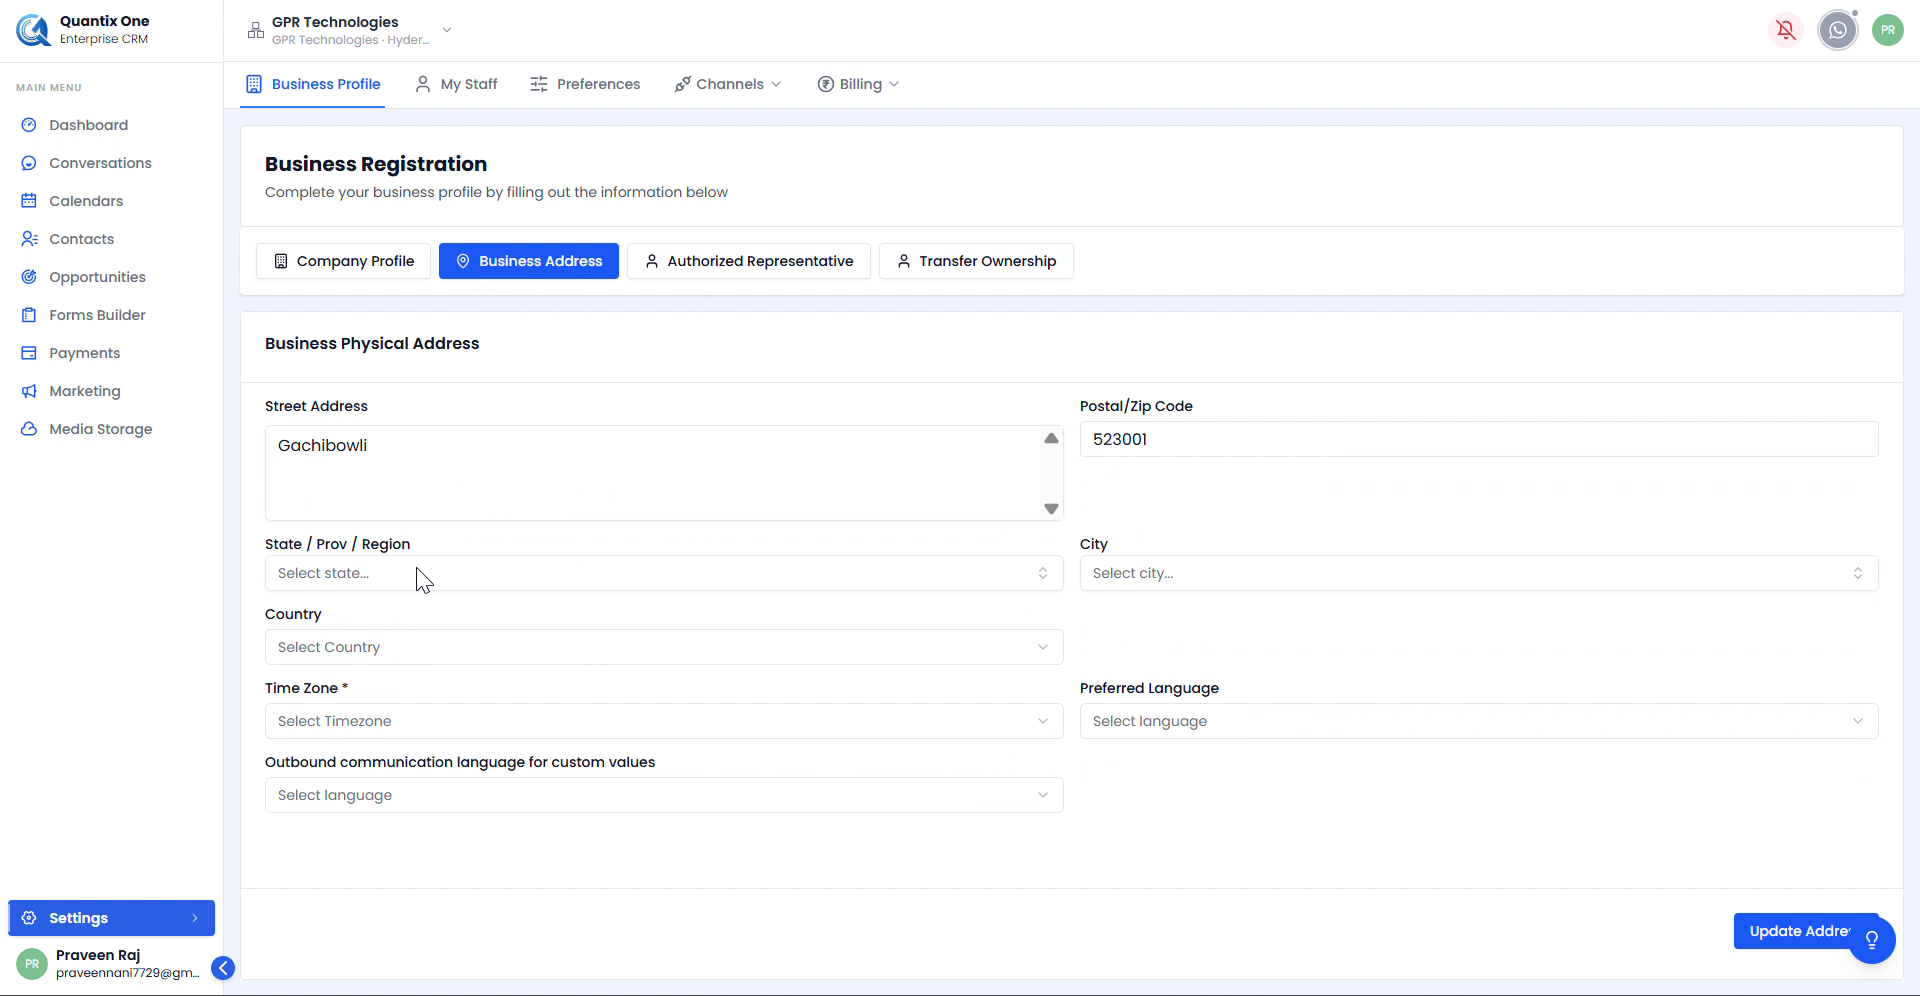 The Business Physical Address page. Time Zone is mandatory. Click Update Address to save.
| Field | Description |
|---|---|
| Street Address | Full street address of the business premises |
| Postal / Zip Code | Area postal code |
| State / Prov / Region | State or province |
| City | City of operation |
| Country | Country of residence |
| Time Zone | Primary time zone for the organization (mandatory) |
| Preferred Language | Default language for the platform interface |
| Outbound communication language | Language used for outbound communications with custom variable fields |
Authorized Representative
Store the details of the person officially representing your organization.
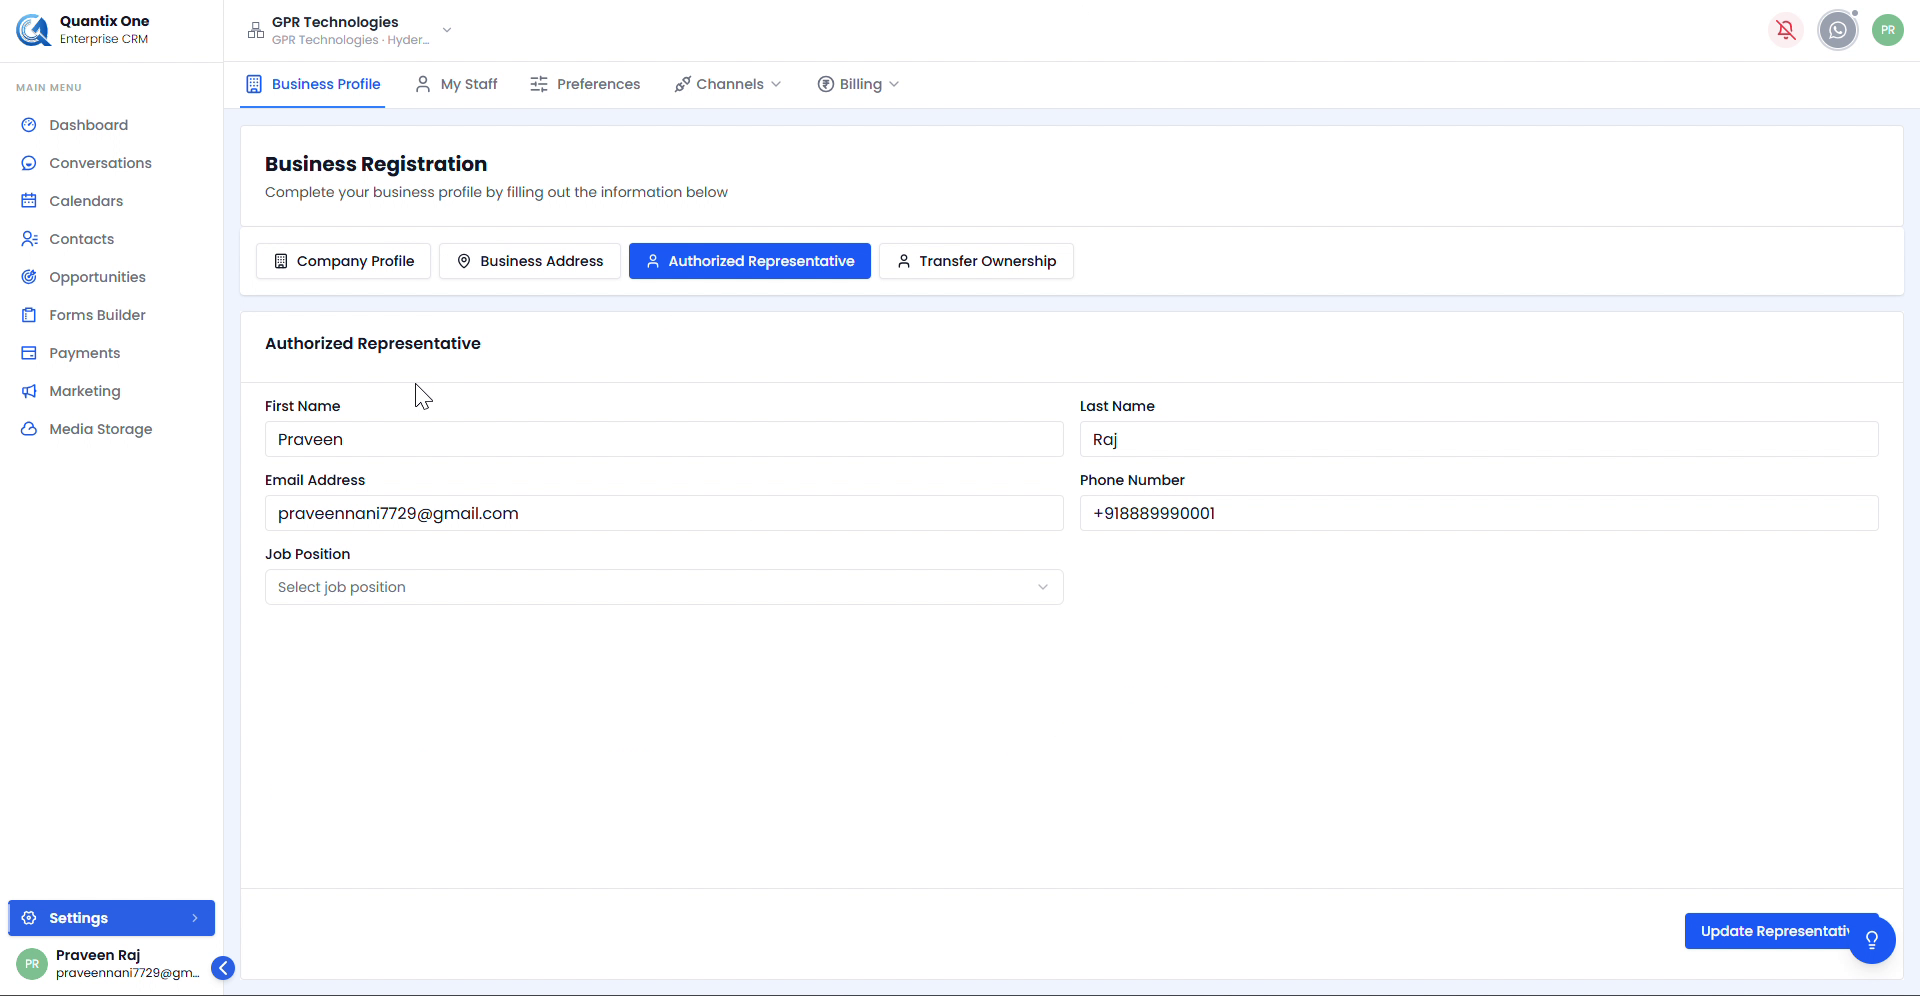 The Authorized Representative page. Click Update Representative to save changes.
| Field | Description |
|---|---|
| First Name / Last Name | Representative's full name |
| Email Address | Used for official representative communications |
| Phone Number | Contact number of the representative |
| Job Position | The representative's role within the organization |
Transfer Ownership
Transfer full ownership of the organization account to another active staff member.
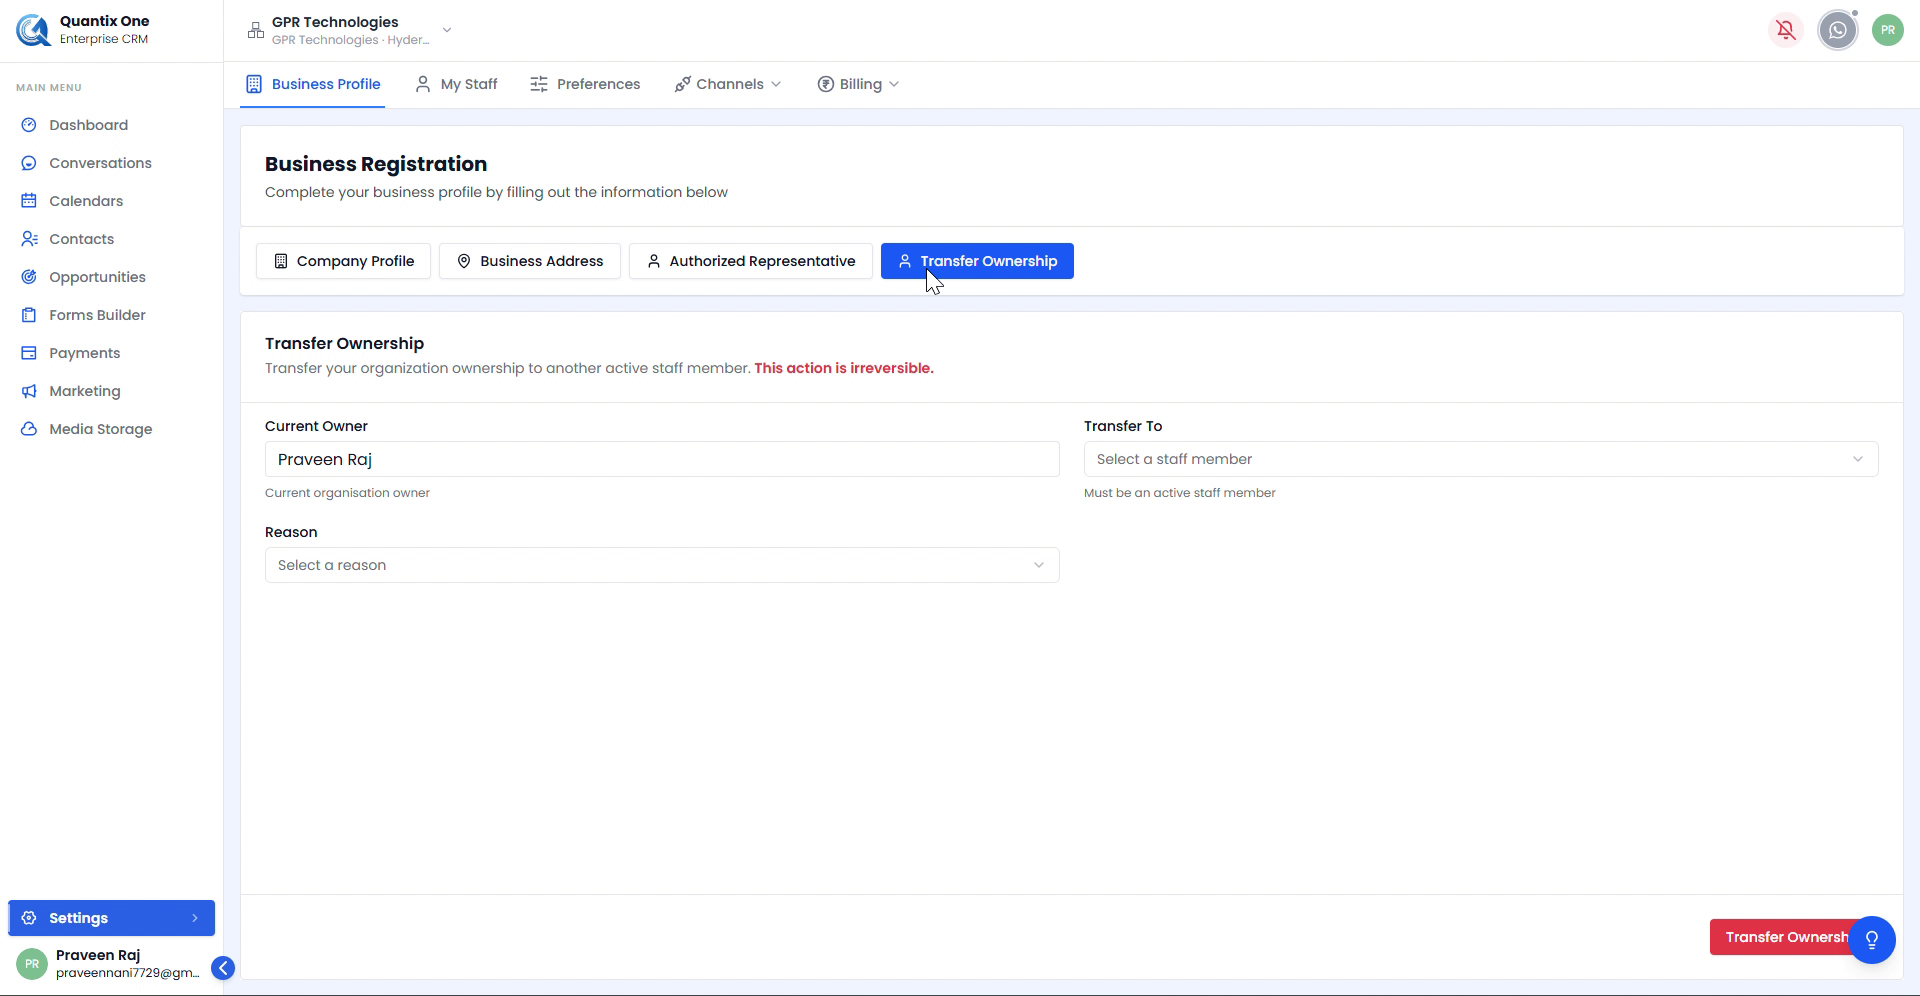 Select the staff member to transfer to and provide a reason. Click Transfer Ownership to complete.
| Field | Description |
|---|---|
| Current Owner | Displays the existing owner's name (read-only) |
| Transfer To | Select an active staff member from the dropdown |
| Reason | Select the reason for the transfer |
Warning: Transfer Ownership is permanent and irreversible. The current owner will immediately lose admin control once confirmed.
My Staff
The My Staff tab gives you a complete view of all staff members, their roles, and access management tools.
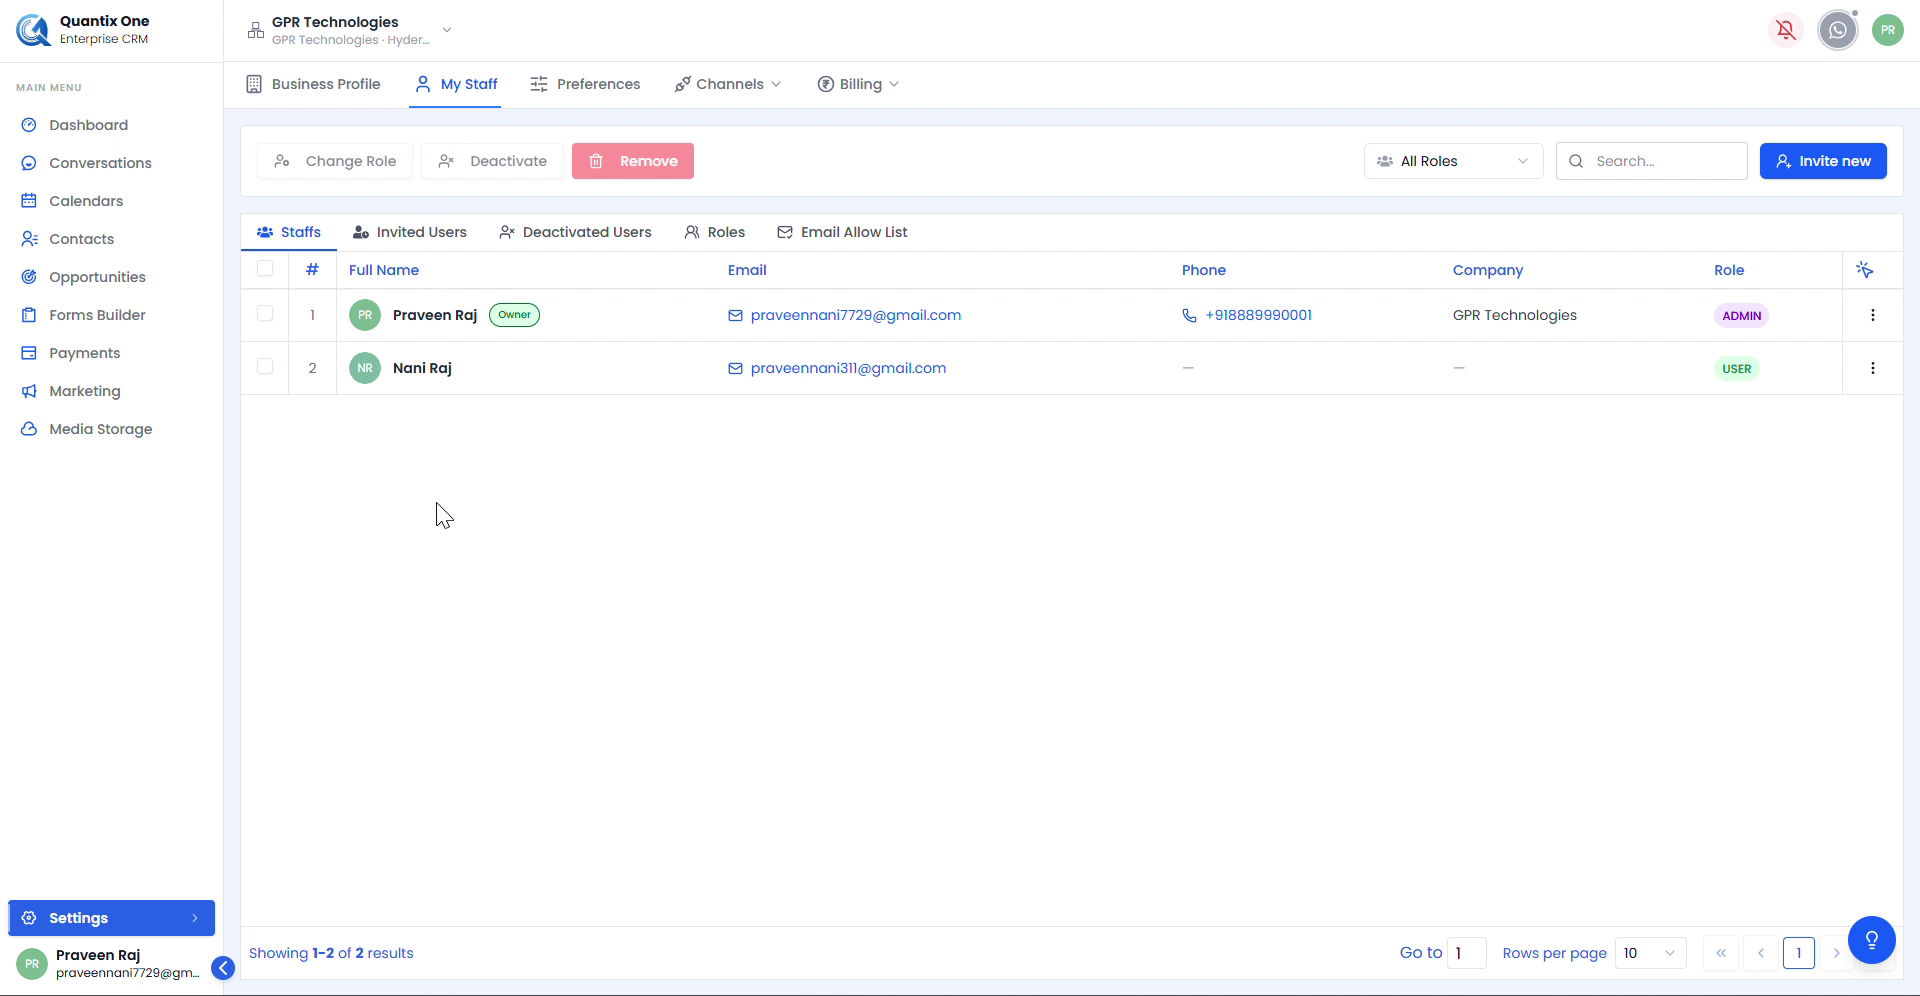 The Staffs tab listing all active staff members with Full Name, Email, Phone, Company, and Role. The account creator is marked with an Owner badge.
Select one or more staff members using the checkboxes to apply bulk actions from the toolbar — Change Role, Deactivate, or Remove.
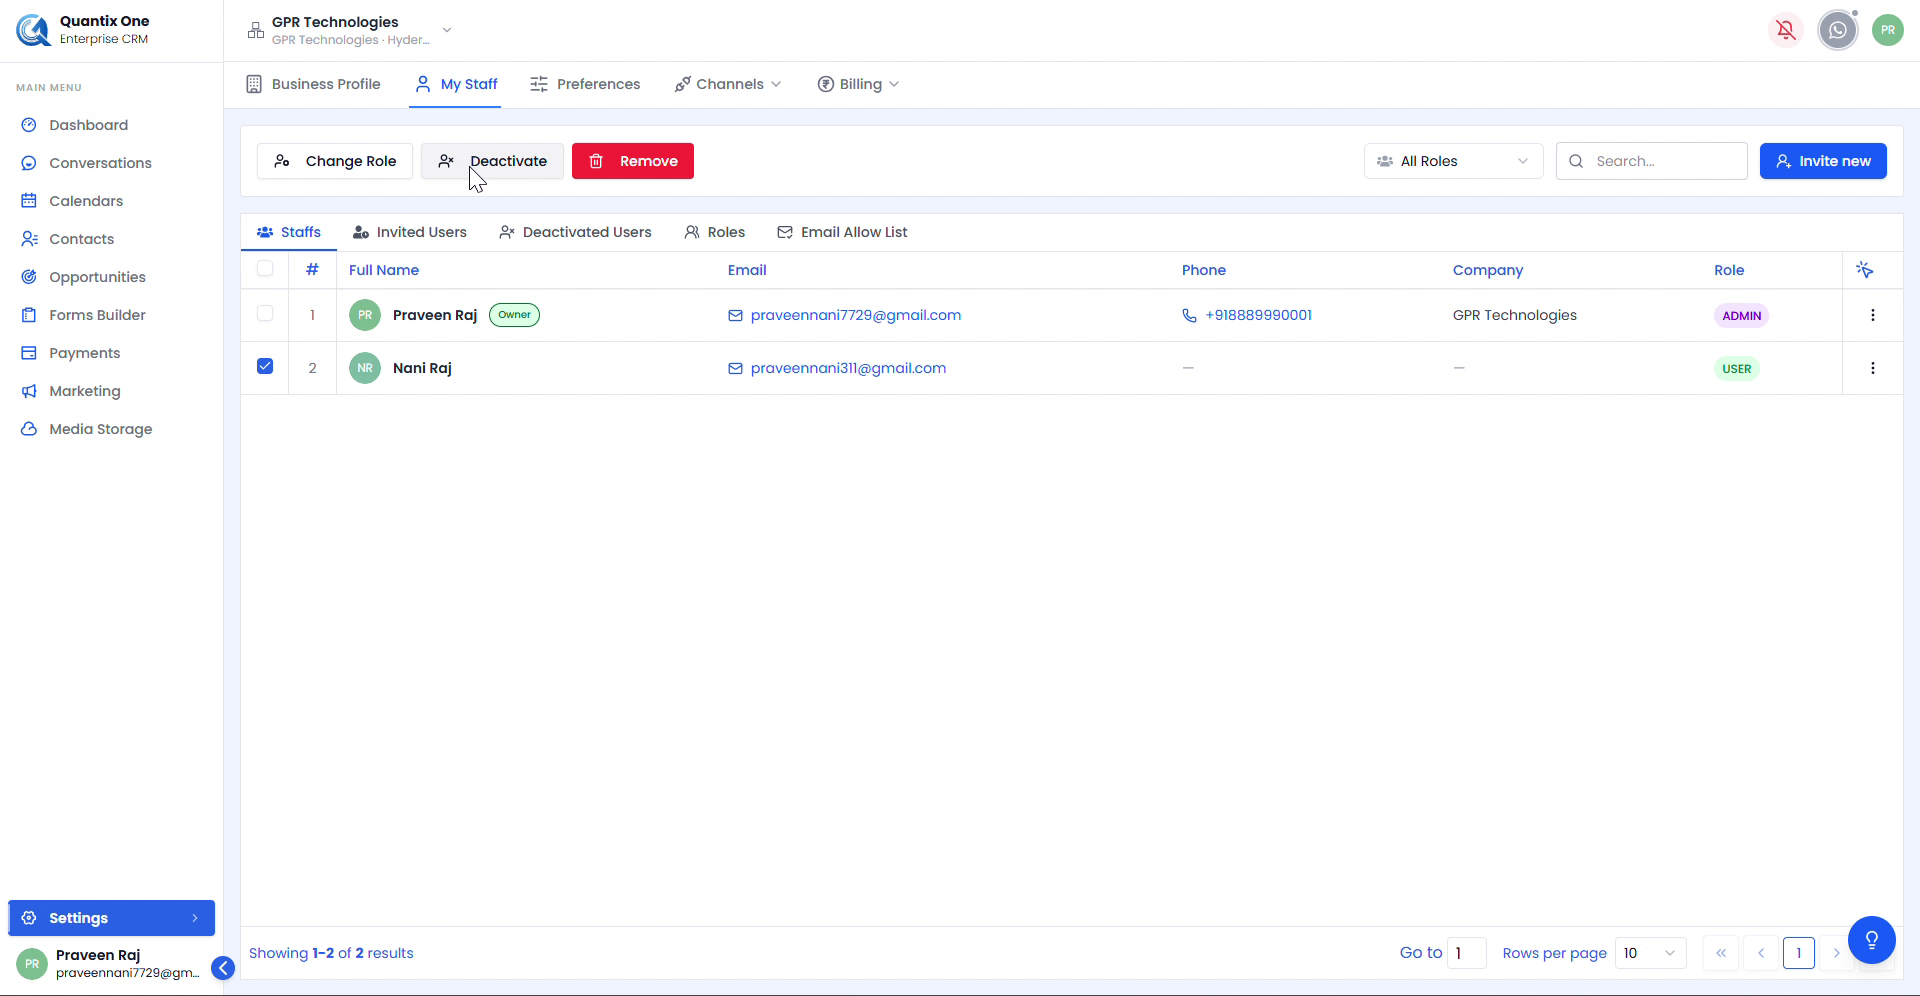 Selecting a staff member reveals the bulk action buttons. Use Invite new to add new team members.
The My Staff section has five tabs:
Invited Users
Track all pending and accepted invitations sent to users to join your organization.
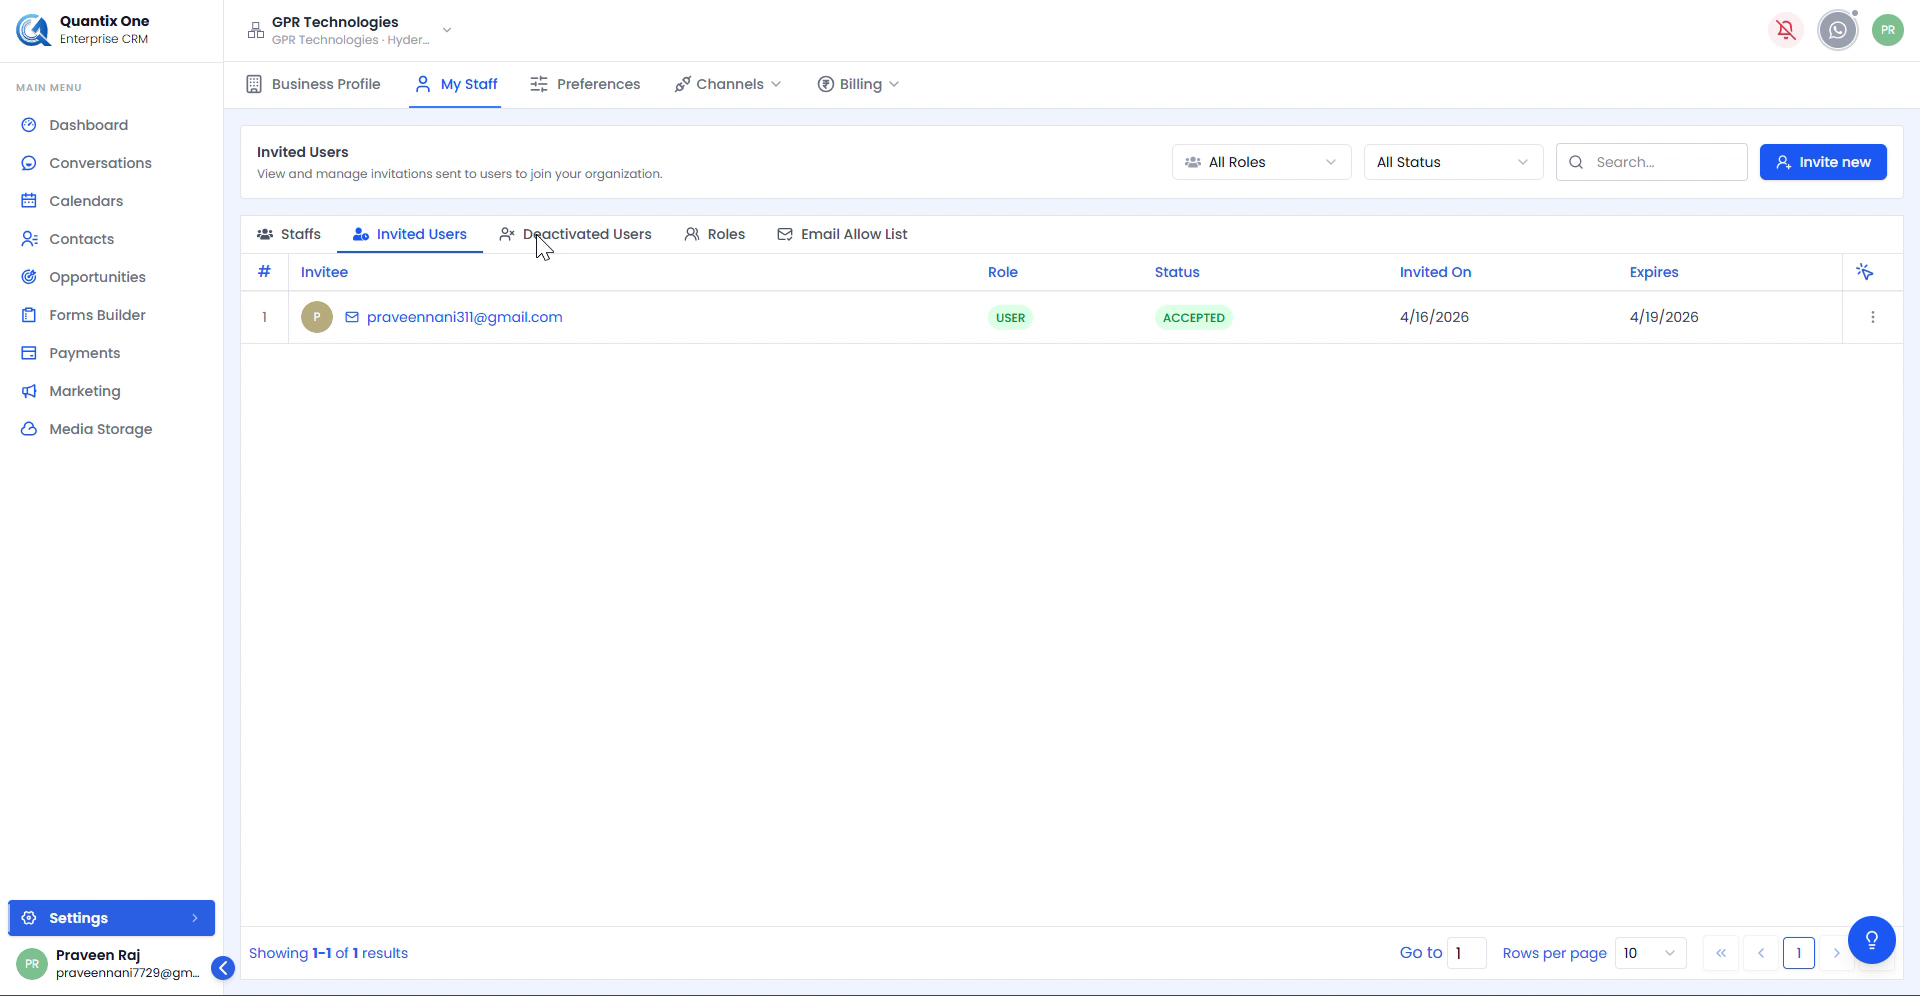 Each row shows the invitee's email, Role, Status (Pending / Accepted / Cancelled), Invited On date, and Expiry date.
Deactivated Users
View staff members who have been deactivated. Deactivated users lose platform access but their records are retained.
Roles
Manage system roles and create custom roles for your organization.
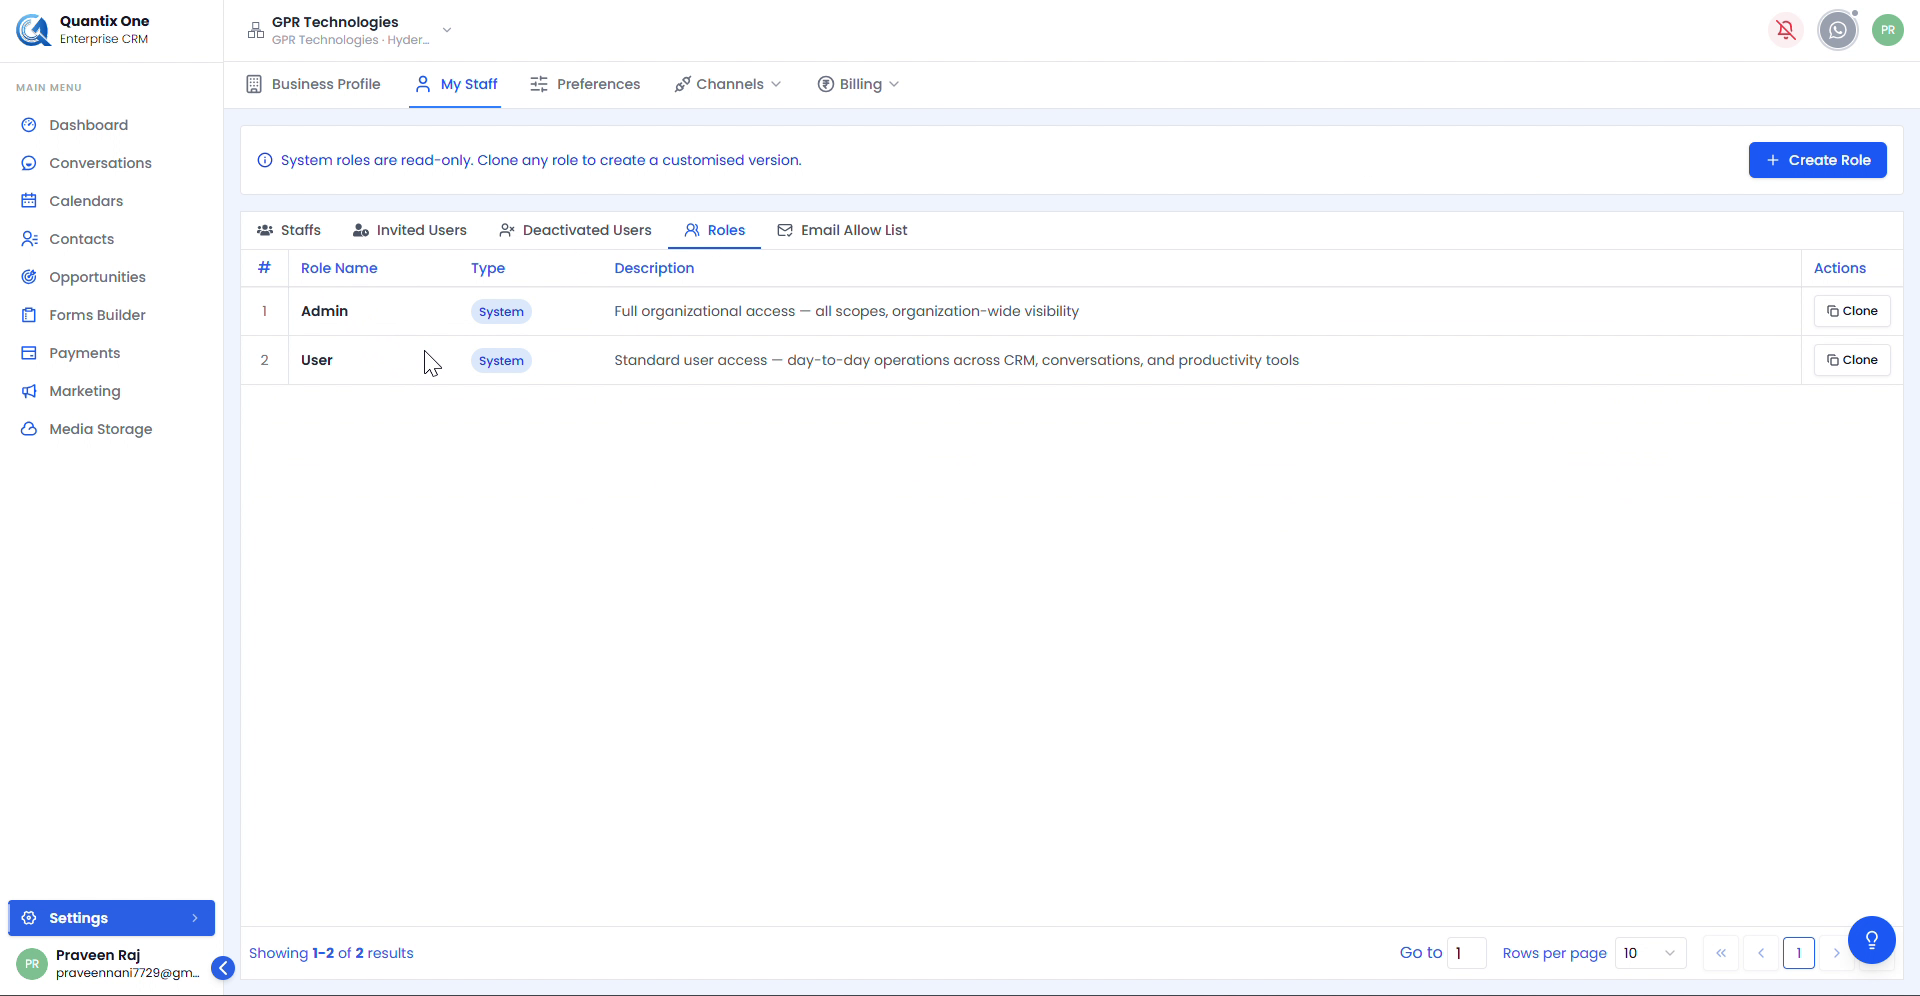 Two default system roles — Admin (full organizational access) and User (standard day-to-day access). Clone any role to customize it, or click + Create Role to build a new one from scratch.
Email Allow List
Control which staff members are permitted to send emails from configured sending identities. Access to this section is governed by RBAC settings.
 The Staff Email Access page displaying staff members and their permitted sending identities.
Preferences
The Preferences tab lets you control appearance, privacy, and notification settings for your account.
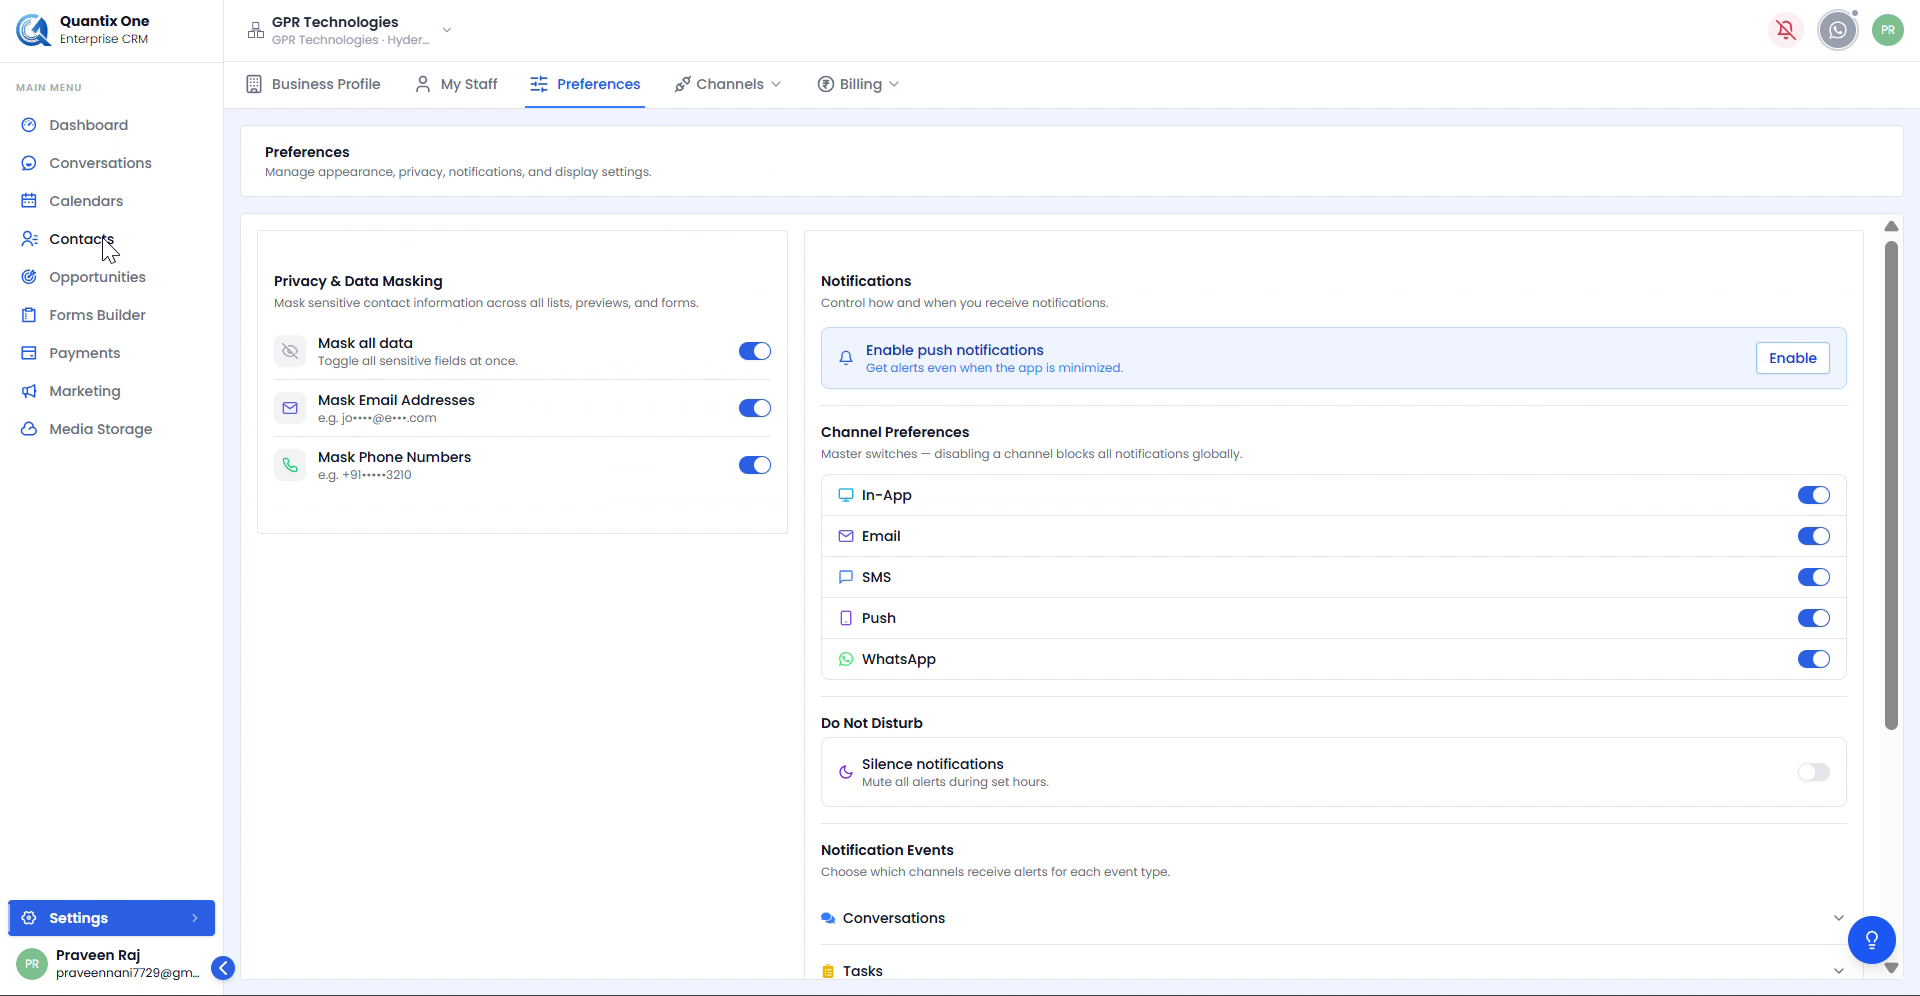 The Preferences page split into Privacy & Data Masking (left) and Notifications with Channel Preferences (right).
Privacy & Data Masking
Control how sensitive contact information is displayed across all lists, previews, and forms within the CRM.
| Toggle | What it does |
|---|---|
| Mask all data | Master toggle — hides all sensitive fields at once |
| Mask Email Addresses | Obscures emails as jo****@e***.com |
| Mask Phone Numbers | Obscures phone numbers as +91-••••-3210 |
Notifications
Configure how and when you receive alerts.
- Enable Push Notifications — Click Enable to activate browser push notifications, even when the app is minimized
- Channel Preferences — Master switches for In-App, Email, SMS, Push, and WhatsApp notifications
- Do Not Disturb — Toggle Silence notifications to mute all alerts during set hours
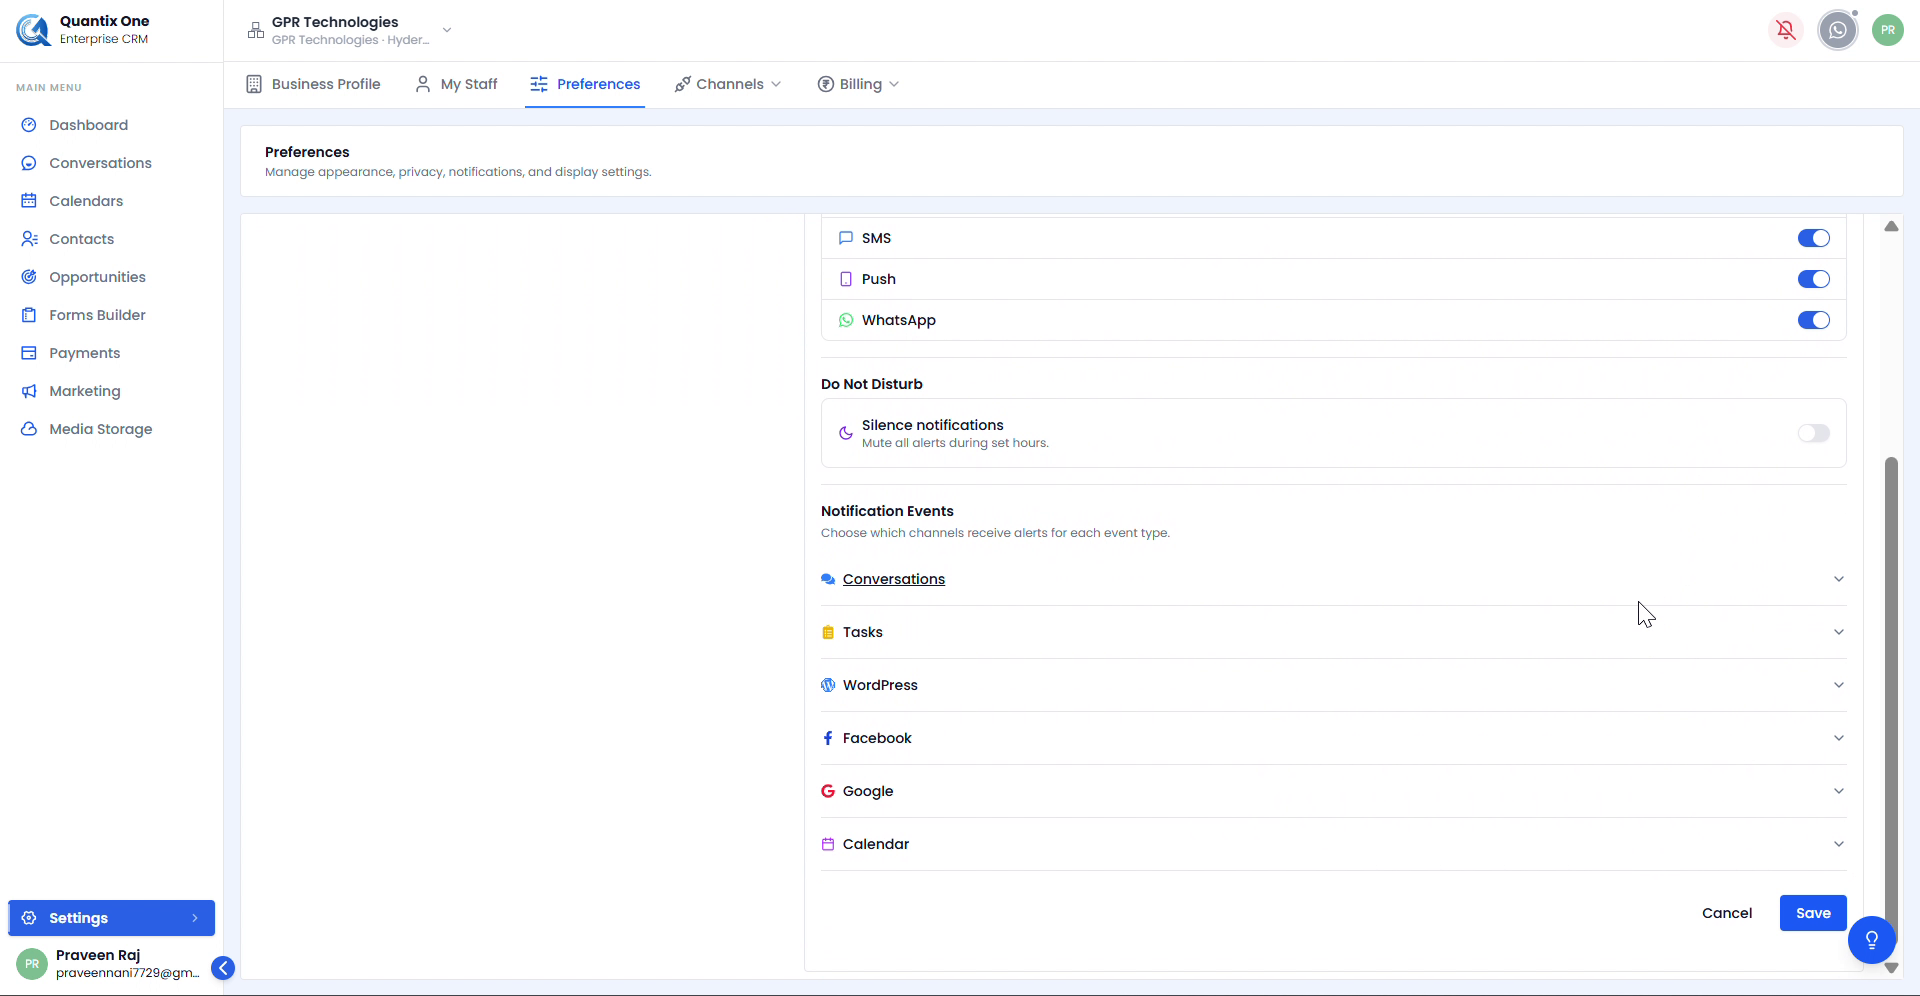 Notification Events section with collapsible categories — Conversations, Tasks, WordPress, Facebook, Google, and Calendar. Expand each to configure per-channel alert settings. Click Save to apply.
Channels
The Channels dropdown connects your communication channels to QuantixOne CRM.
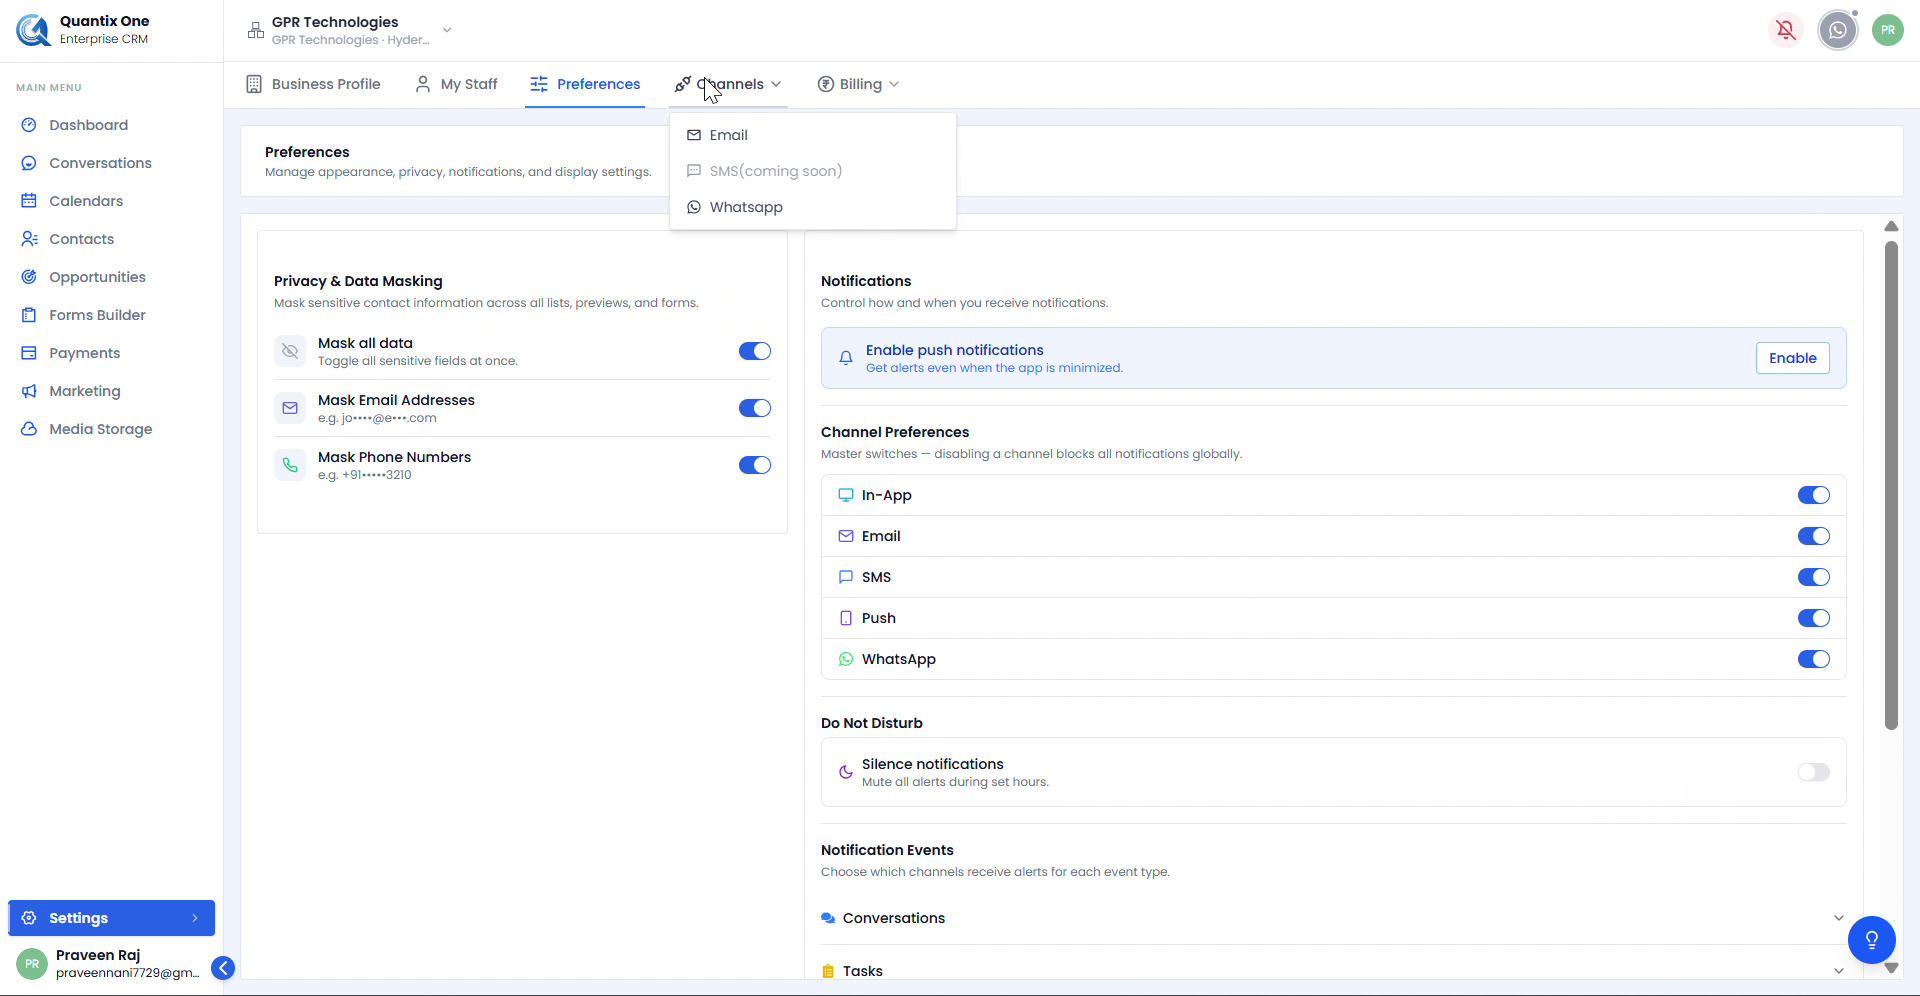 The Channels dropdown showing three options — Email, SMS (coming soon), and WhatsApp.
Email
Set up your email sending domain and manage sending identities.
Configure tab — Add and verify your sending domain.
 Enter your domain name, select a Region (e.g. ap-south-1), and click Register Domain to begin DNS verification.
Settings tab — View all configured sending domains and manage which staff members can send from each email identity.
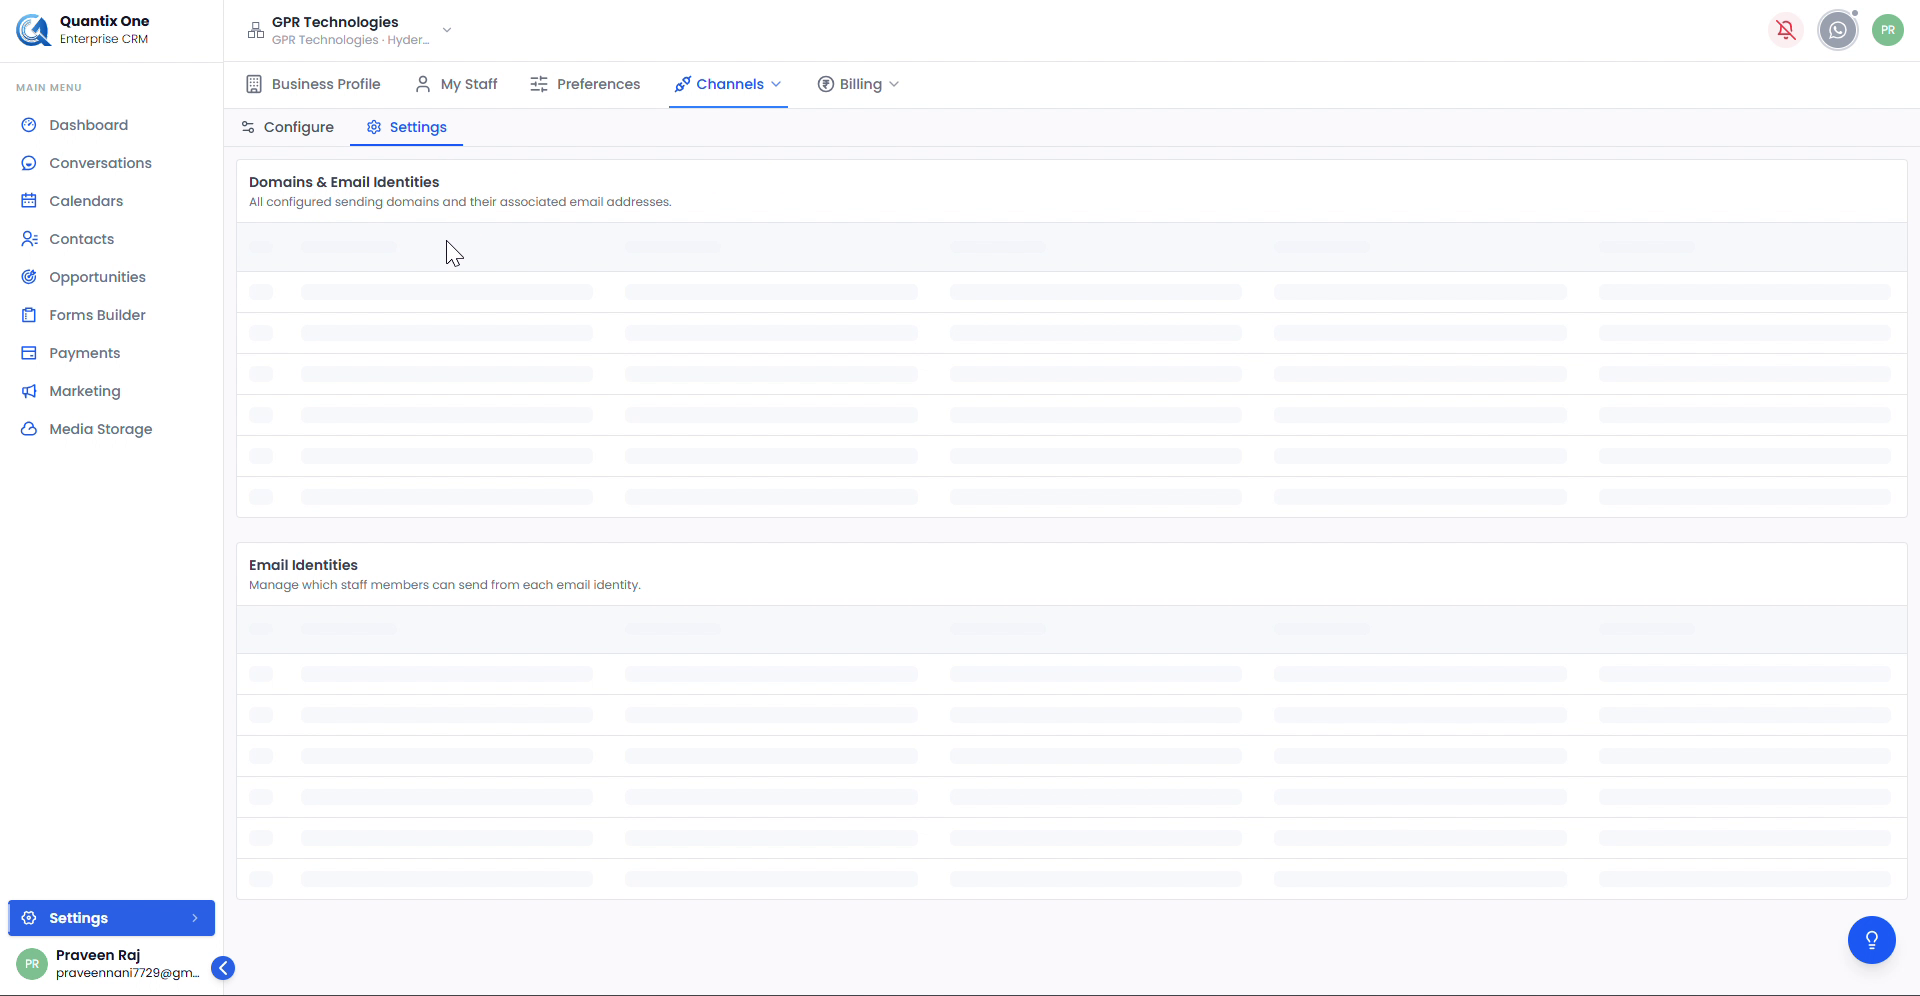 The Email Settings page listing Domains & Email Identities and Email Identities once domains have been registered and verified.
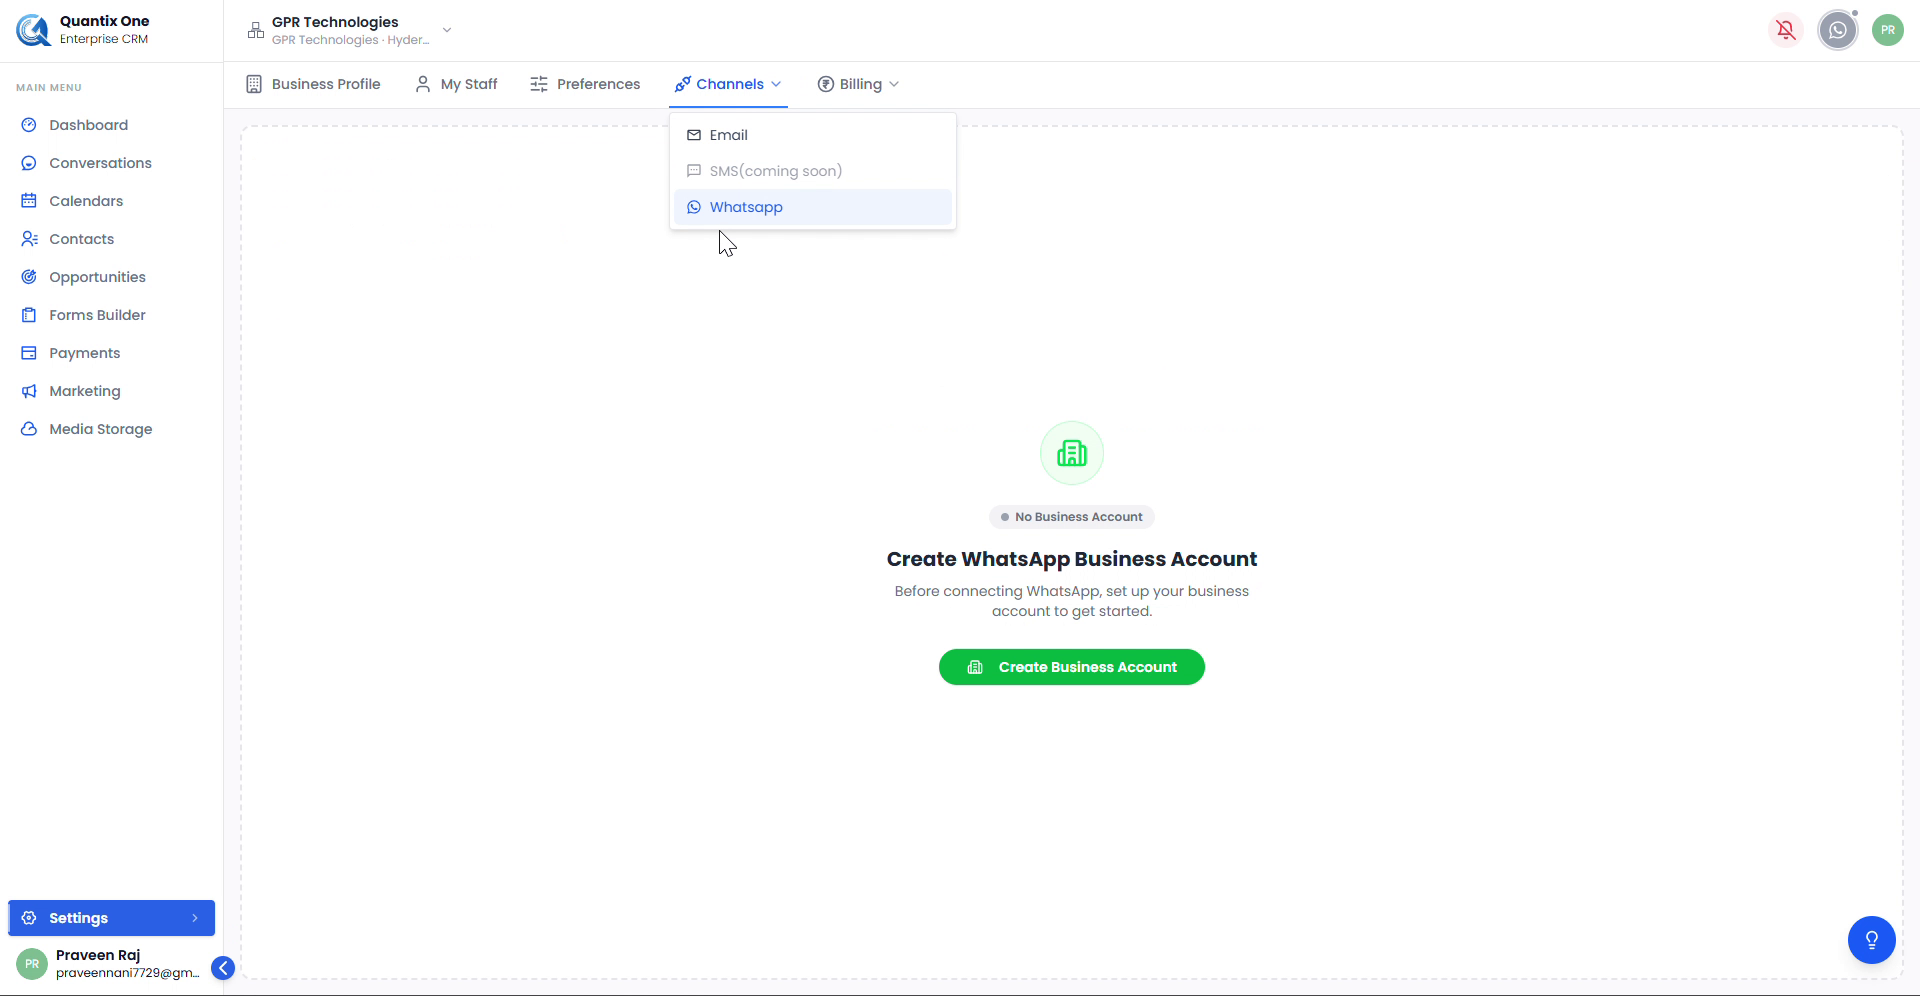
WhatsApp
Connect your WhatsApp Business Account to enable WhatsApp messaging within QuantixOne CRM.
 If no account is connected, click Create Business Account to begin the WhatsApp Business Account setup process.
Billing
The Billing dropdown manages your subscription plan, usage, add-ons, and invoices.
Upgrade Plan
View and upgrade your subscription tier.
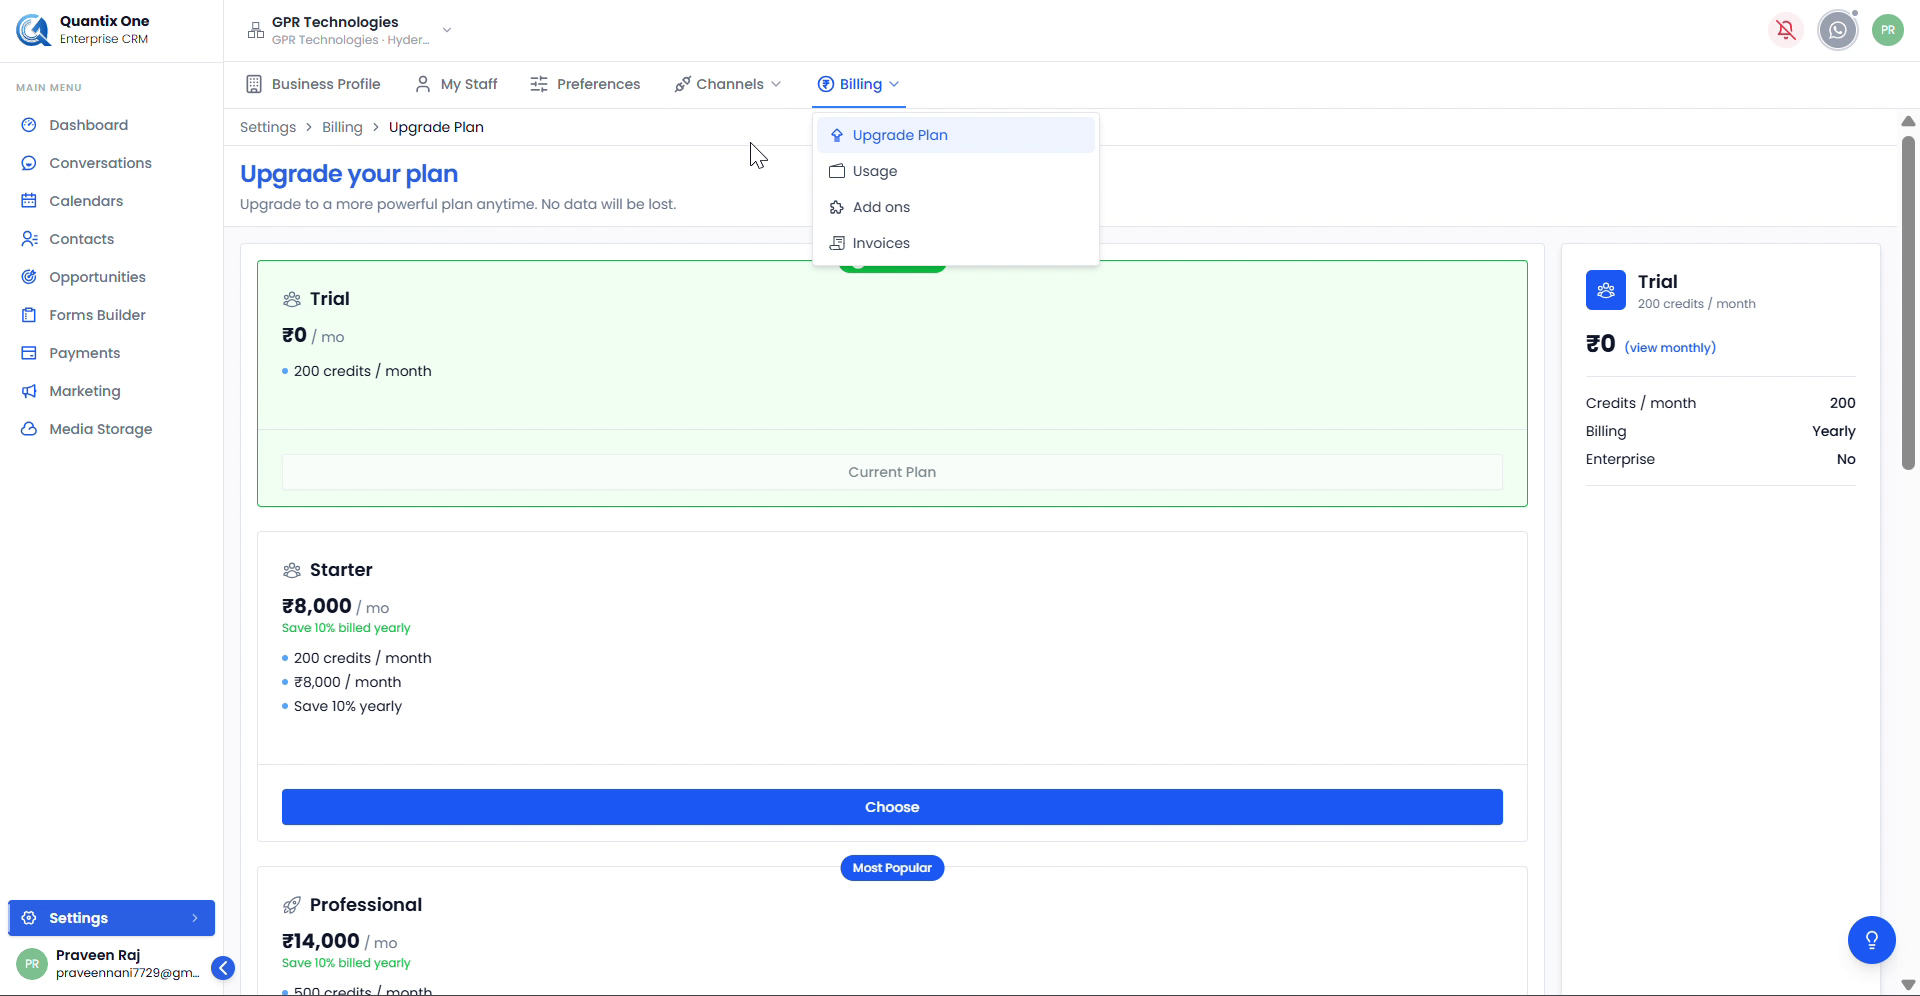 The Upgrade Plan page showing your current plan and available paid tiers. The right panel summarizes your active plan details.
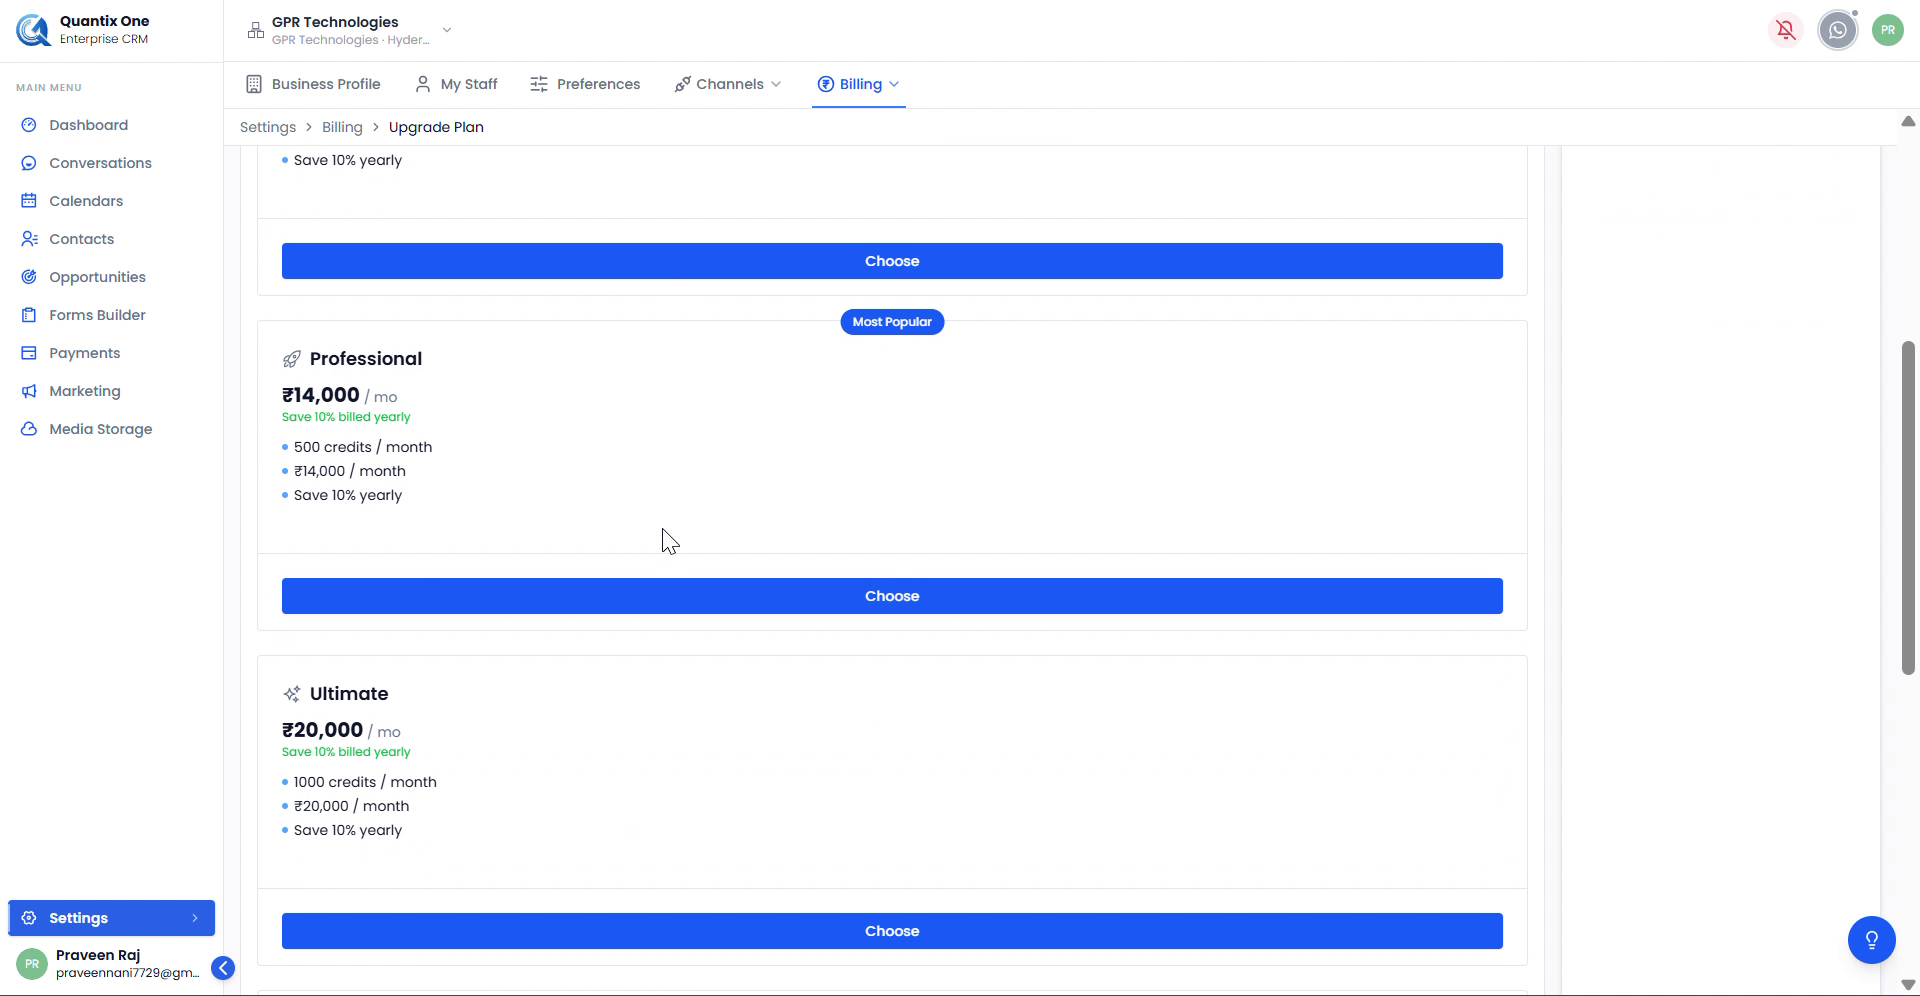
 Available paid plans — Professional (₹14,000/mo, 500 credits) and Ultimate (₹20,000/mo, 1,000 credits), both billed yearly with a 10% saving. Click Choose to upgrade.
Add-ons
Purchase optional add-on packages to extend your plan's capabilities.
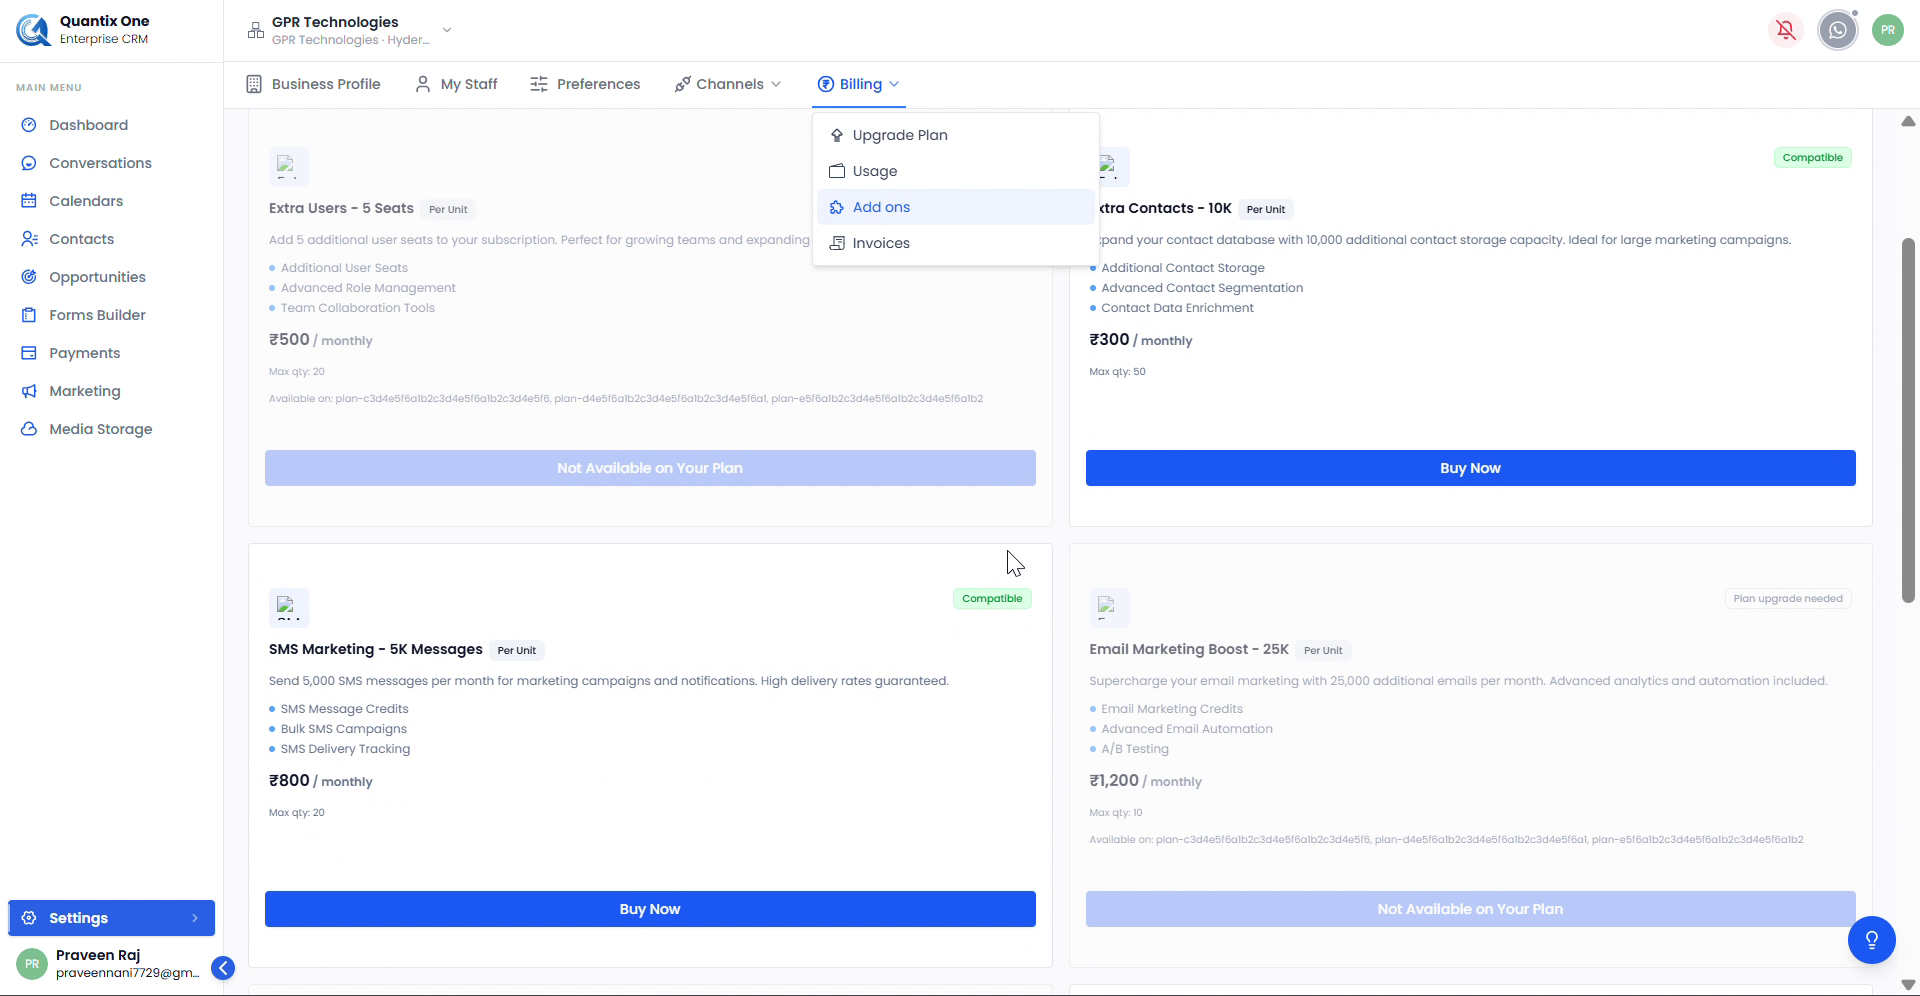
 The Add-ons page listing available packages with pricing and compatibility status. Click Buy Now on eligible add-ons.
| Add-on | Price | What's included |
|---|---|---|
| Extra Users – 5 Seats | ₹500/month | Additional user seats, advanced role management, team collaboration tools |
| Extra Contacts – 10K | ₹300/month | Additional contact storage, advanced segmentation, data enrichment |
| SMS Marketing – 5K Messages | ₹800/month | SMS credits, bulk campaigns, delivery tracking |
| Email Marketing Boost – 25K | ₹1,200/month | Email marketing credits, advanced automation, A/B testing |
Invoices
View and download all billing records for your account.
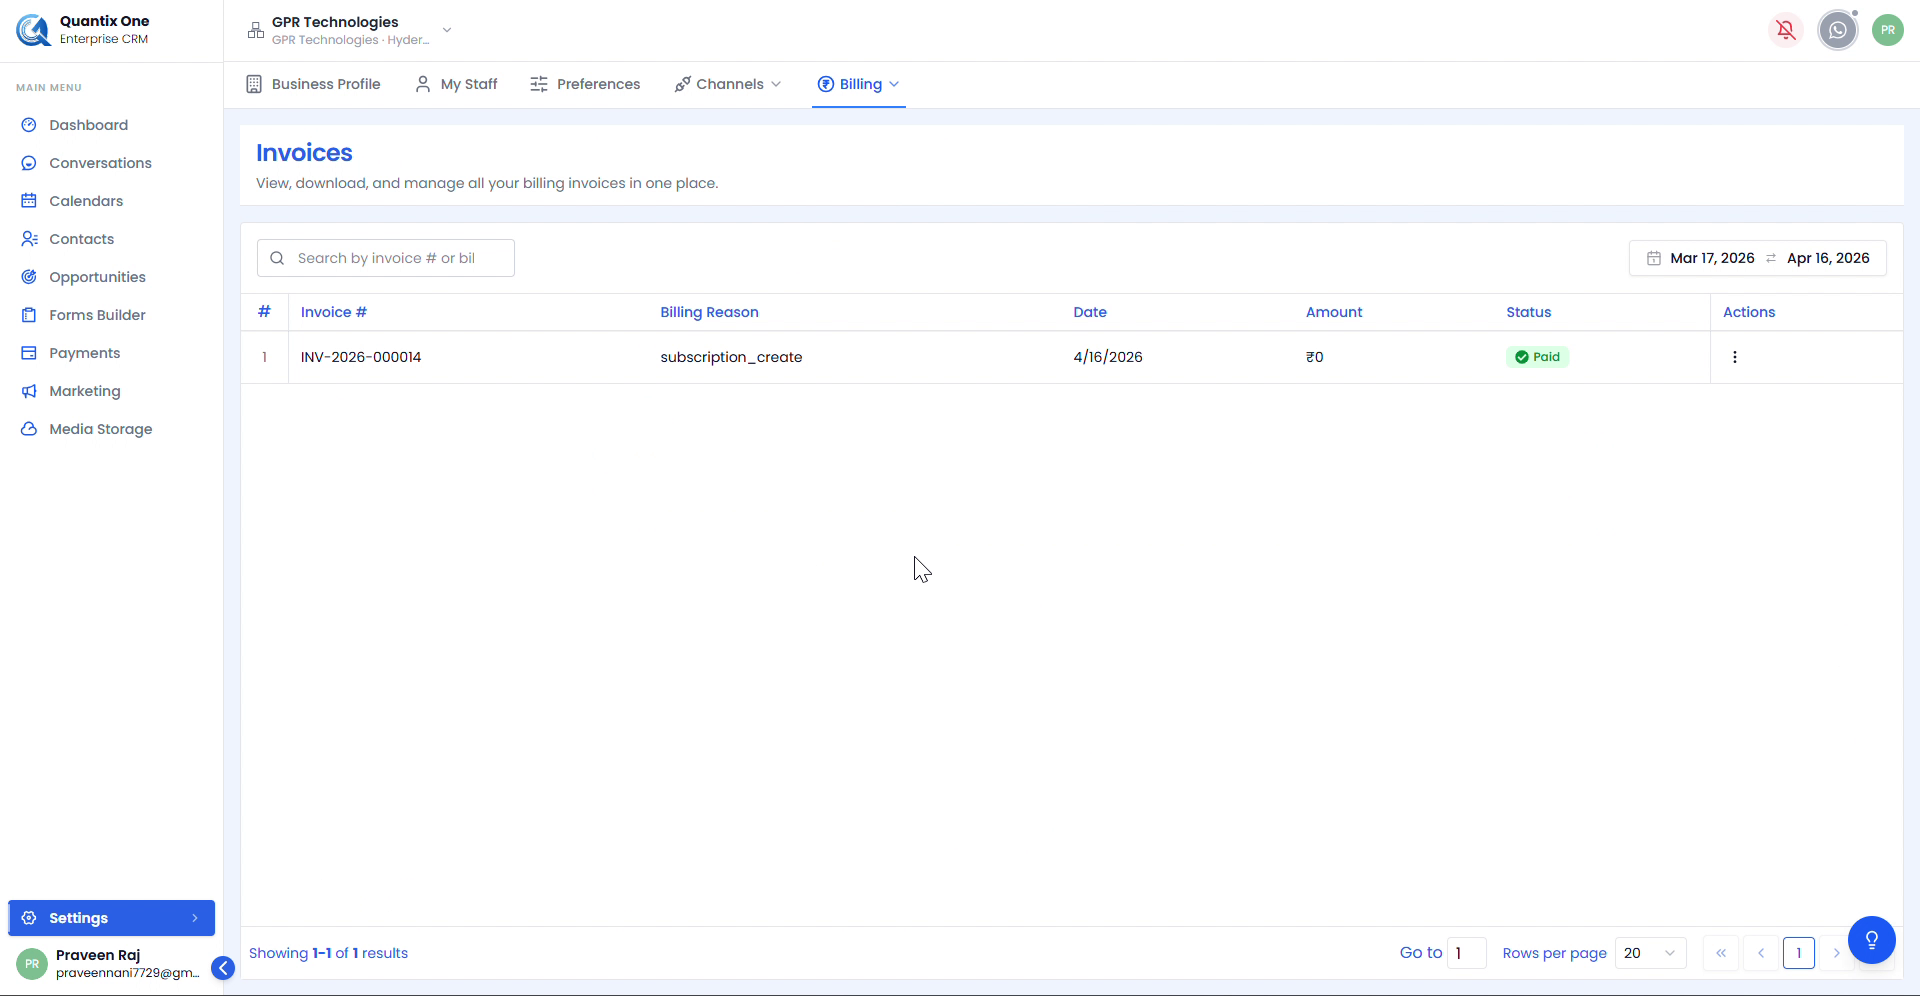 The Invoices page listing all billing records with Invoice #, Billing Reason, Date, Amount, and Status. Use the date range filter to narrow results. Download invoices from the action menu.
Video Walkthrough
Watch the complete Settings walkthrough below.