Emptying the Trash
When you delete a contact, company, or task in QuantixOne CRM, it is not permanently removed right away. Instead, it is moved to the Trash (also called the Recycle Bin), where it can be reviewed, restored, or permanently deleted.
Viewing Deleted Items
To access the Trash, click Trash or Deleted Items in the left sidebar under the Contacts section.
The Trash shows a list of deleted contacts, companies, and tasks, along with who deleted them and when.
You can filter the Trash view by item type using the tabs at the top:
- Contacts
- Companies
- Tasks
Restoring a Contact or Company
If you deleted something by mistake, you can restore it with a single click.
Select the item (or items) you want to restore by checking the checkbox next to each one. Then click the Restore button that appears in the action bar.
The restored item will reappear in your contacts or companies list as if it was never deleted.
Permanently Deleting Items
To permanently remove items from QuantixOne, select the items you want to delete in the Trash view and click Delete Permanently.
A confirmation prompt will appear before the deletion is carried out.
Note: Permanently deleted items cannot be recovered. Make sure you no longer need the data before proceeding.
Settings & Custom Fields
The Settings section lets you configure your contacts workspace, including creating custom fields that capture data specific to your business needs.
Accessing Settings
To open the Settings for the Contacts module, click the Settings icon (gear icon) in the sidebar or at the top of the contacts page.
What Are Custom Fields?
Custom Fields allow you to add extra data fields to your contacts, companies, or tasks beyond the built-in fields. For example, you might want to track a contact's Preferred Language, Lead Score, or Subscription Plan — fields that are specific to your business.
Custom fields you create will appear on the contact form and contact detail page for your entire location.
Creating a Custom Field
In Settings, navigate to the Custom Fields tab. Click + New Field to open the custom field creation form.
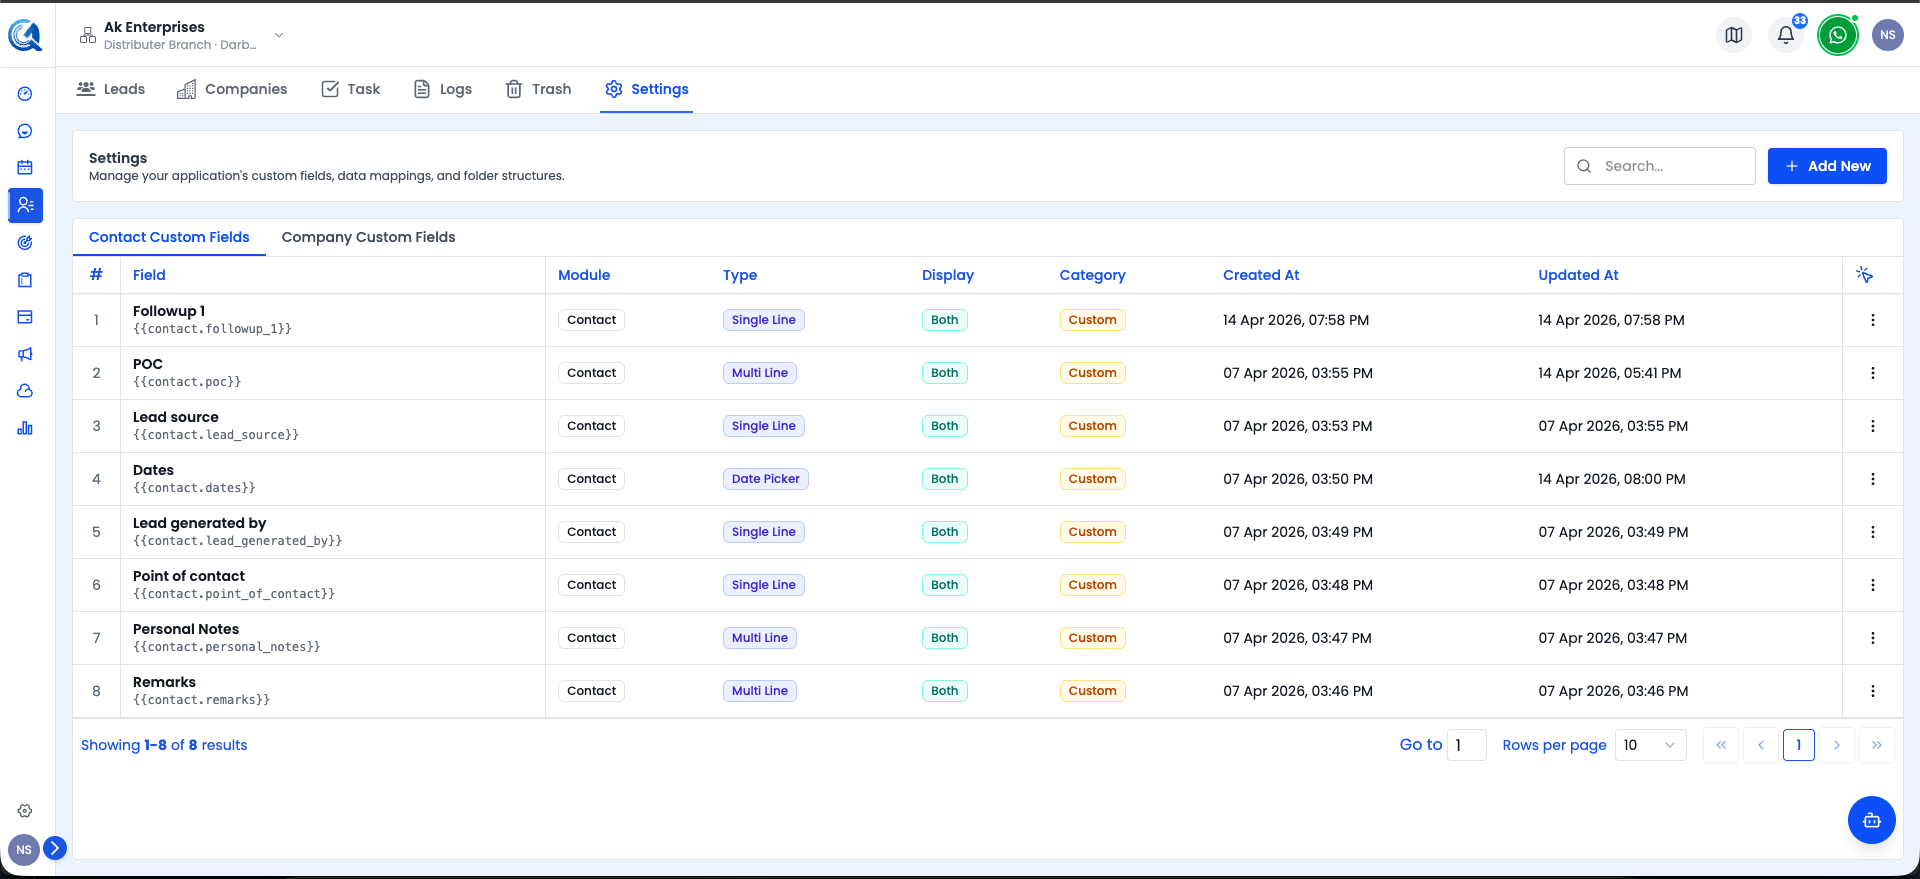 The Custom Fields tab shows all existing custom fields. Click + New Field to add one.
Fill in the field details:
- Field Name — The label that will appear on the contact form (e.g., "Lead Score").
- Field Type — The type of data this field holds (see below).
- Apply To — Choose whether this field applies to Contacts, Companies, or Tasks.
- Required — Toggle on if this field must be filled in when creating or editing a record.
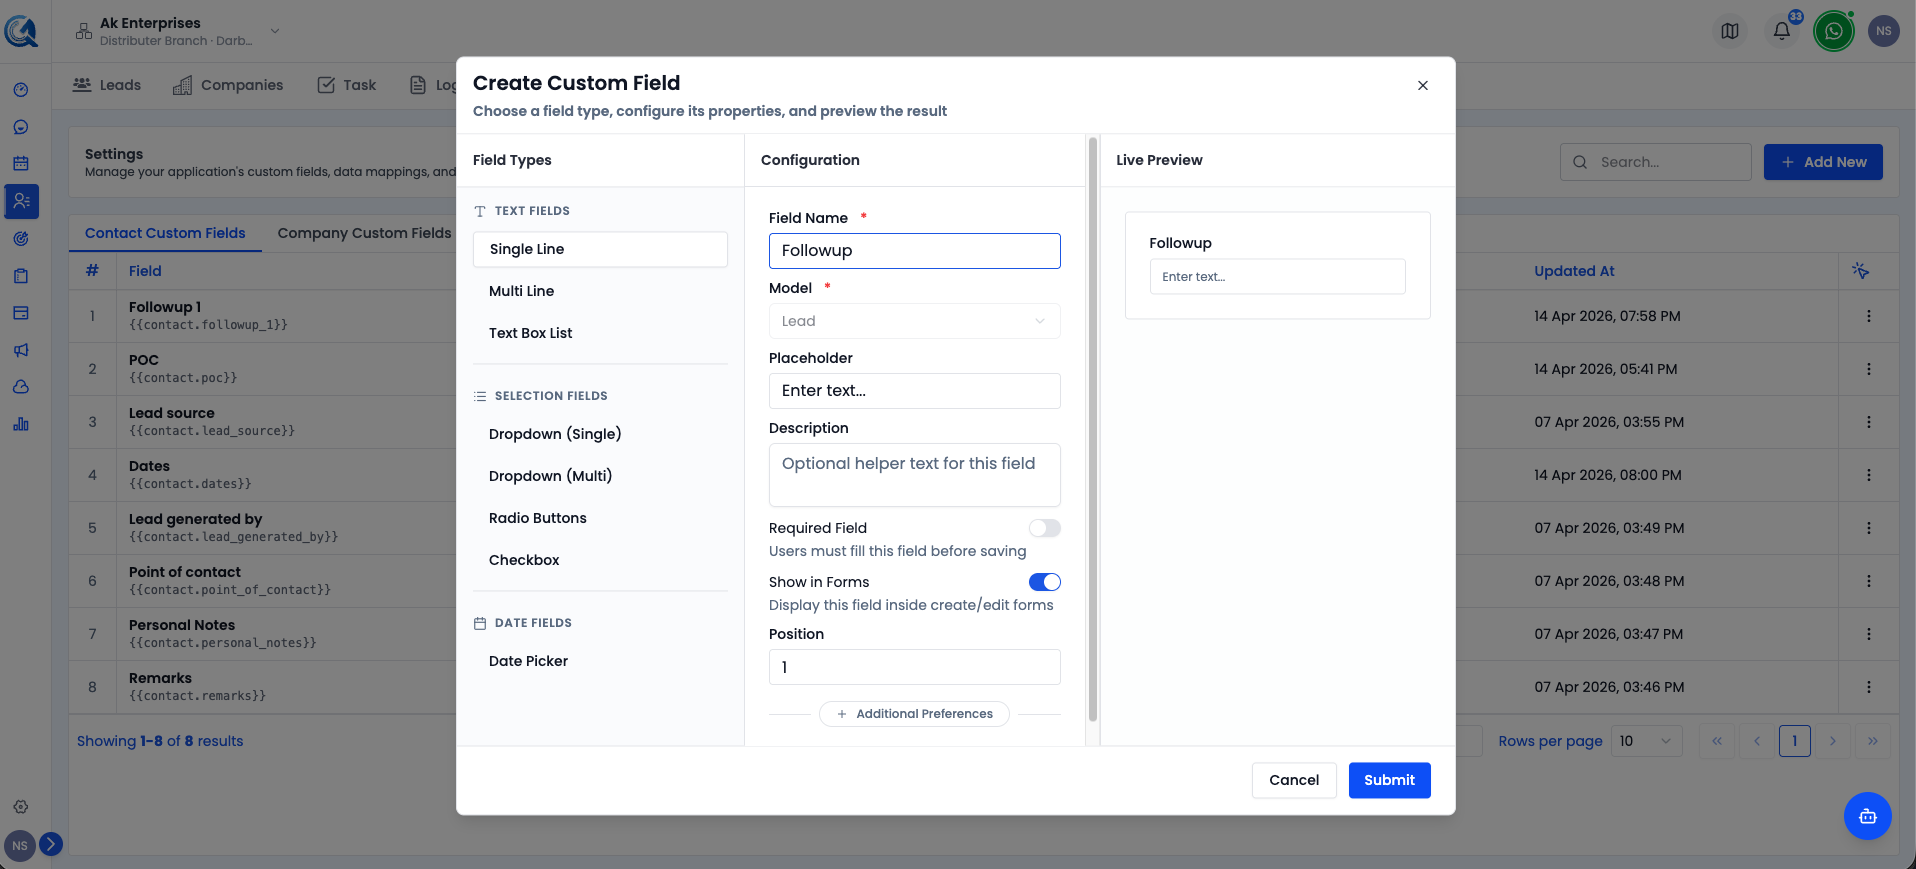 Fill in the field name, type, and where it applies.
Click Save to create the custom field. It will immediately appear on all contact (or company/task) forms in your location.
Custom Field Types
Choose the right field type for the kind of data you want to collect:
| Field Type | Description | Example |
|---|---|---|
| Text | Short text entry | Nickname, Job Title |
| Long Text | Multi-line text area | Notes, Bio |
| Number | Numeric value | Lead Score, Revenue |
| Email address with validation | Secondary Email | |
| Phone | Phone number | Office Line |
| Date | Date picker | Contract Date |
| Date & Time | Date and time picker | Meeting Scheduled At |
| Checkbox | True / False toggle | Has Signed NDA |
| Dropdown | Single selection from a list | Preferred Language |
| Multi-Select | Multiple selections from a list | Services Interested In |
| URL | Website link | LinkedIn Profile |
Managing Existing Custom Fields
To edit a custom field, click the Edit (pencil) icon next to the field in the Custom Fields list. Update the name or settings and click Save.
To delete a custom field, click the Delete (trash) icon next to it. Deleting a custom field will remove the field and its data from all records.
Note: Deleting a custom field permanently removes any data stored in that field across all contacts. This action cannot be undone.
Video Walkthrough
Watch the complete walkthrough below to see how to use the Trash and manage custom fields in QuantixOne CRM.
Note: Video walkthrough coming soon.