Campaigns
Campaigns let you send a message to a large group of contacts at once, using a template. Instead of messaging people one by one, you build a campaign, choose who should receive it, and send it out in bulk across WhatsApp or Email.
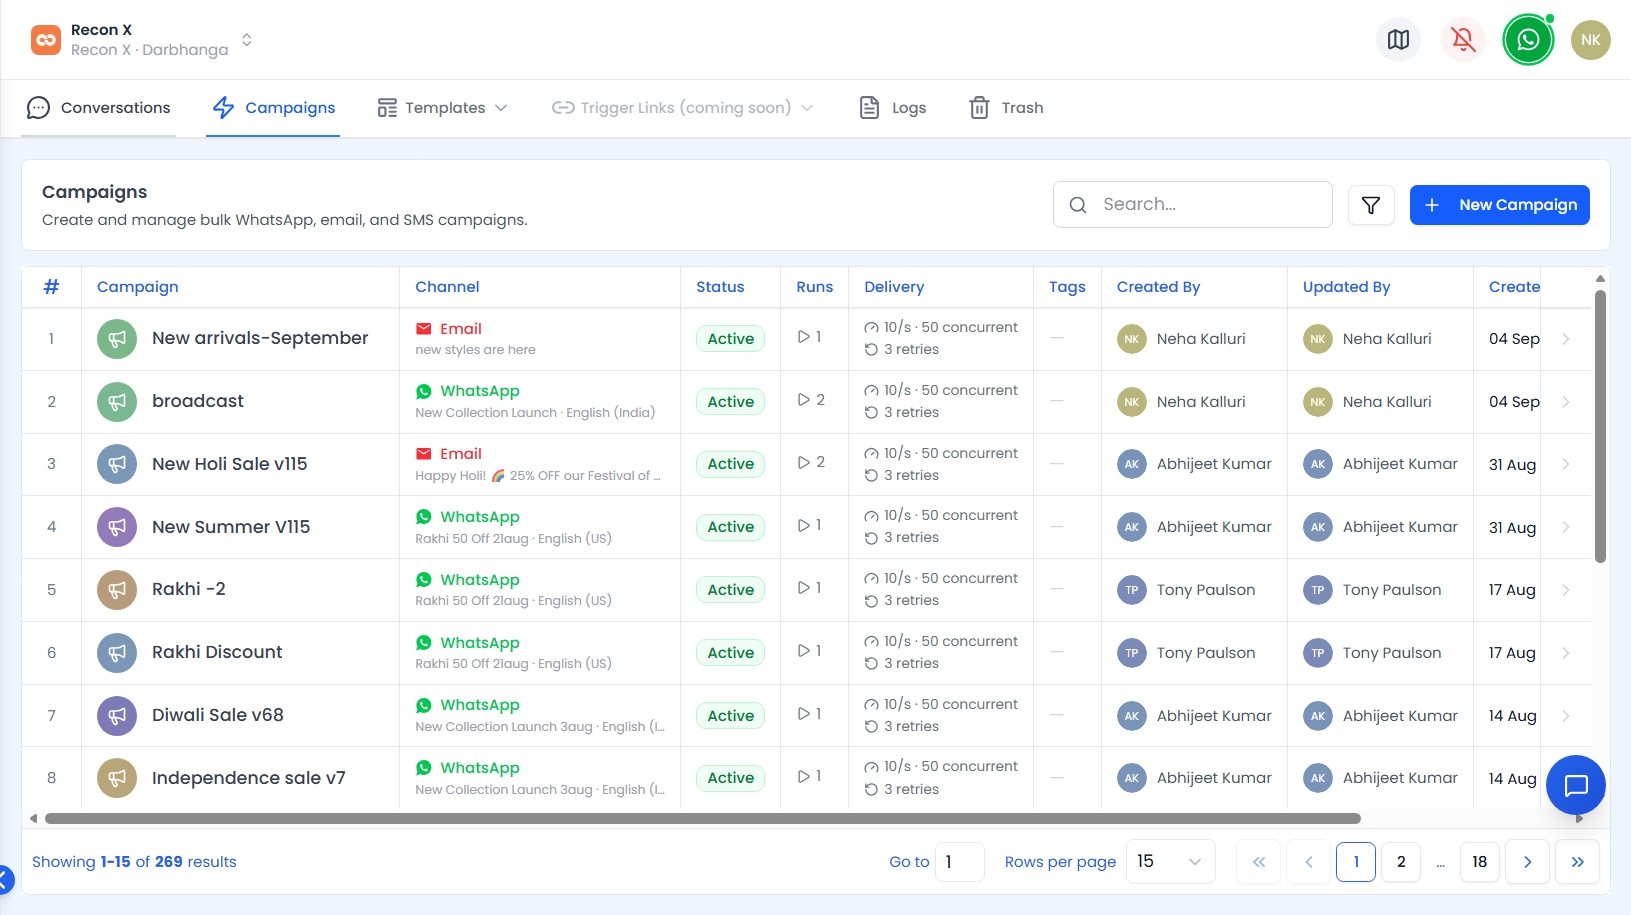 The Campaigns list — each row shows its channel, status, and delivery breakdown.
Creating a Campaign
Click Campaigns in the left sidebar under the Conversations section, then click + New Campaign.
Creating a campaign is a two-step process:
- Select Campaign Type — choose Broadcast Campaign (send to contacts you pick directly in QuantixOne) or CSV Broadcast (upload a CSV of recipients).
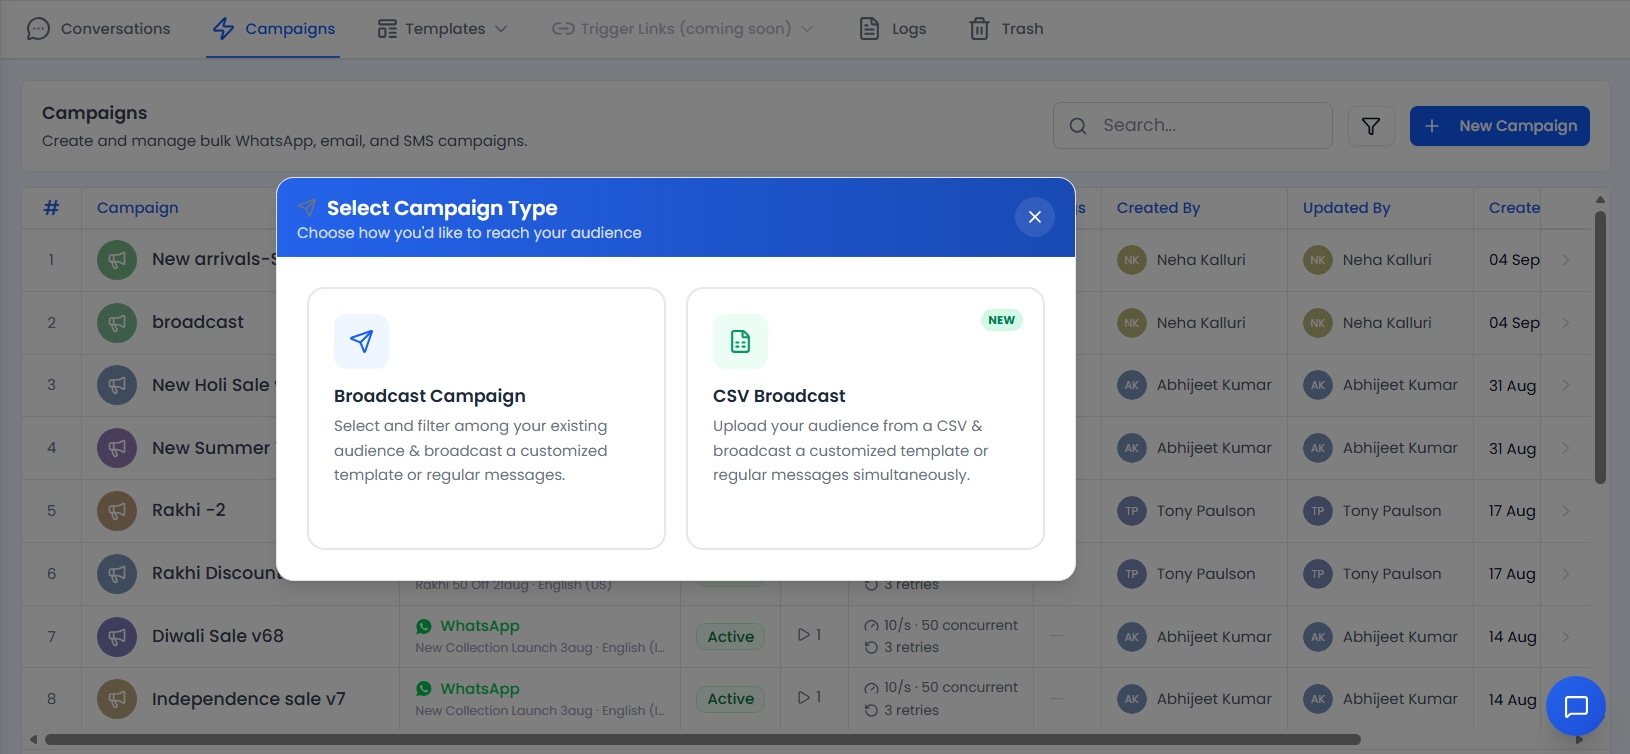 Choose Broadcast Campaign or CSV Broadcast to start a new campaign.
- Choose Channel — pick WhatsApp or Email for this campaign.
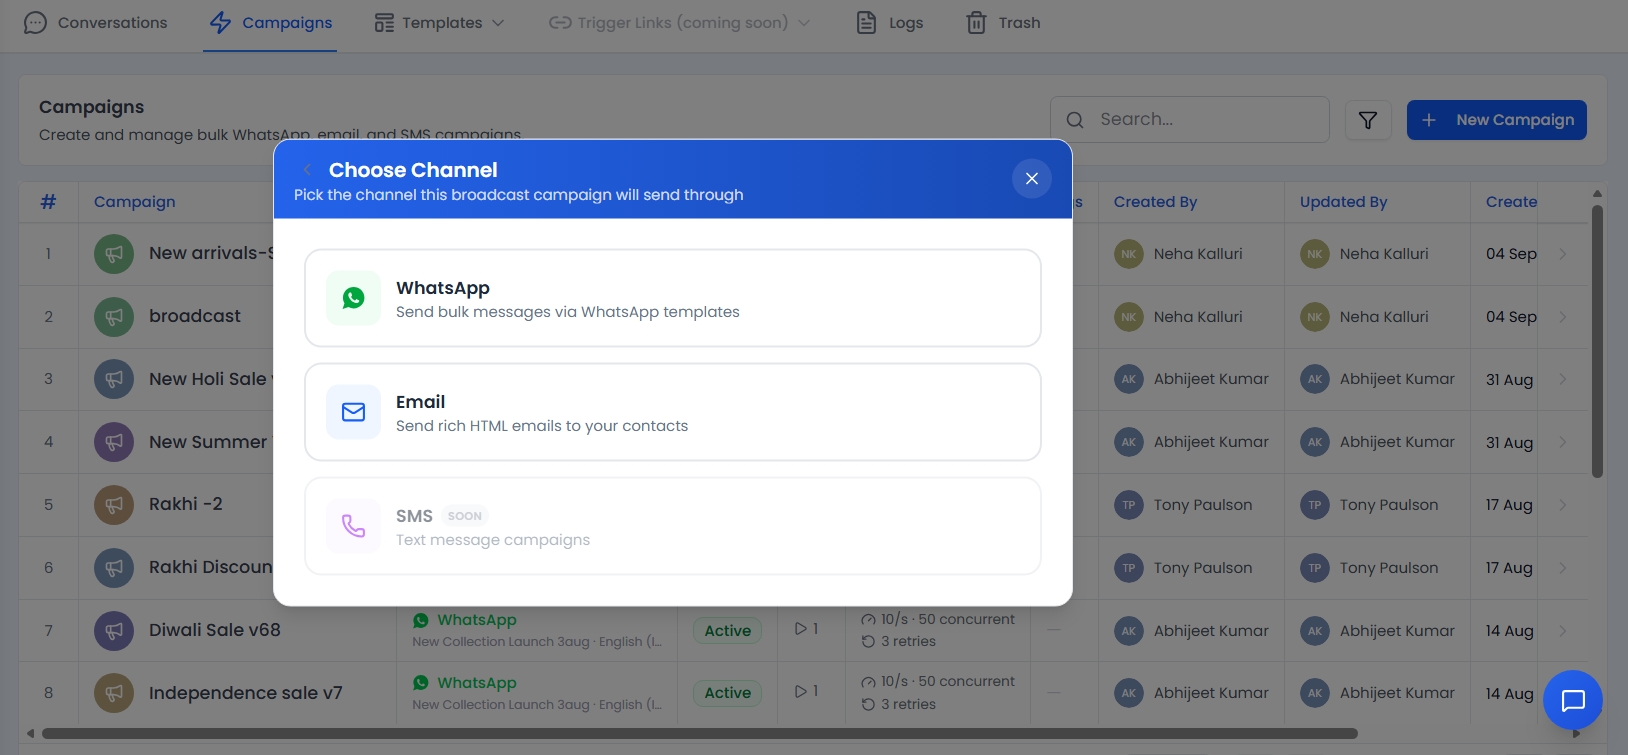 Pick the channel this campaign will send through.
Note: A campaign currently sends through one channel at a time — there's no combined WhatsApp + Email campaign. SMS campaigns are marked "Soon" and aren't available yet.
Then fill in the campaign details:
- Campaign Name — A unique name to identify the campaign. Campaign names must be unique — if you reuse an existing name, you'll be asked to pick a different one before you can save.
- Template — Select the message template to send. For WhatsApp, only approved templates can be used.
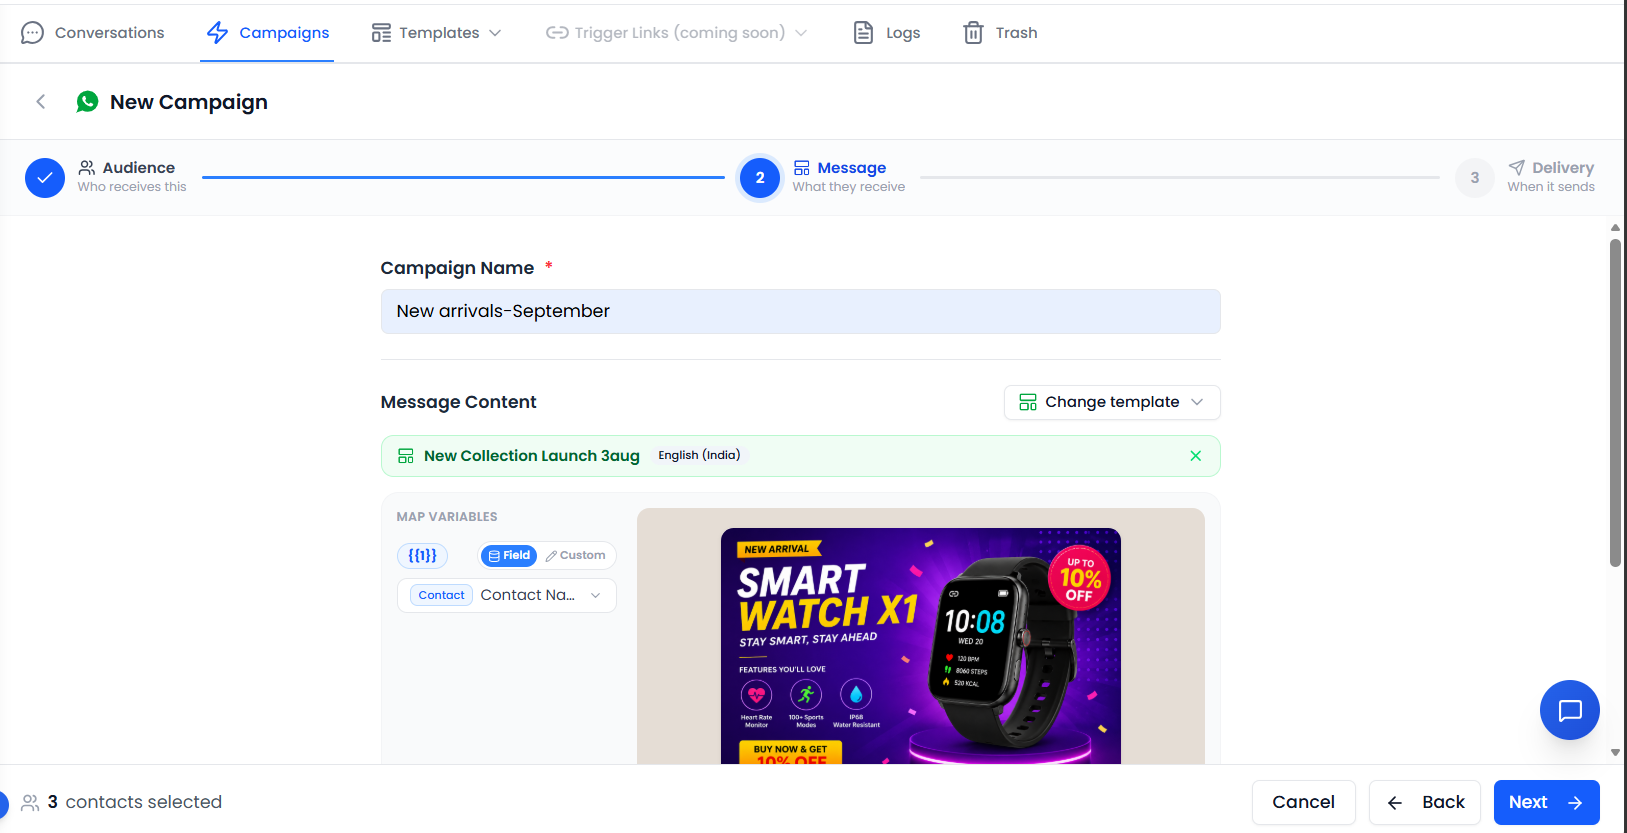 Name the campaign, pick a template, and map any variables it uses.
Note: WhatsApp campaigns can only use approved WhatsApp templates. See Message Templates for how to create and submit one.
Choosing Recipients
For a Broadcast Campaign, choose your audience using one of two tabs:
- Contacts — Pick individual contacts directly from your contact list.
- Filter by Tags — Filter contacts by the tags applied to them (e.g. send only to contacts tagged "VIP" or "Newsletter"). You can select one or more tags — contacts matching any of the selected tags will be included.
For a CSV Broadcast, you'll instead upload a CSV file of recipients as part of the import flow.
Scheduling and Sending
Once your audience and template are set:
- Review the recipient count and message preview.
- Choose to Send Now or Schedule for Later.
- Click Launch Campaign.
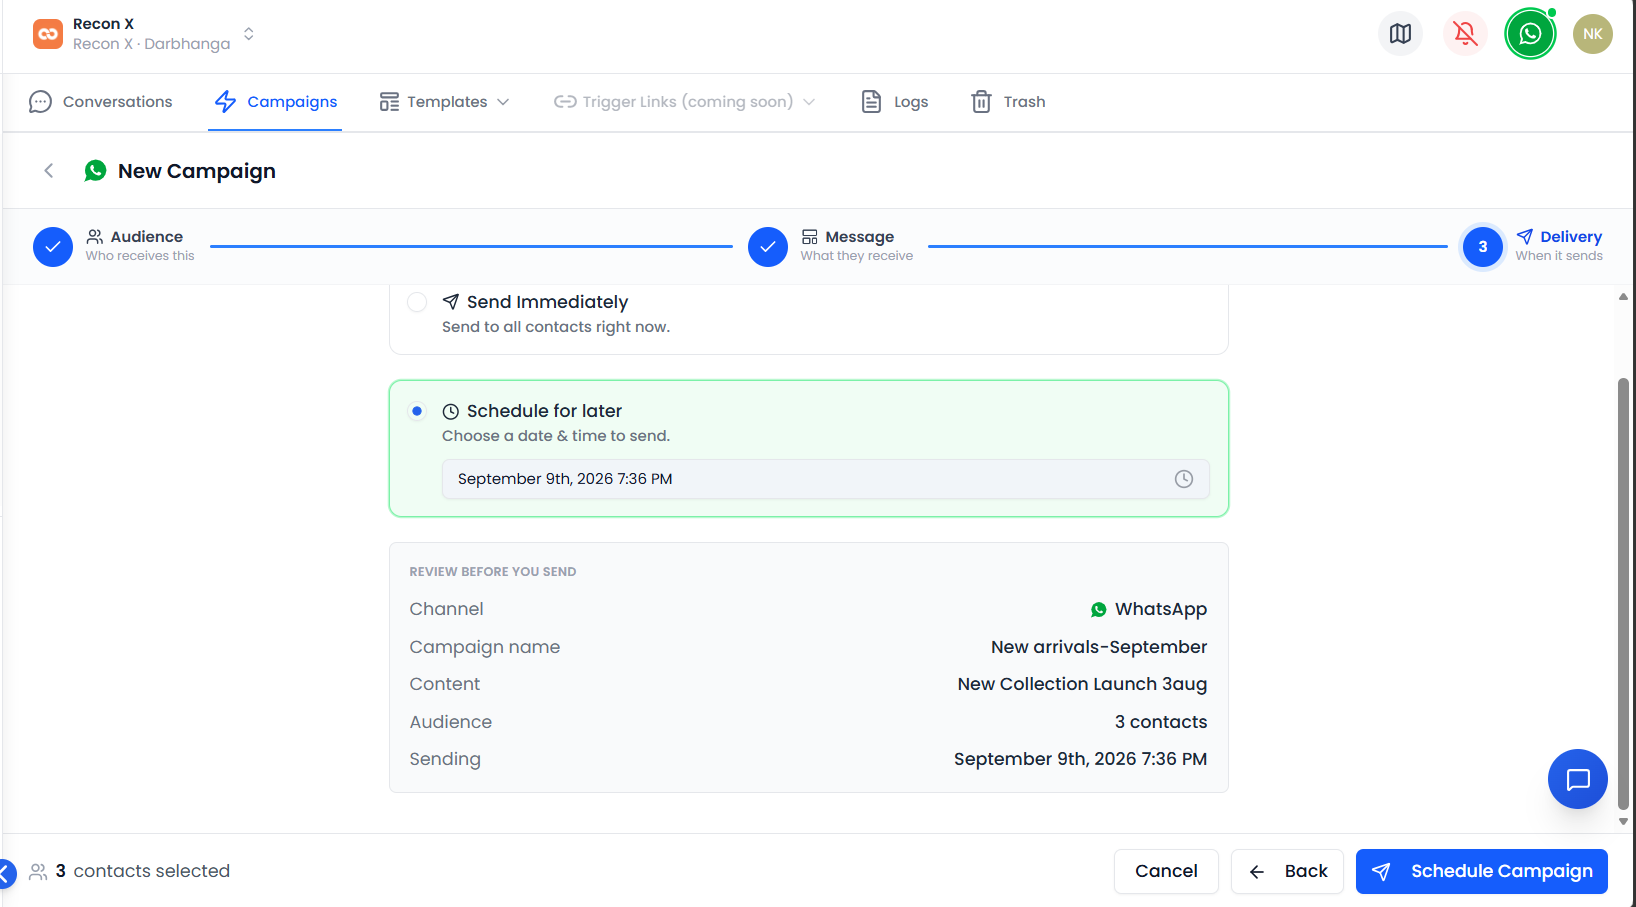 Review the recipient count and delivery time before sending or scheduling.
Note: Sending a WhatsApp campaign uses WhatsApp credits — one credit per recipient message. Make sure your account has enough credits before launching. See Message Tracking & Analytics for more on credits.
Monitoring a Campaign
After launch, open the campaign from the Campaigns list to see its run history and delivery breakdown in one combined table. A run can be in any of the following states:
| Status | Meaning |
|---|---|
| Draft | Campaign is still being set up, not yet ready to send |
| Ready | Fully configured and ready to launch |
| Scheduled | Campaign will send at the chosen time |
| Running | Messages are currently going out |
| Paused | Sending has been paused mid-run |
| Completed | All messages have been sent |
| Cancelled | The run was cancelled before completing |
While a run is Scheduled or Running, the status and delivery counts refresh automatically every few seconds — no need to manually reload the page.
The campaign detail view also shows delivered, read, and failed counts per recipient.
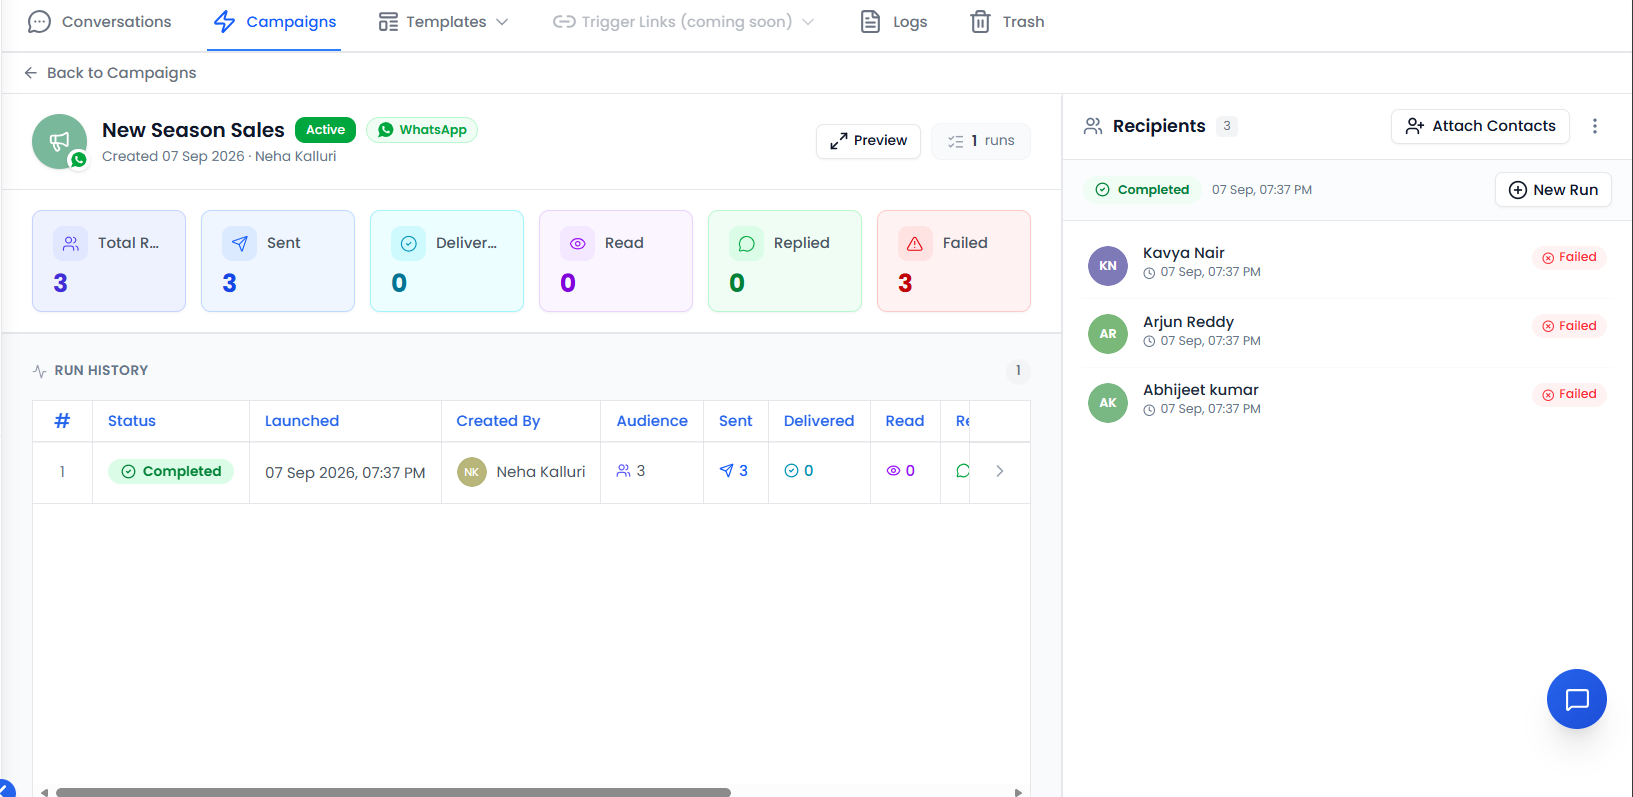 Run history and per-recipient delivery status for a launched campaign.
Best Practices
- Use Clear, Unique Names — Makes campaigns easy to find and compare later.
- Segment Your Audience — Use tags to keep messages relevant to each group.
- Check Credit Balance — Confirm you have enough credits before launching a large WhatsApp campaign.
- Preview Before Sending — Always review the message preview to catch template or variable issues.
Troubleshooting
Can't save a campaign?
- Check that the campaign name isn't already in use — names must be unique.
Campaign failed to launch?
- Check your WhatsApp credit balance.
- Confirm the selected template is still approved.
Video Walkthrough
Watch a complete walkthrough of setting up and running a WhatsApp campaign.