DNS Records
To use a custom domain for sending email through QuantixOne, you must add specific DNS records to your domain provider. These records authenticate your domain, improve deliverability, and enable inbound email receipt.
Why DNS Records Are Required
| Record Type | Purpose |
|---|---|
| DKIM | Cryptographically signs outgoing emails so receiving servers can verify they came from you |
| DMARC | Tells receiving servers what to do if DKIM or SPF checks fail |
| MX | Routes inbound emails to QuantixOne's mail servers for receipt processing |
| CNAME / TXT | Domain ownership verification |
Finding Your Required Records
- Go to Settings → Channels → Email → Configure.
- Click on your registered domain (or register one if you haven't yet).
- The DNS Records panel displays all records you need to add.
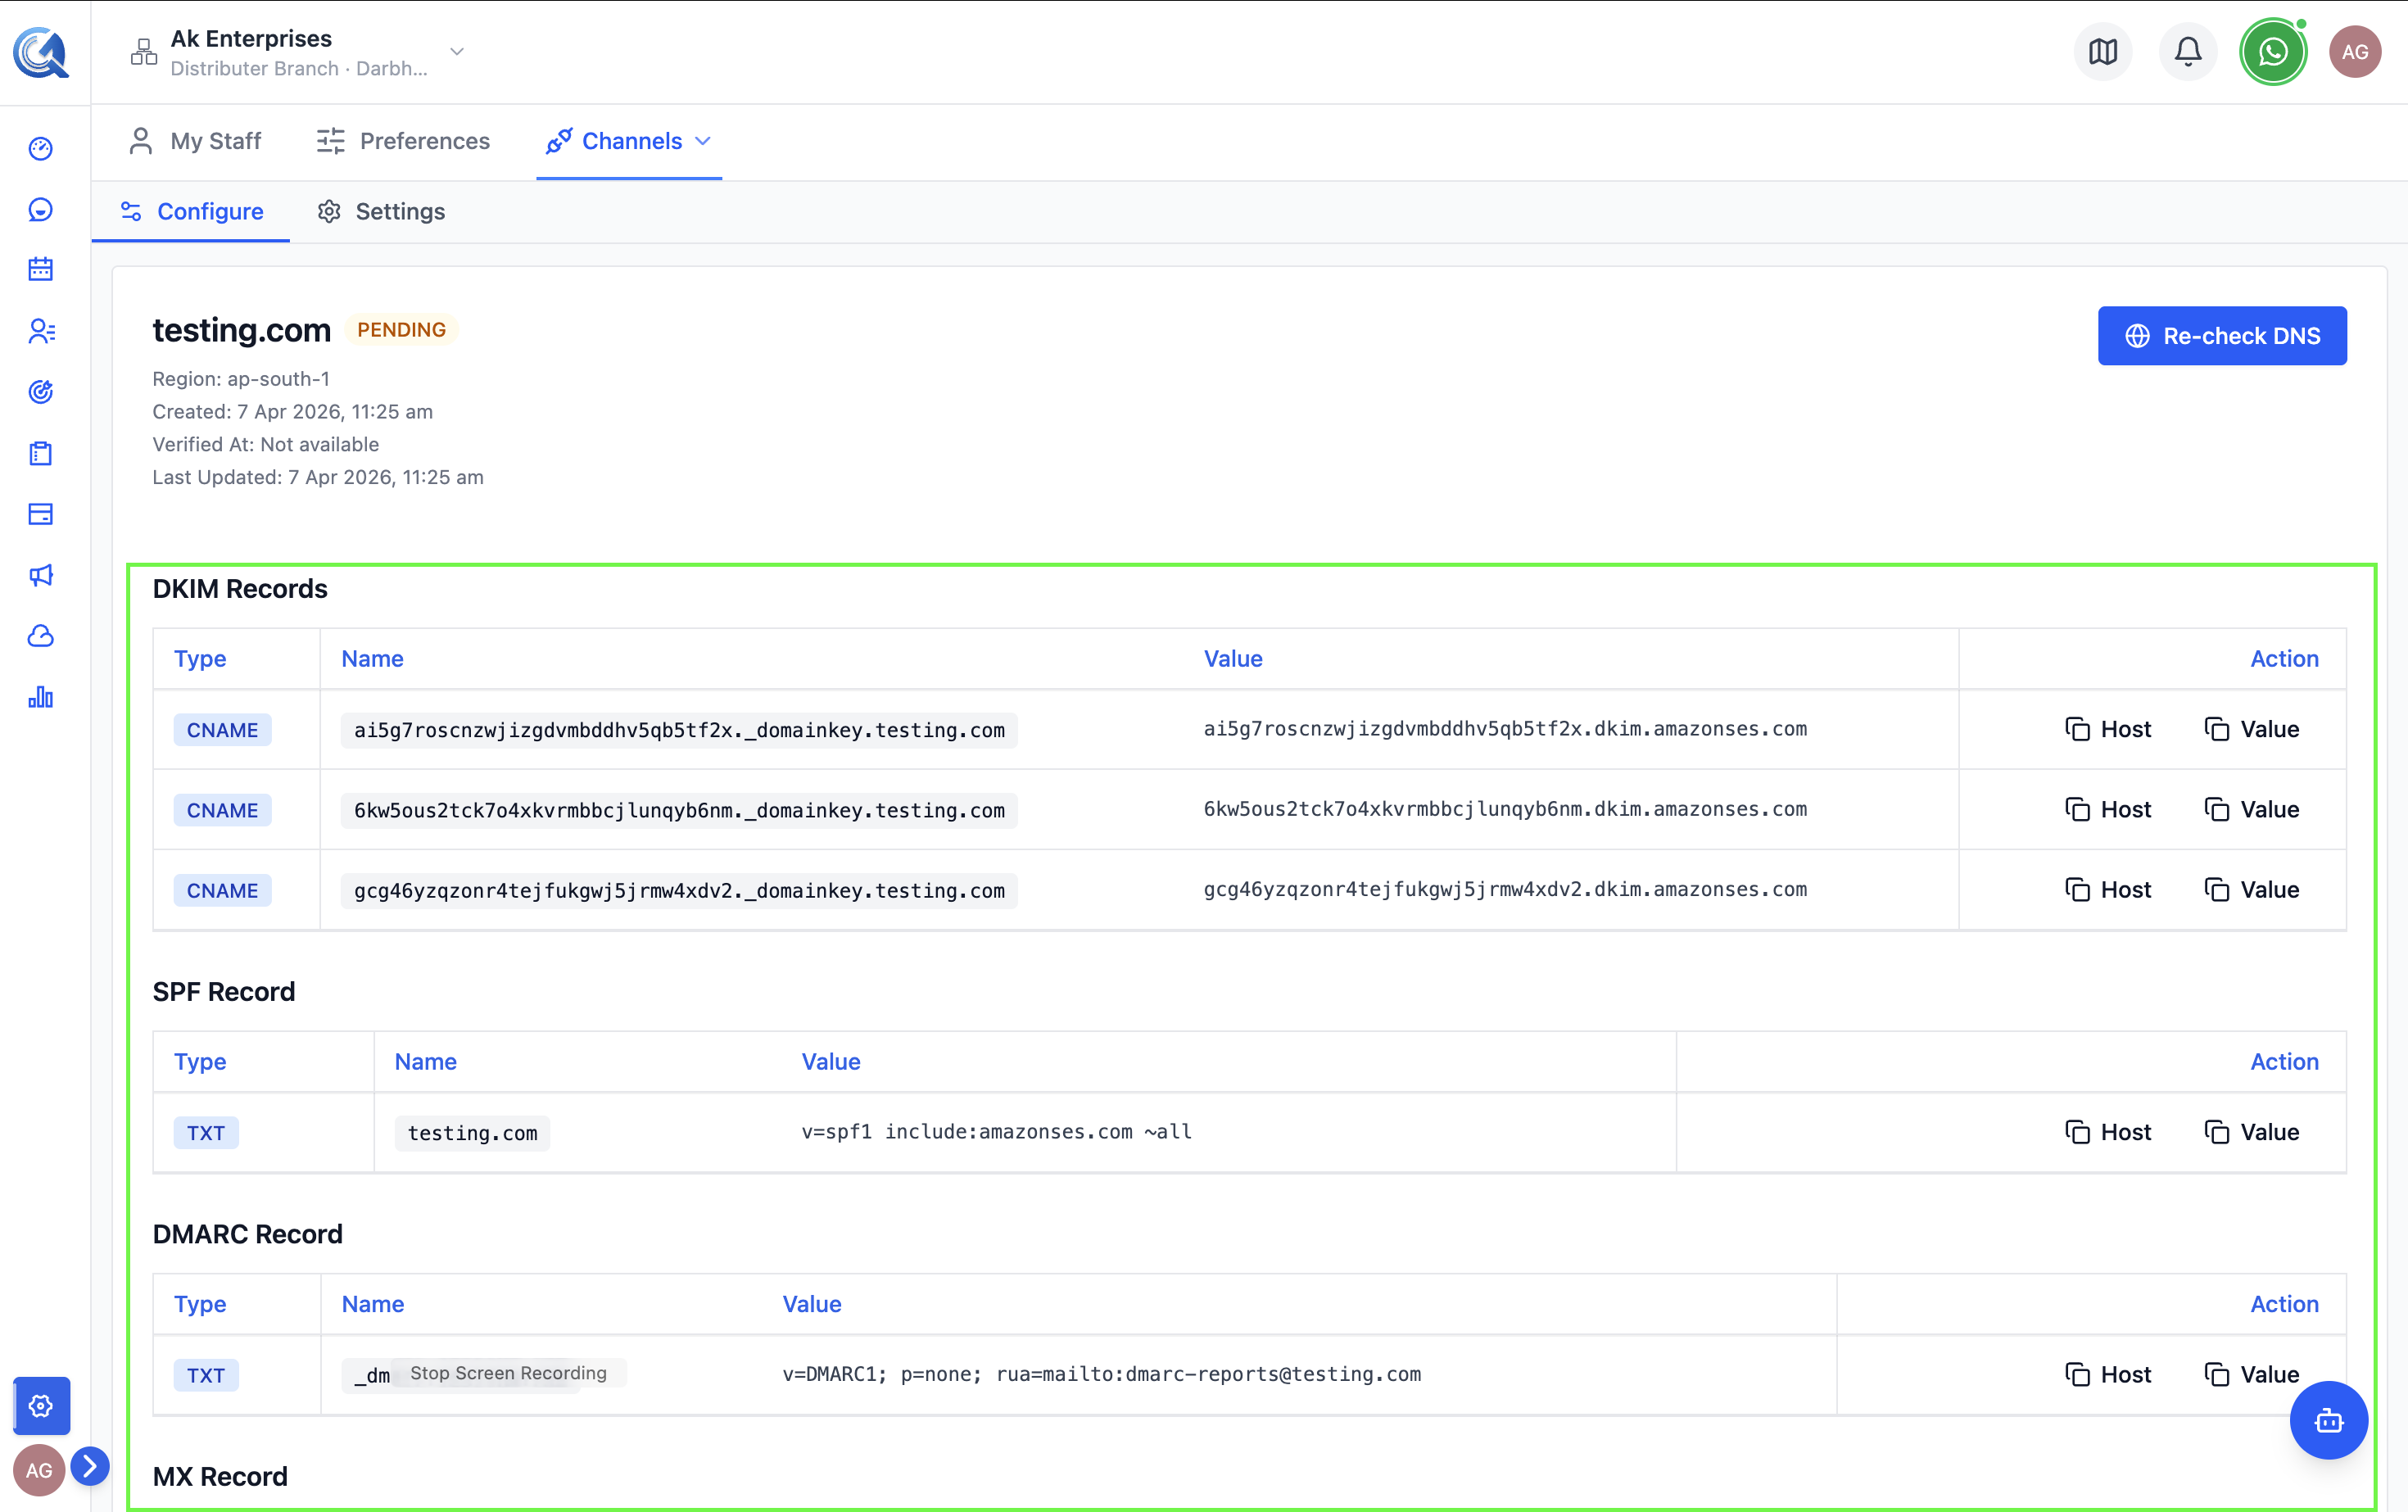 All required DNS records are listed after domain registration.
Record Details
Each record row shows:
| Column | Description |
|---|---|
| Type | Record type (TXT, CNAME, MX) |
| Name / Host | The subdomain or @ for the root domain |
| Value | The exact content to paste into your DNS provider |
| TTL | Recommended time-to-live (usually 300 or 3600) |
| Status | Whether the record has been detected as propagated |
Click the Copy icon next to any value to copy it to your clipboard.
Adding Records in Common DNS Providers
Cloudflare
All QuantixOne DNS records must be set to DNS only (grey cloud icon) in Cloudflare. Enabling the orange proxy cloud will intercept mail traffic and break DKIM signing and inbound email routing.
- Log in to Cloudflare and select your domain.
- Go to DNS → Records.
- Click Add Record.
- Set the Type, Name, and Content fields from QuantixOne.
- Set Proxy status to DNS only (grey cloud) for all QuantixOne records.
- Click Save.
AWS Route 53
- Open the Hosted Zone for your domain.
- Click Create Record.
- Choose the record type and paste the Name and Value.
- Set TTL to 300 and click Create Records.
GoDaddy
- Go to My Products → DNS → Manage Zones.
- Select your domain.
- Click Add and enter the Type, Name, and Value.
Namecheap
- Go to Domain List → Manage → Advanced DNS.
- Click Add New Record.
- Set the Type, Host, and Value fields.
Verifying Records
After adding all records:
- Return to Settings → Channels → Email → Configure.
- Click Verify next to your domain.
DNS propagation can take up to 48 hours. The status column updates to Verified once all records are detected.
Troubleshooting
Run a free lookup at mxtoolbox.com/SuperTool.aspx to check DKIM, SPF, MX, and DMARC records from outside your network. This is faster than waiting for the QuantixOne verify button to reflect changes.
If your DNS provider prompts for a Priority value when adding the MX record, enter 10.
Records not propagating: Use a DNS lookup tool (e.g., dig or MXToolbox) to check if the records are visible from outside your network.
Incorrect CNAME: Make sure you did not include a trailing period if your DNS provider adds one automatically — the values should be pasted exactly as shown.
MX priority: If prompted for a priority value when adding the MX record, use 10.