Custom Fields
Custom Fields let you add extra data fields to your deals beyond the built-in ones. Every business has unique information it needs to track — such as "Decision Date", "Budget Approved", "Contract Length", or "Procurement Contact". Custom fields let you capture exactly what your sales process needs.
Custom fields you create appear on every deal form and deal detail page for your location.
Navigating to Custom Fields
Click the Settings icon (gear icon) on the Opportunities page and select the Custom Fields tab.
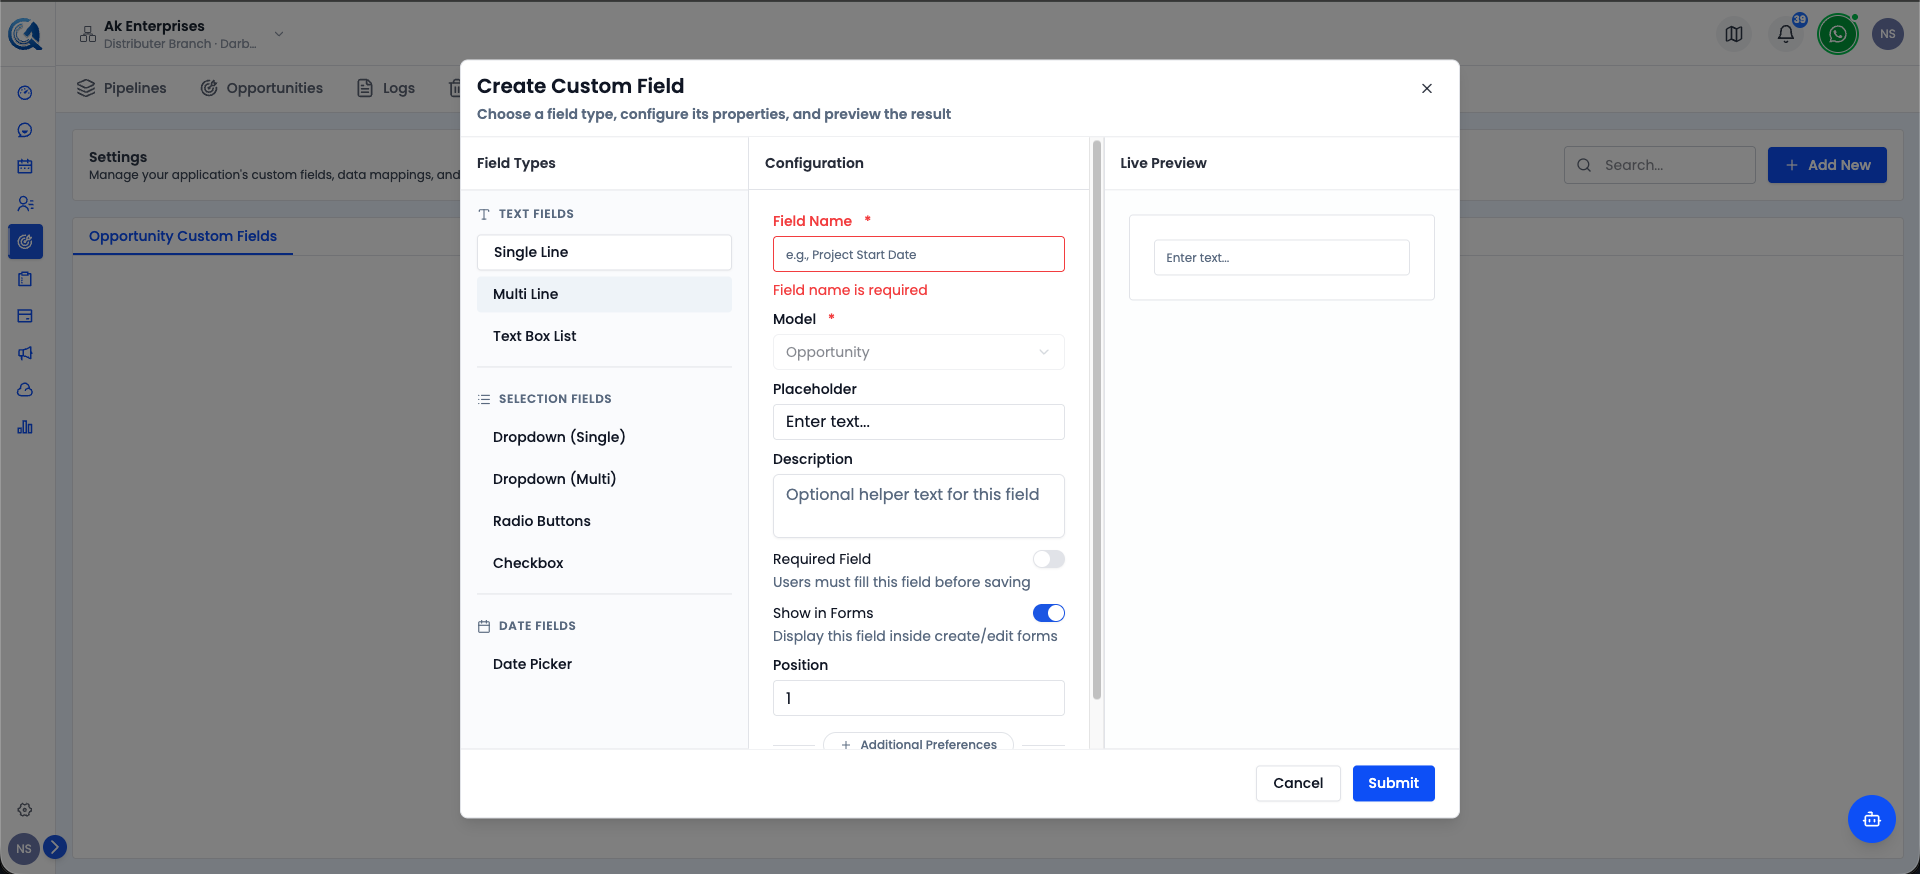
Creating a Custom Field
Click + New Field to open the custom field creation form.
Fill in the field details:
Field Name
Enter the label that will appear on the deal form (e.g., "Decision Date", "Budget Range", "Procurement Contact").
Field Type
Choose the type of data this field will hold:
| Field Type | Description | Example |
|---|---|---|
| Text | Short text entry | Procurement Contact Name |
| Long Text | Multi-line text area | Detailed Notes |
| Number | Numeric value | Headcount, Units |
| Currency | Monetary amount | Annual Budget |
| Percentage | A percentage value | Discount Offered |
| Date | Date picker | Decision Date, Contract Expiry |
| Checkbox | True / False toggle | Budget Approved, NDA Signed |
| Dropdown | Single selection from a list | Deal Tier (Bronze / Silver / Gold) |
| Multi-Select | Multiple selections from a list | Competitors Considered |
| URL | Website link | Prospect Website |
 Enter the field name and select the appropriate data type.
Required
Toggle Required on if this field must be filled in every time a deal is created or updated.
Dropdown Options (for Dropdown and Multi-Select fields only)
If you chose Dropdown or Multi-Select, a section will appear to define the available options. Click + Add Option to add each choice.
Click Save to create the custom field.
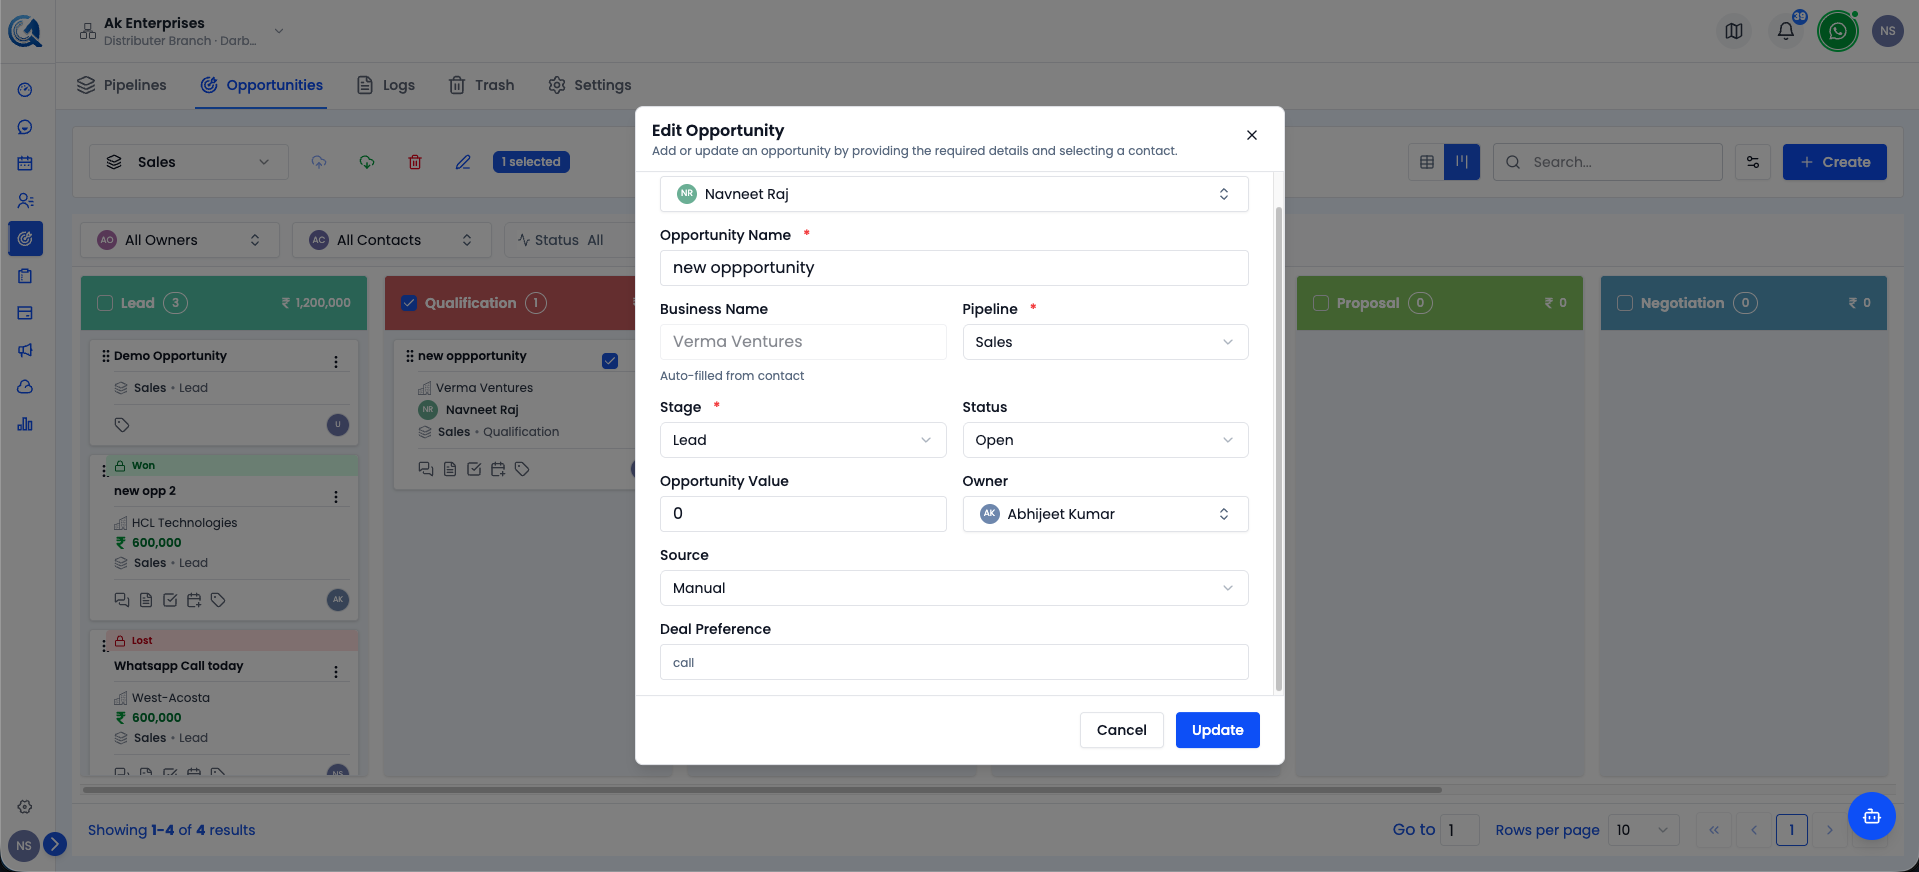
Viewing Custom Fields on a Deal
Once created, the custom field appears on the deal creation form and on every deal's detail page under the Custom Fields section.
To fill in a custom field, open a deal, click Edit, enter the value in the custom field, and click Save.
Editing a Custom Field
To update a custom field's name or settings, go to Settings → Custom Fields, click the Edit icon next to the field, make your changes, and click Save.
 Edit your custom fields.
Note: Changing the field type of an existing custom field may affect existing data stored in that field. Check your existing deal records after making type changes.
Deleting a Custom Field
To delete a custom field, click the Delete icon next to it in the Custom Fields settings and confirm.
Note: Deleting a custom field permanently removes it and all data stored in it from every deal in your location. This cannot be undone. Export your deals first if you need to preserve the data.
Video Walkthrough
Watch the complete walkthrough below to see how to create and use custom fields in QuantixOne CRM.