Collections
Collections let you organise your products into named groups — for example by category, service tier, season, or any grouping that fits your business. A product can belong to one or more collections simultaneously. There are two collection types: Manual (you hand-pick the products) and Smart (products are matched automatically by conditions you define).
Navigating to Collections
From the main navigation, click Payments → Products → Collections tab.
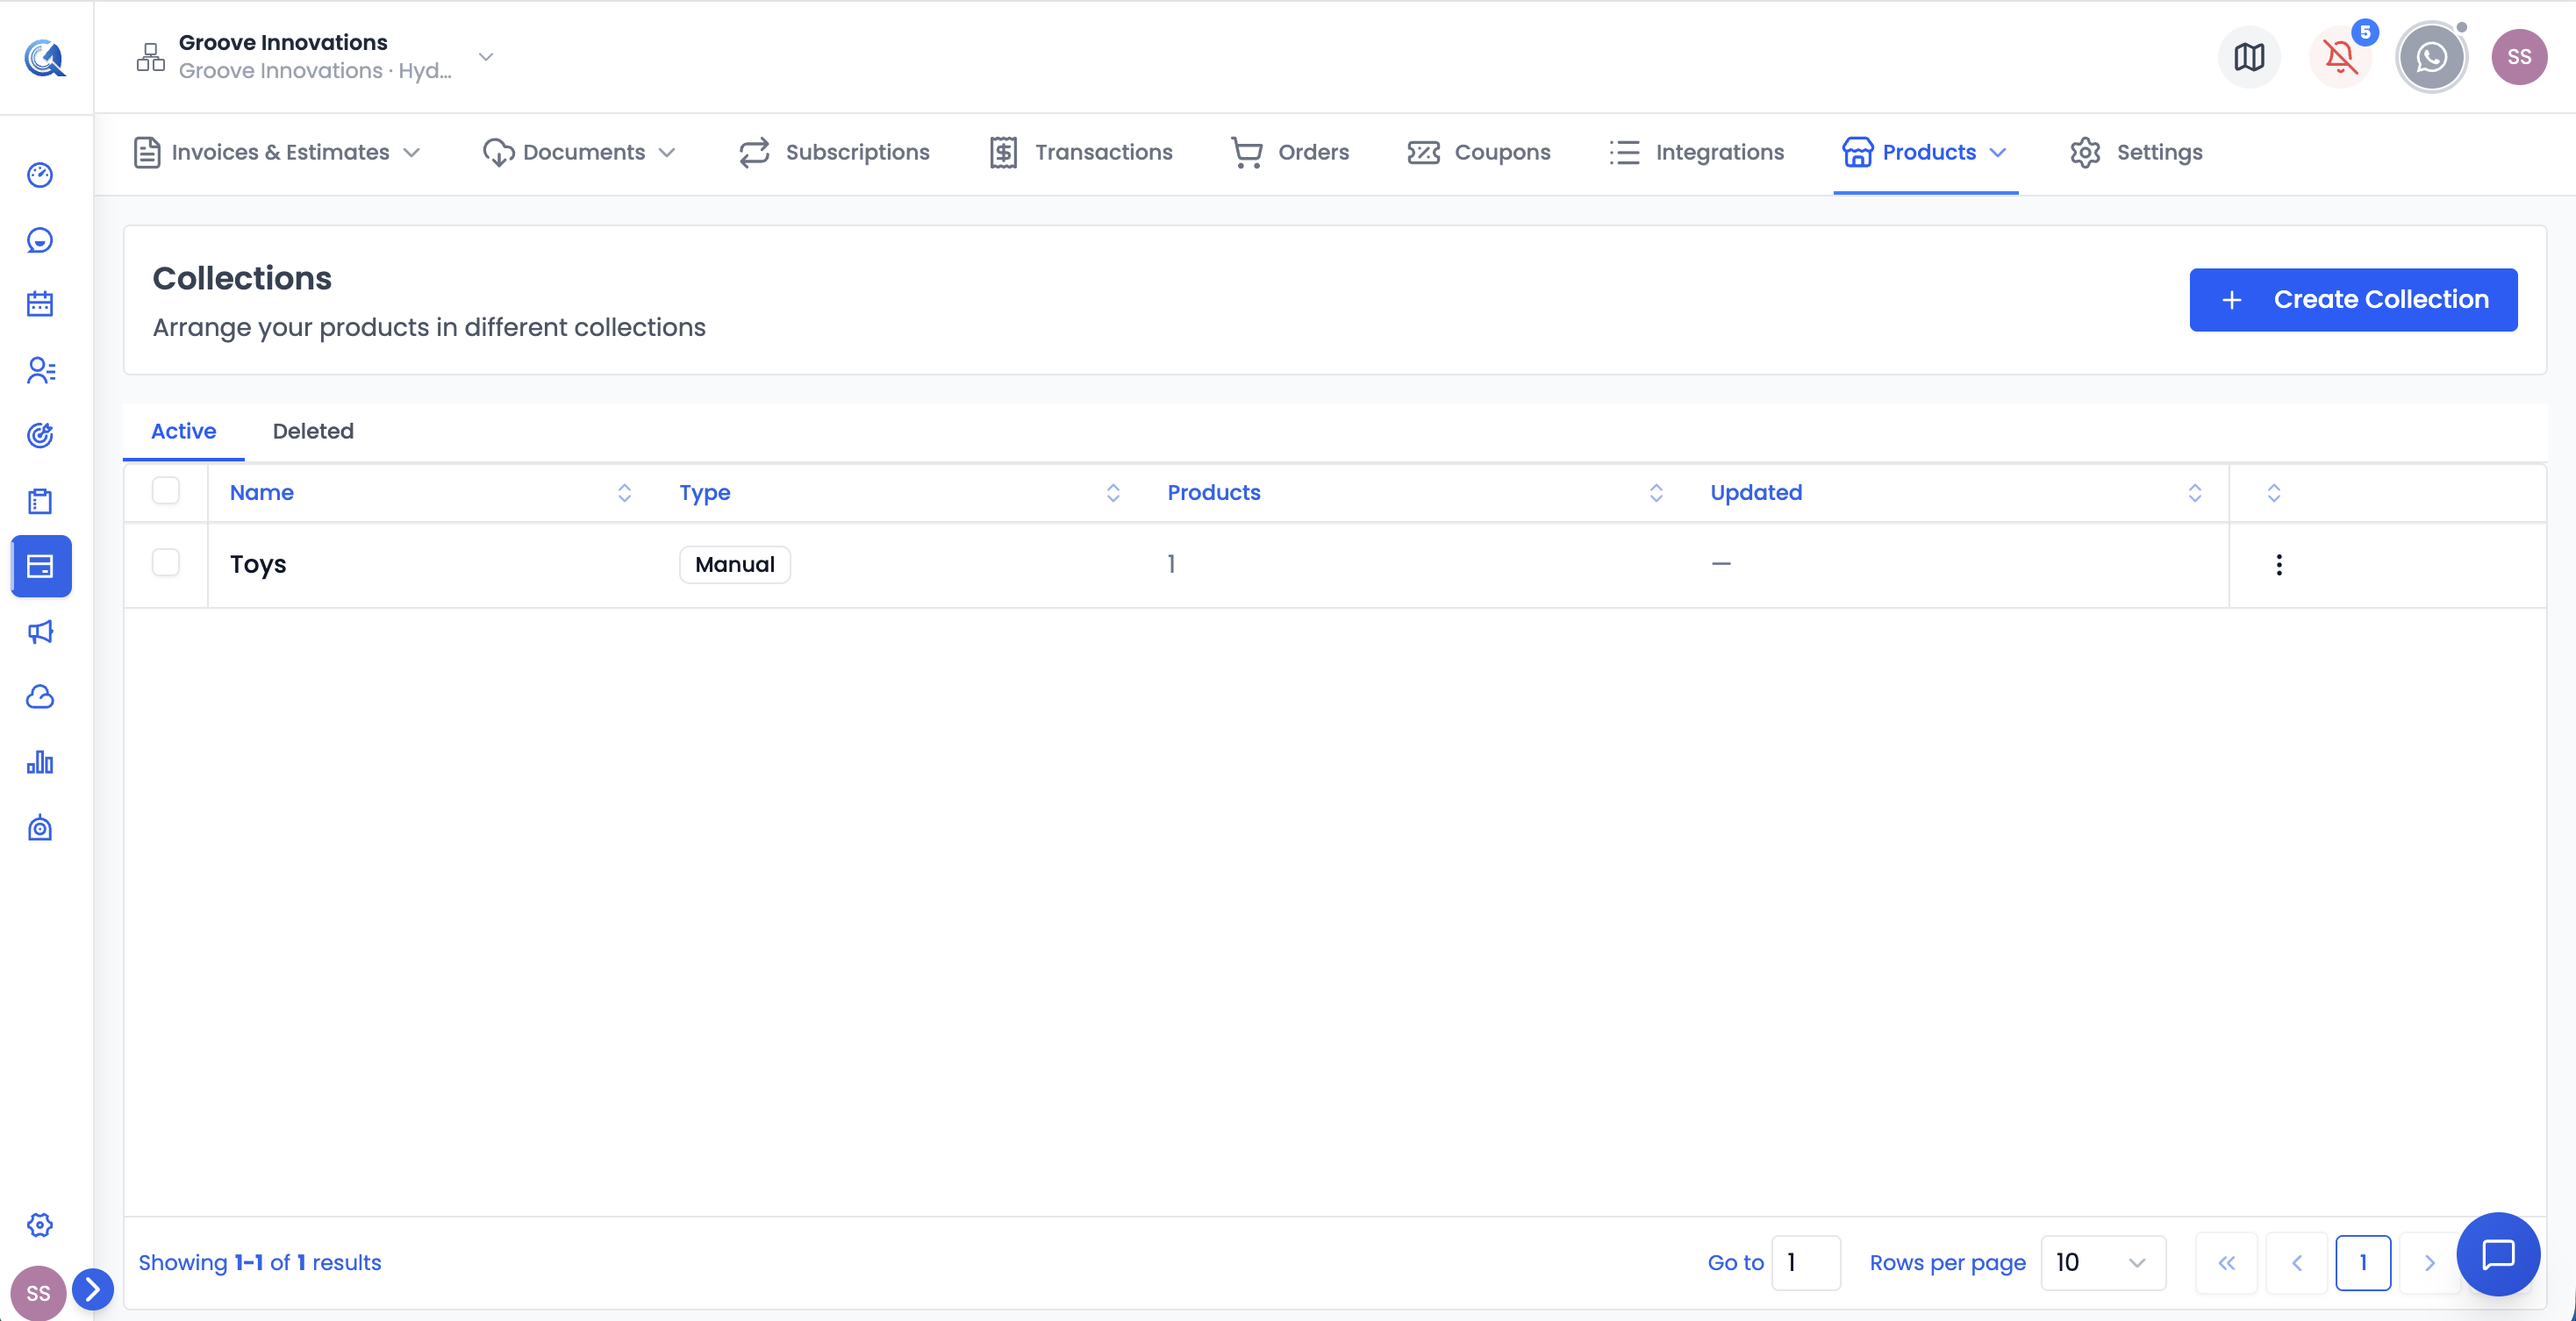 The Collections list. Each row shows the collection name, type (Manual or Smart), product count, and last updated date.
Collection List Columns
| Column | What it shows |
|---|---|
| Name | The collection name |
| Type | Badge showing Manual or Smart |
| Products | The number of products currently in this collection |
| Updated | The date the collection was last modified |
Collection Actions
Use the action menu (⋯) on any collection row:
| Action | Description |
|---|---|
| Edit | Opens the collection form to update the name, type, conditions, products, or SEO fields |
| View Products | Opens a modal listing all products in this collection |
| Duplicate | Creates a copy of the collection with the same type, conditions (for Smart), and product assignments (for Manual) |
| Delete | Soft-deletes the collection. Moves it to the Deleted tab. Products are NOT deleted. |
Why Use Collections
Collections make it faster to find and attach the right products when building invoices and documents.
- When adding a Product List component to a document, you can filter the product picker by collection — instead of scrolling through your entire catalogue.
- In the invoice line item picker, filtering by collection narrows the list to only the relevant products.
Example: Create a "Website Services" collection and a "Maintenance Plans" collection. When building a proposal for a web client, switch to "Website Services" to see only those products instantly.
Adding a product to a new collection does not remove it from existing ones. Removing a product from a collection only removes it from that collection — the product stays in the full catalogue and in all other collections it belongs to.
Creating a Collection
Click + New Collection to open the creation form.
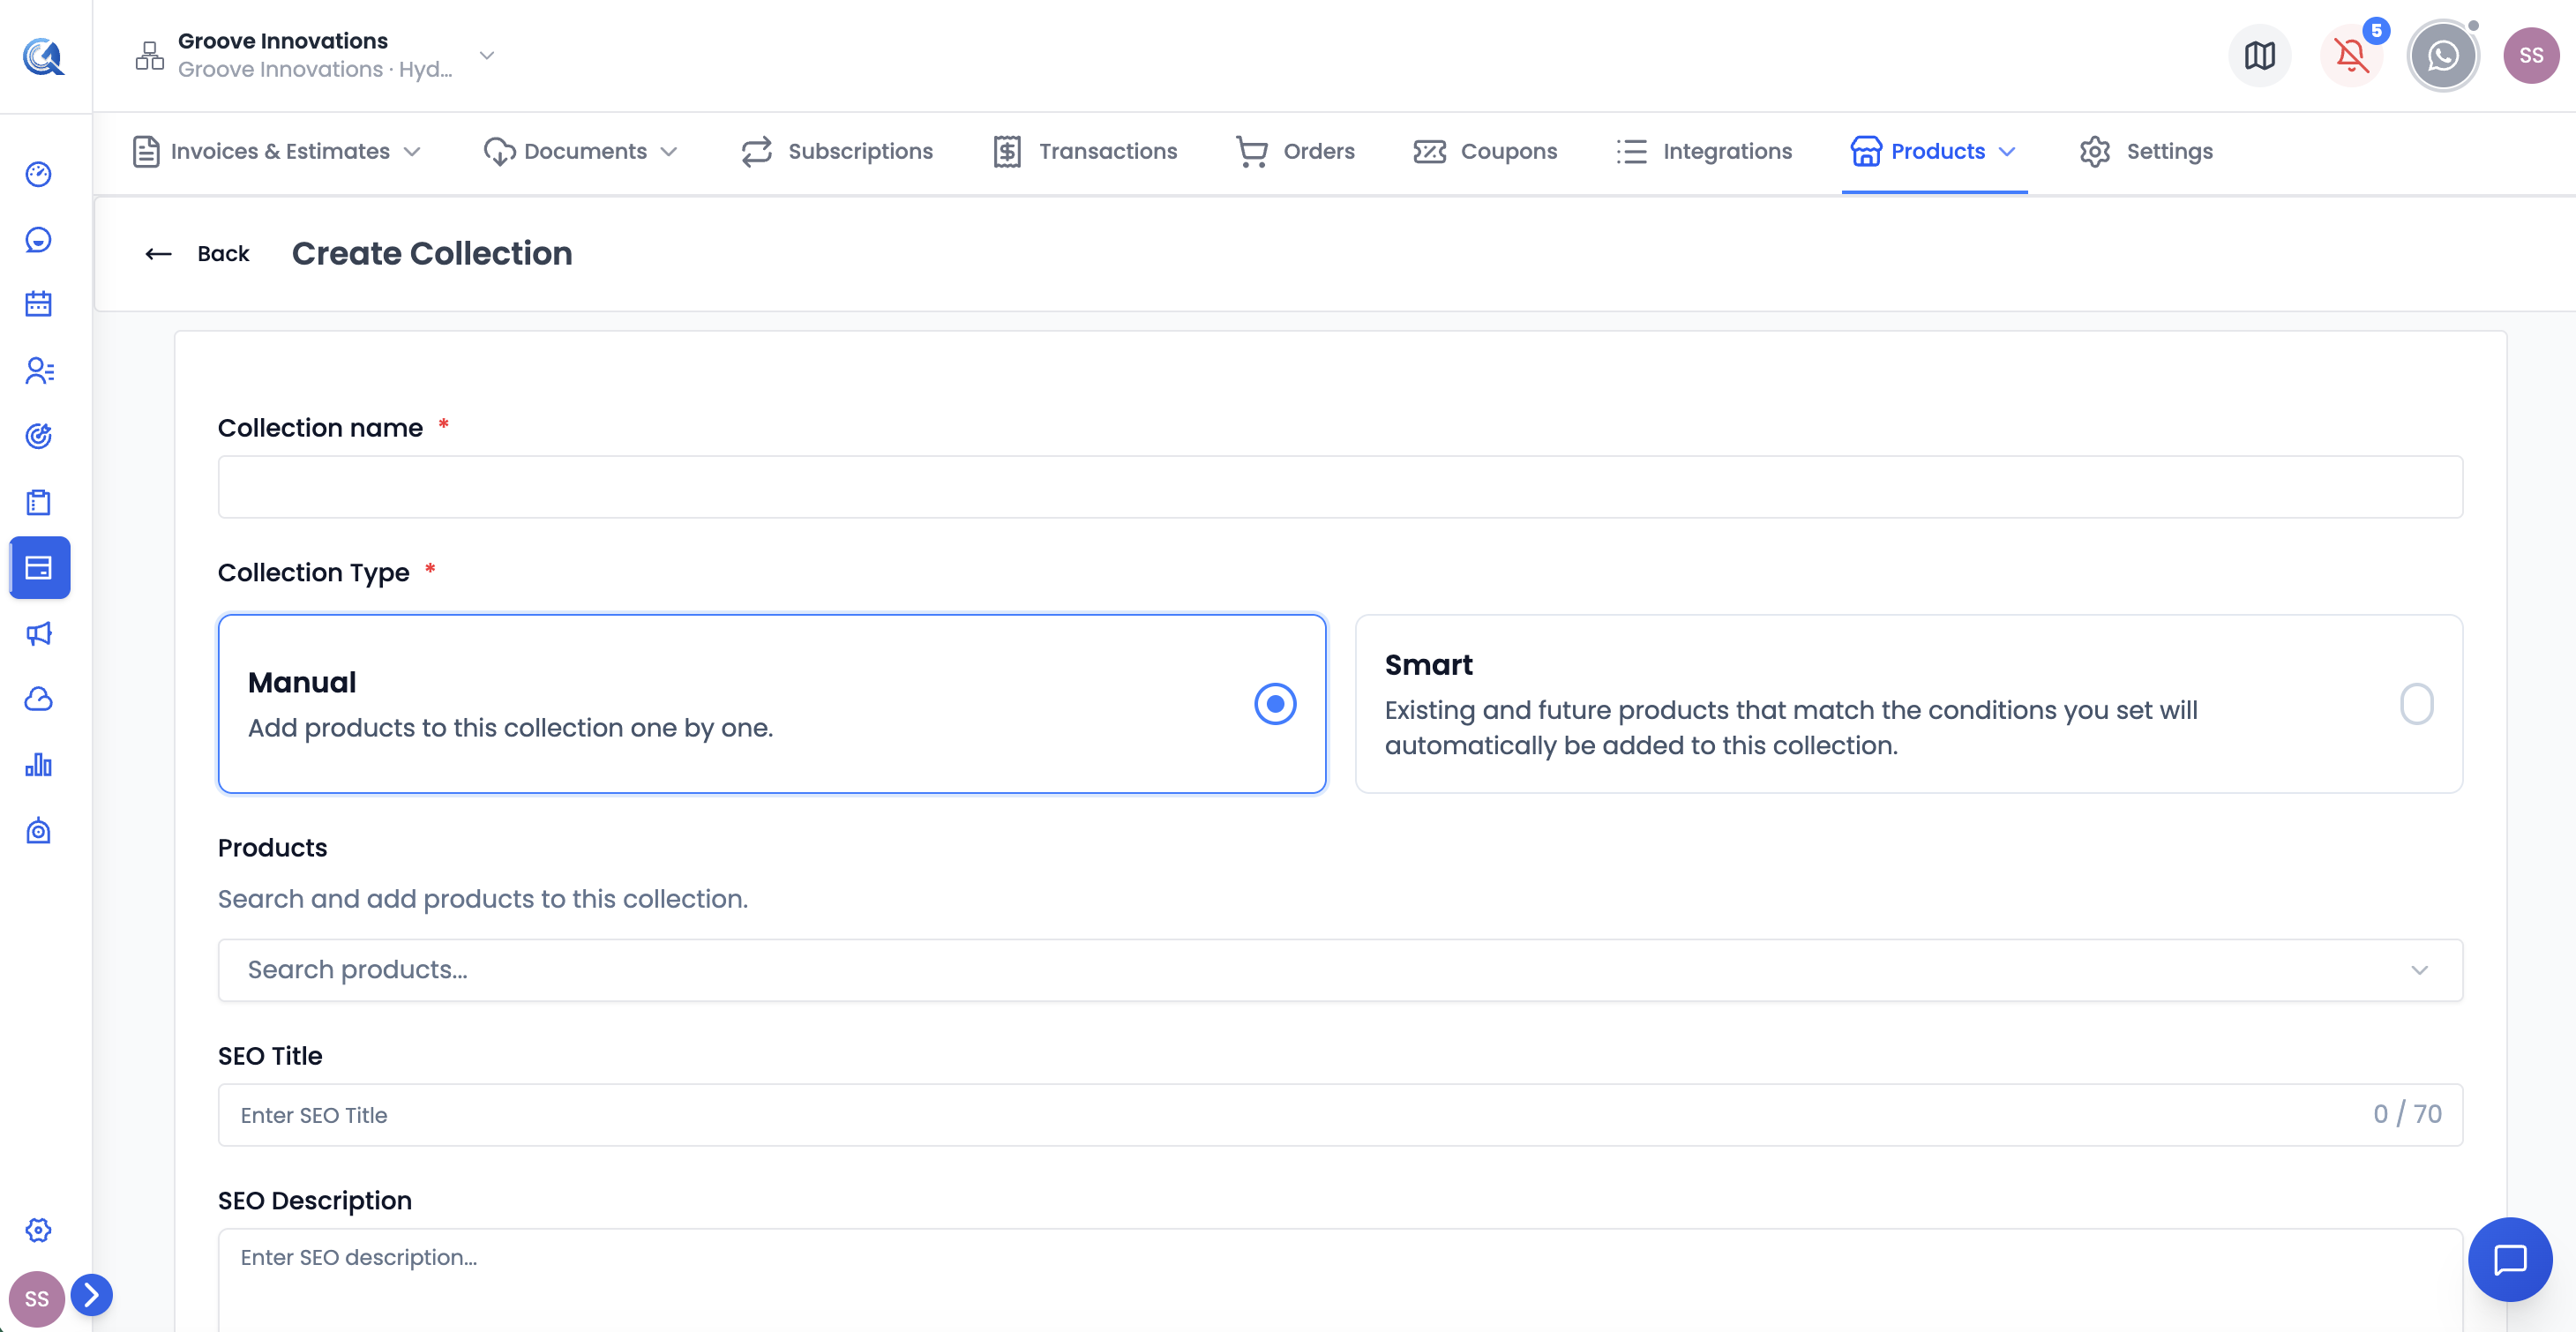 The New Collection dialog. Enter a name and choose Manual or Smart before filling in the remaining fields.
Step 1 — Collection Name
Enter the name for this collection (required). This name appears in the collections list and in every product picker that supports collection filtering. Examples: "Monthly Retainers", "One-Time Projects", "Physical Products".
Step 2 — Collection Type
Choose how products are added to this collection:
Manual
You hand-pick which products belong to the collection.
- A product search field appears. Type to search your catalogue by product name.
- Click a product to select it. Selected products appear as removable badges below the search field.
- Click the × on a badge to deselect a product before saving.
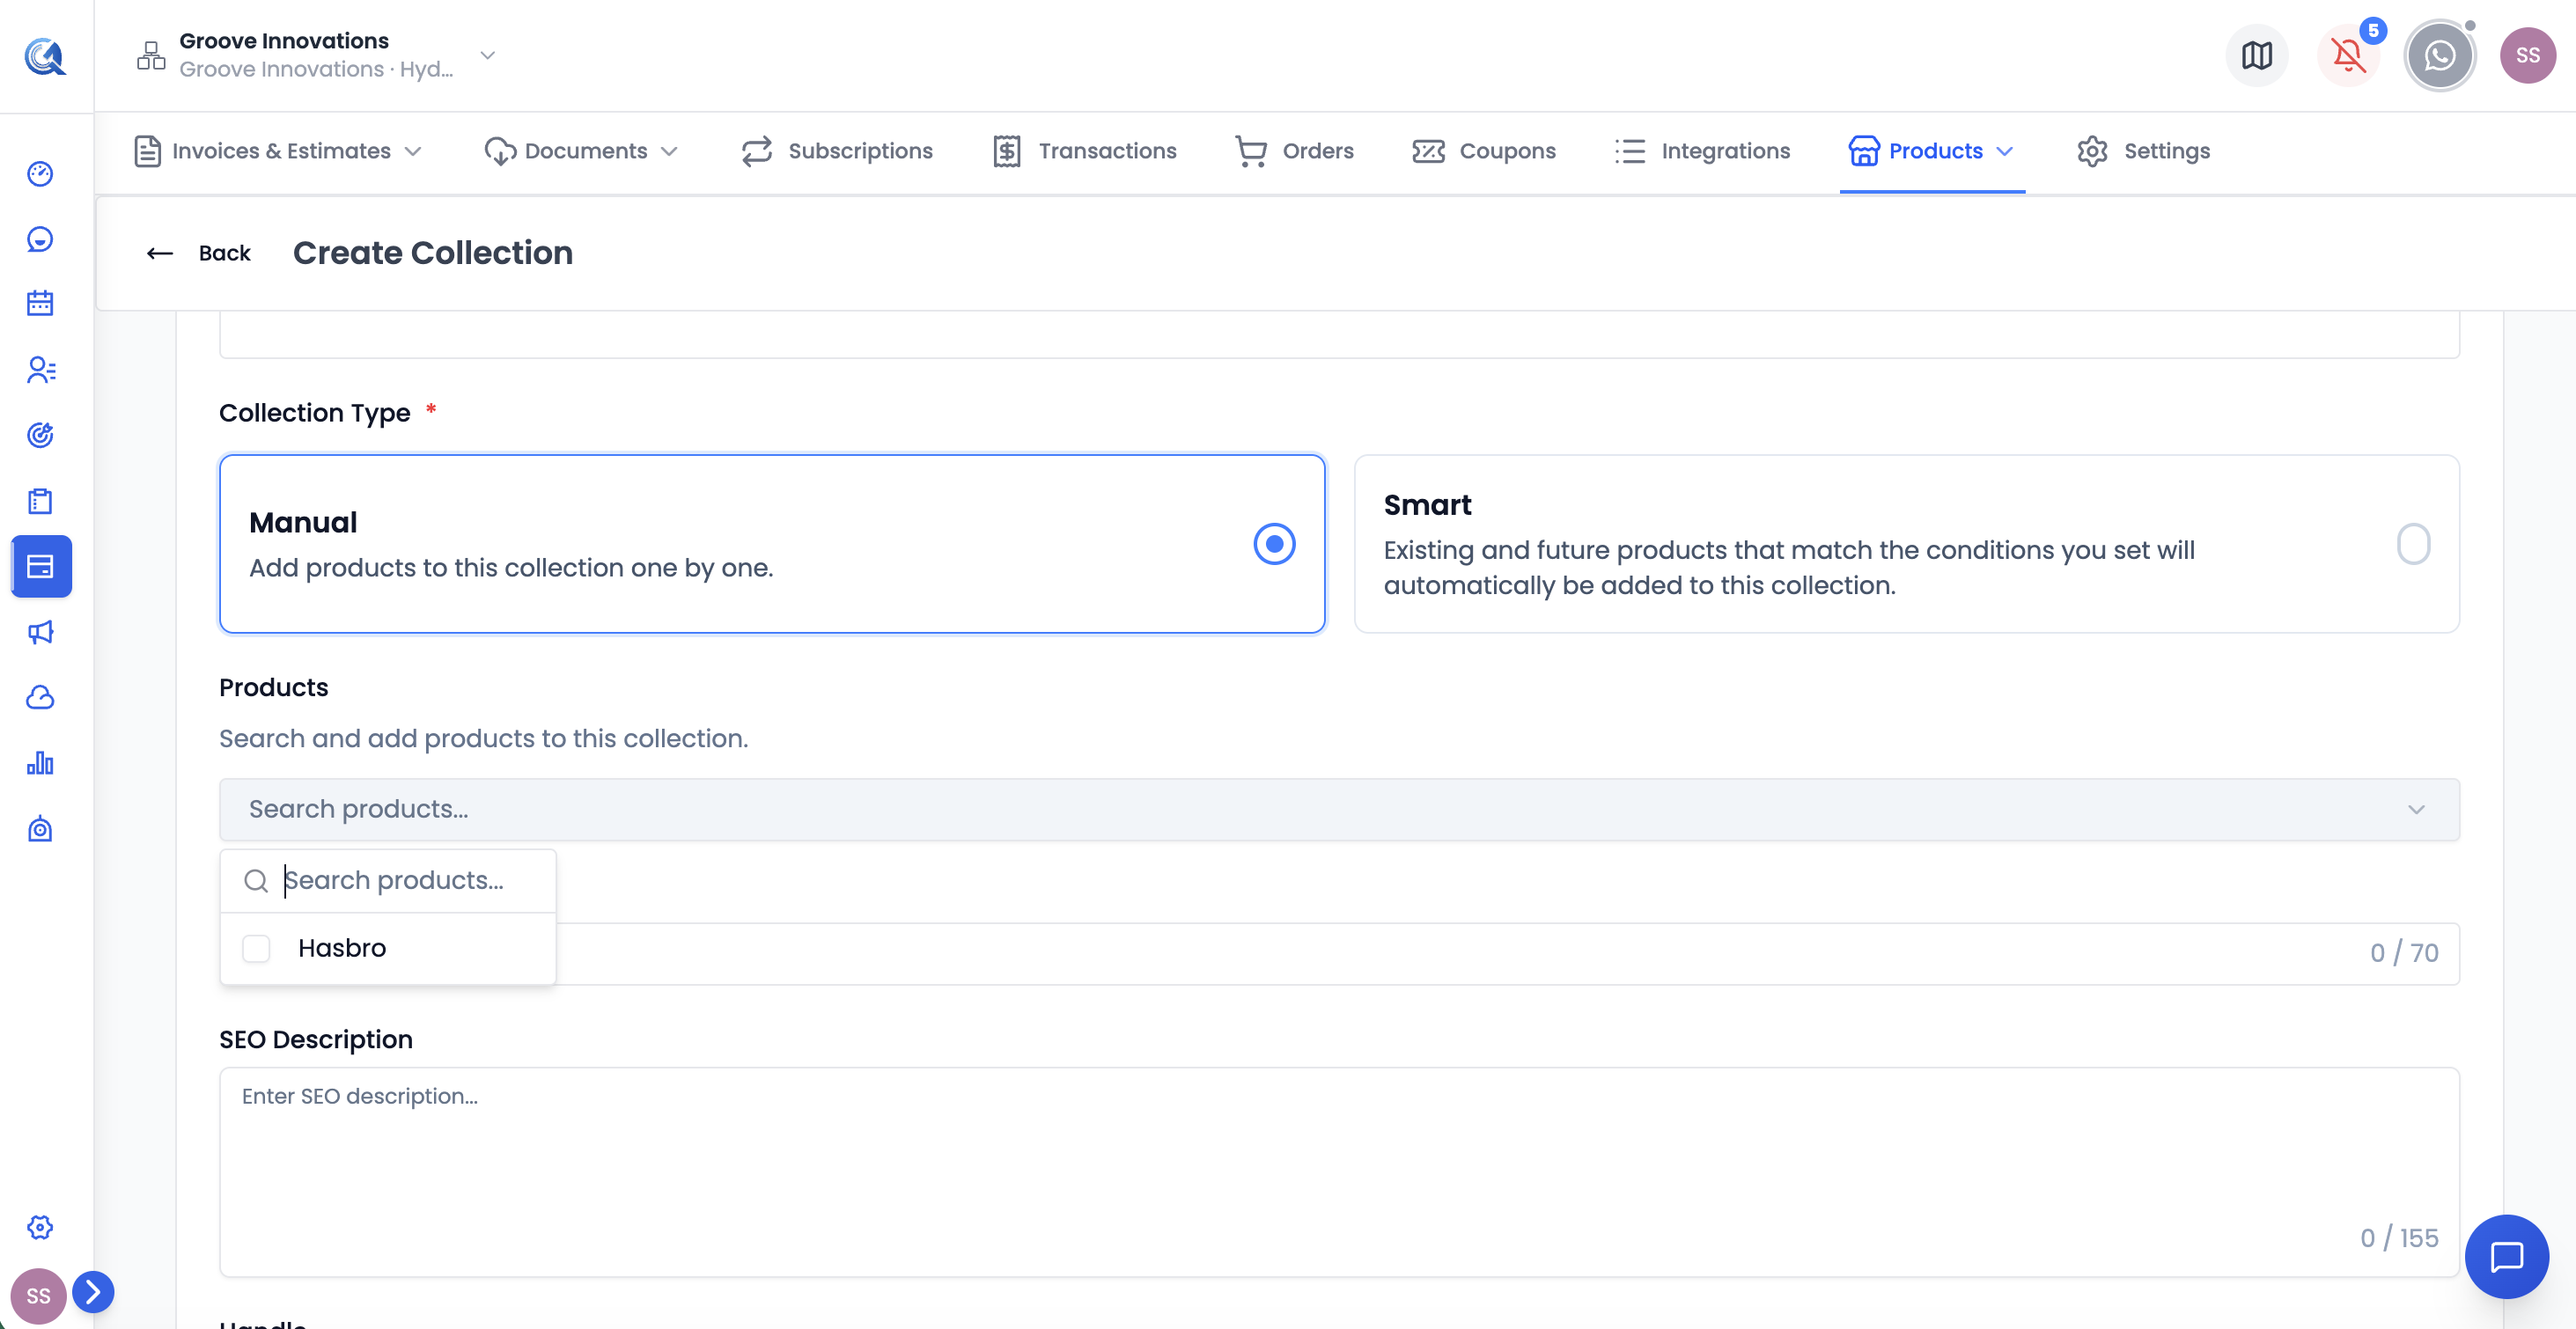 Manual collection type. Search for products and select them — each selected product appears as a badge. Remove any badge to deselect.
Smart
Products are added automatically based on conditions you define. You don't pick products manually — Quantixone matches them in real time.
Step 2a — Set the Match type:
- All — a product must match every condition you add (AND logic). Use when you want to be precise.
- Any — a product matches if it meets at least one condition (OR logic). Use when you want a broader group.
Step 2b — Add conditions:
Each condition has three parts:
| Part | Options |
|---|---|
| Field | title — match on the product name; vendor — match on the vendor/brand; tag — match on a product tag |
| Operator | equals — exact match; contains — partial match anywhere in the value; starts_with — match only the beginning |
| Value | The text to match against — e.g. "Website", "Retainer", "Pro" |
Click + Add Condition to add more rules. Click the remove icon on any row to delete a condition.
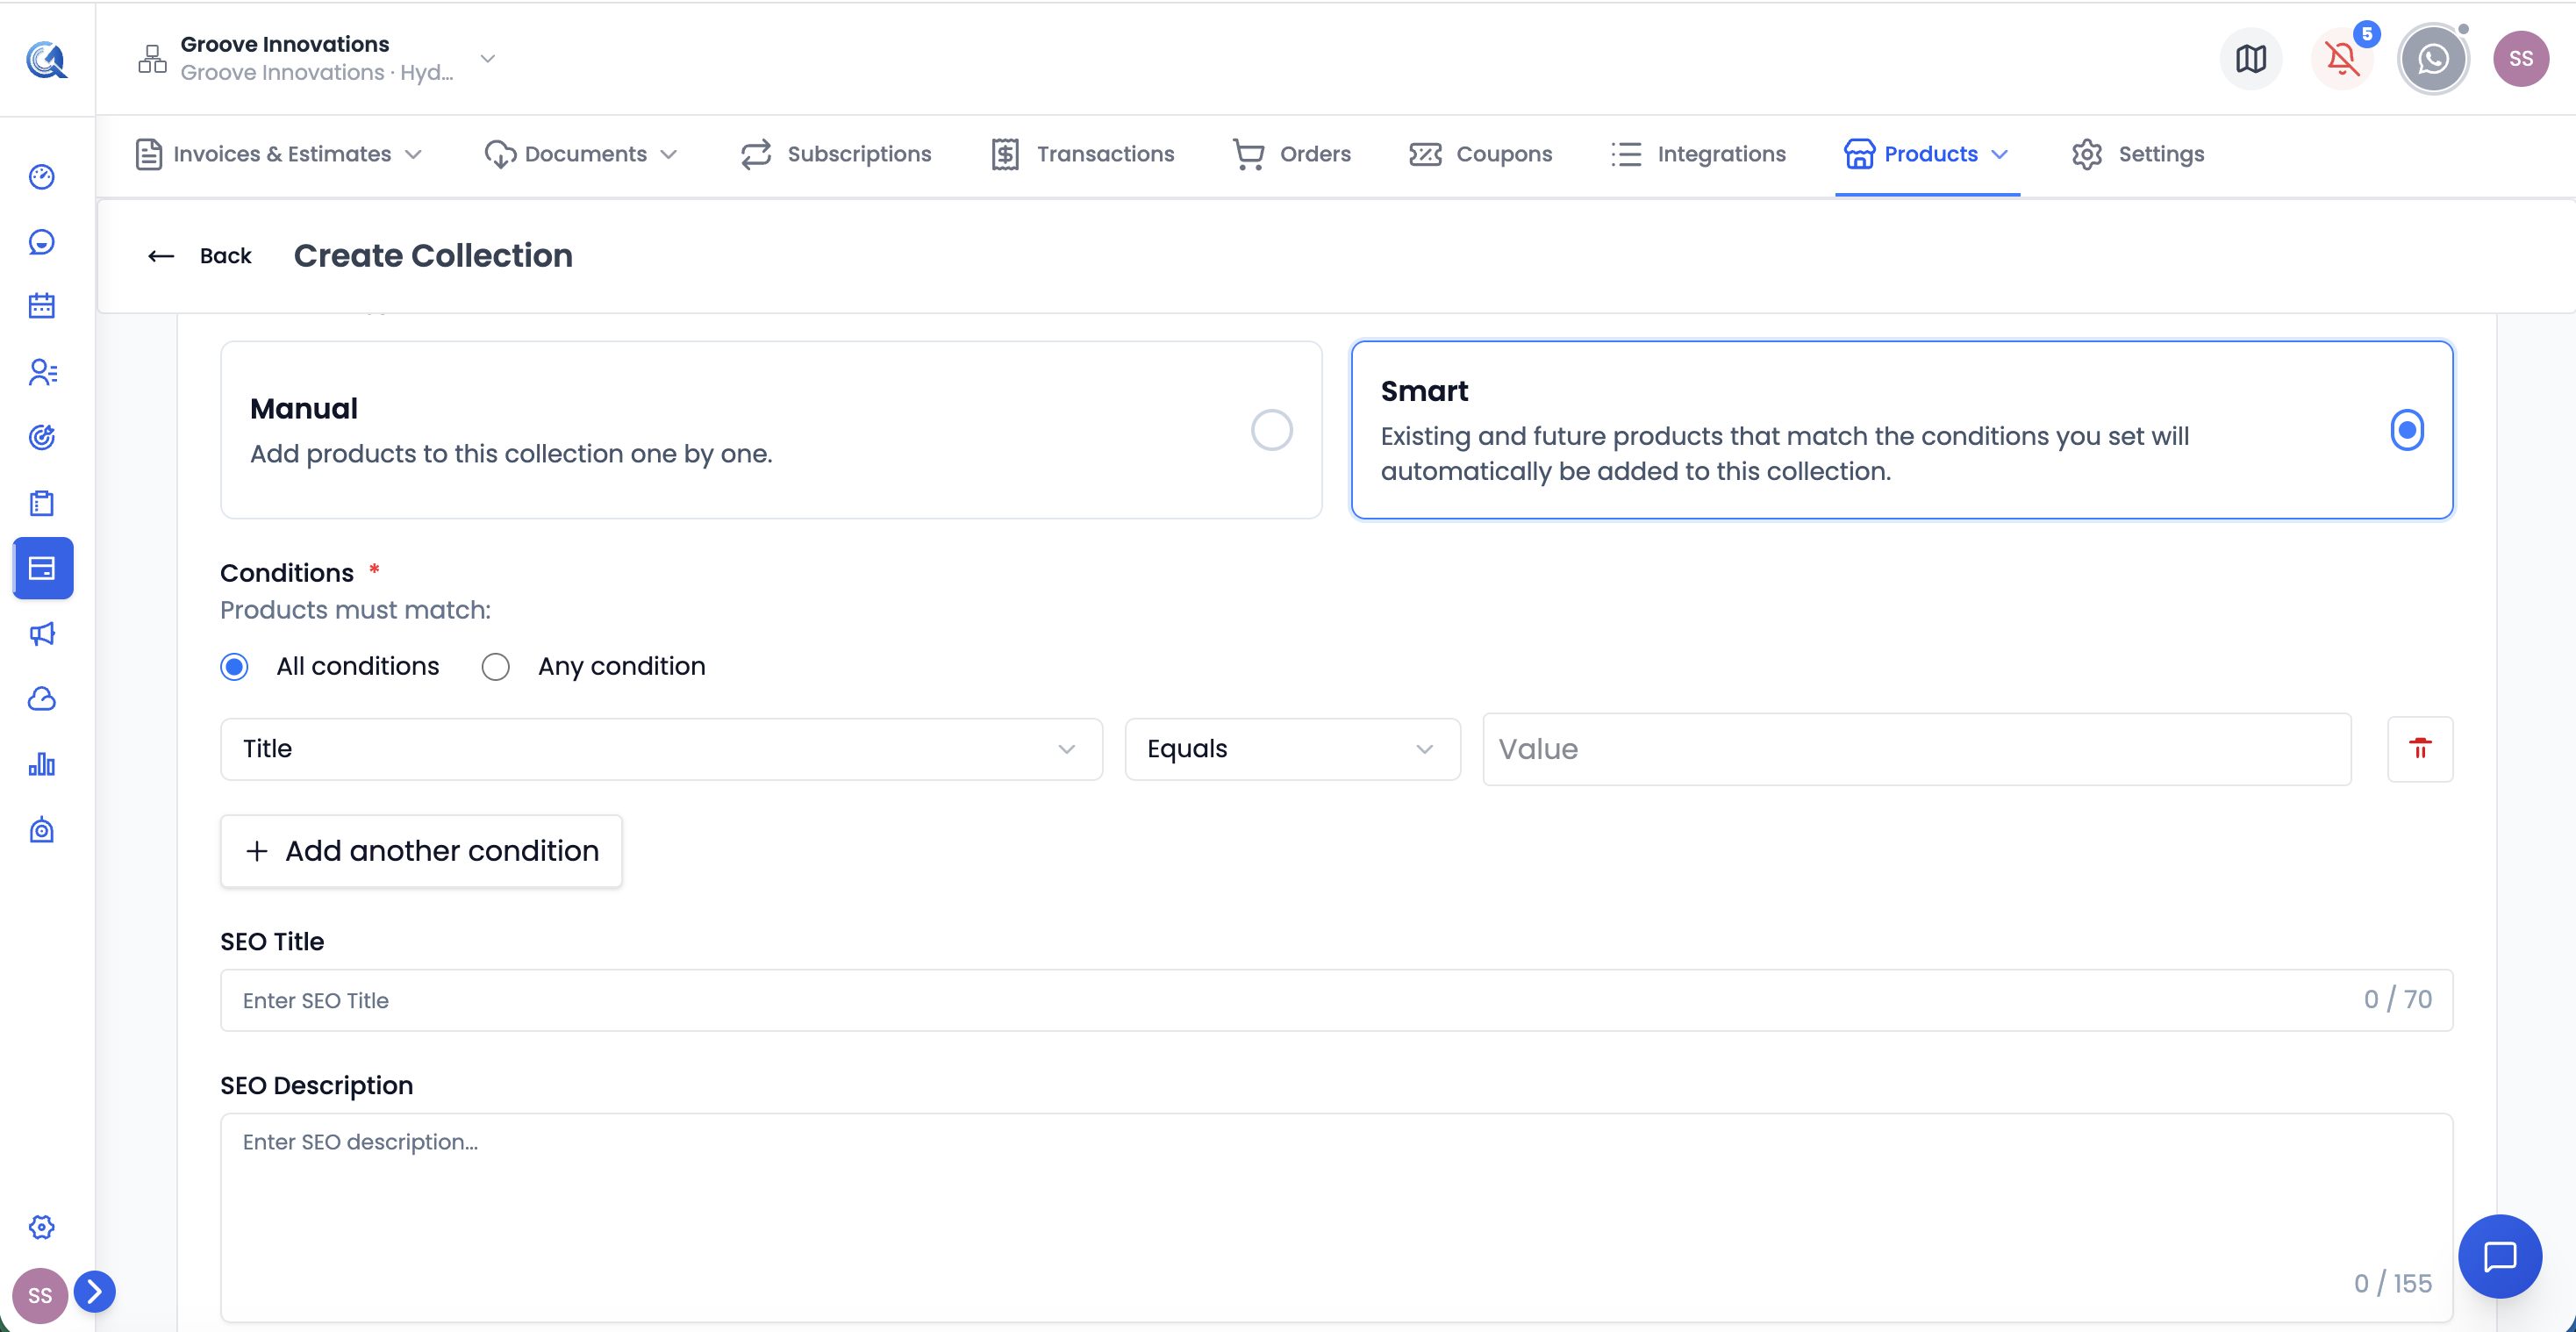 Smart collection type. Each condition row has a field selector, an operator, and a value to match. Add as many conditions as needed.
Example: Field = title, Operator = contains, Value = Retainer — this collection automatically includes every product whose title contains "Retainer". New products with that word in the name are added to the collection instantly, without any manual action.
Step 3 — Additional Options (SEO, optional)
Expand Additional Options to configure the collection's public URL and search engine metadata:
| Field | Description |
|---|---|
| Handle | The URL path for this collection's public page — e.g. /collections/website-services. Auto-generated from the name. You can edit it manually. Must be unique across all collections. |
| SEO Title | The title shown in search engine results. Max 70 characters. If left blank, the collection name is used. |
| SEO Description | The description snippet shown under the title in search results. Max 155 characters. |
Step 4 — Save
Click Save to create the collection. It appears immediately in the Collections list and becomes available in all product pickers that support collection filtering.
Viewing Products in a Collection
Click any collection row or use the View Products action to open a modal listing all products in that collection.
 The View Products modal. Shows every product currently in the collection. Use the remove option on any product to take it out of this collection without deleting it.
From this view:
- Browse all products assigned to the collection
- Remove a product from the collection without deleting it from your product catalogue
Editing a Collection
Use the Edit action from the row menu to open the collection form pre-filled with current values.
- For Manual collections: a "Currently in this collection" list shows products already assigned. Add more via search or remove existing ones.
- For Smart collections: the condition rows are shown for editing. A "Matched Products" section below the conditions updates in real time as you change your rules — this is read-only.
You can switch a Manual collection to Smart and vice versa when editing. Switching type resets the product selection or condition setup for the new type.
Duplicating a Collection
The Duplicate action creates an exact copy — same type, conditions (for Smart), and product assignments (for Manual). The copy is created with "(copy)" appended to the name. Edit it to rename and customise independently.
Deleting a Collection
Use the Delete action to soft-delete a collection. It moves to the Deleted tab and disappears from all product pickers. Products are not affected in any way.
Deleted Collections Tab
Click the Deleted tab at the top of the Collections list to view soft-deleted collections.
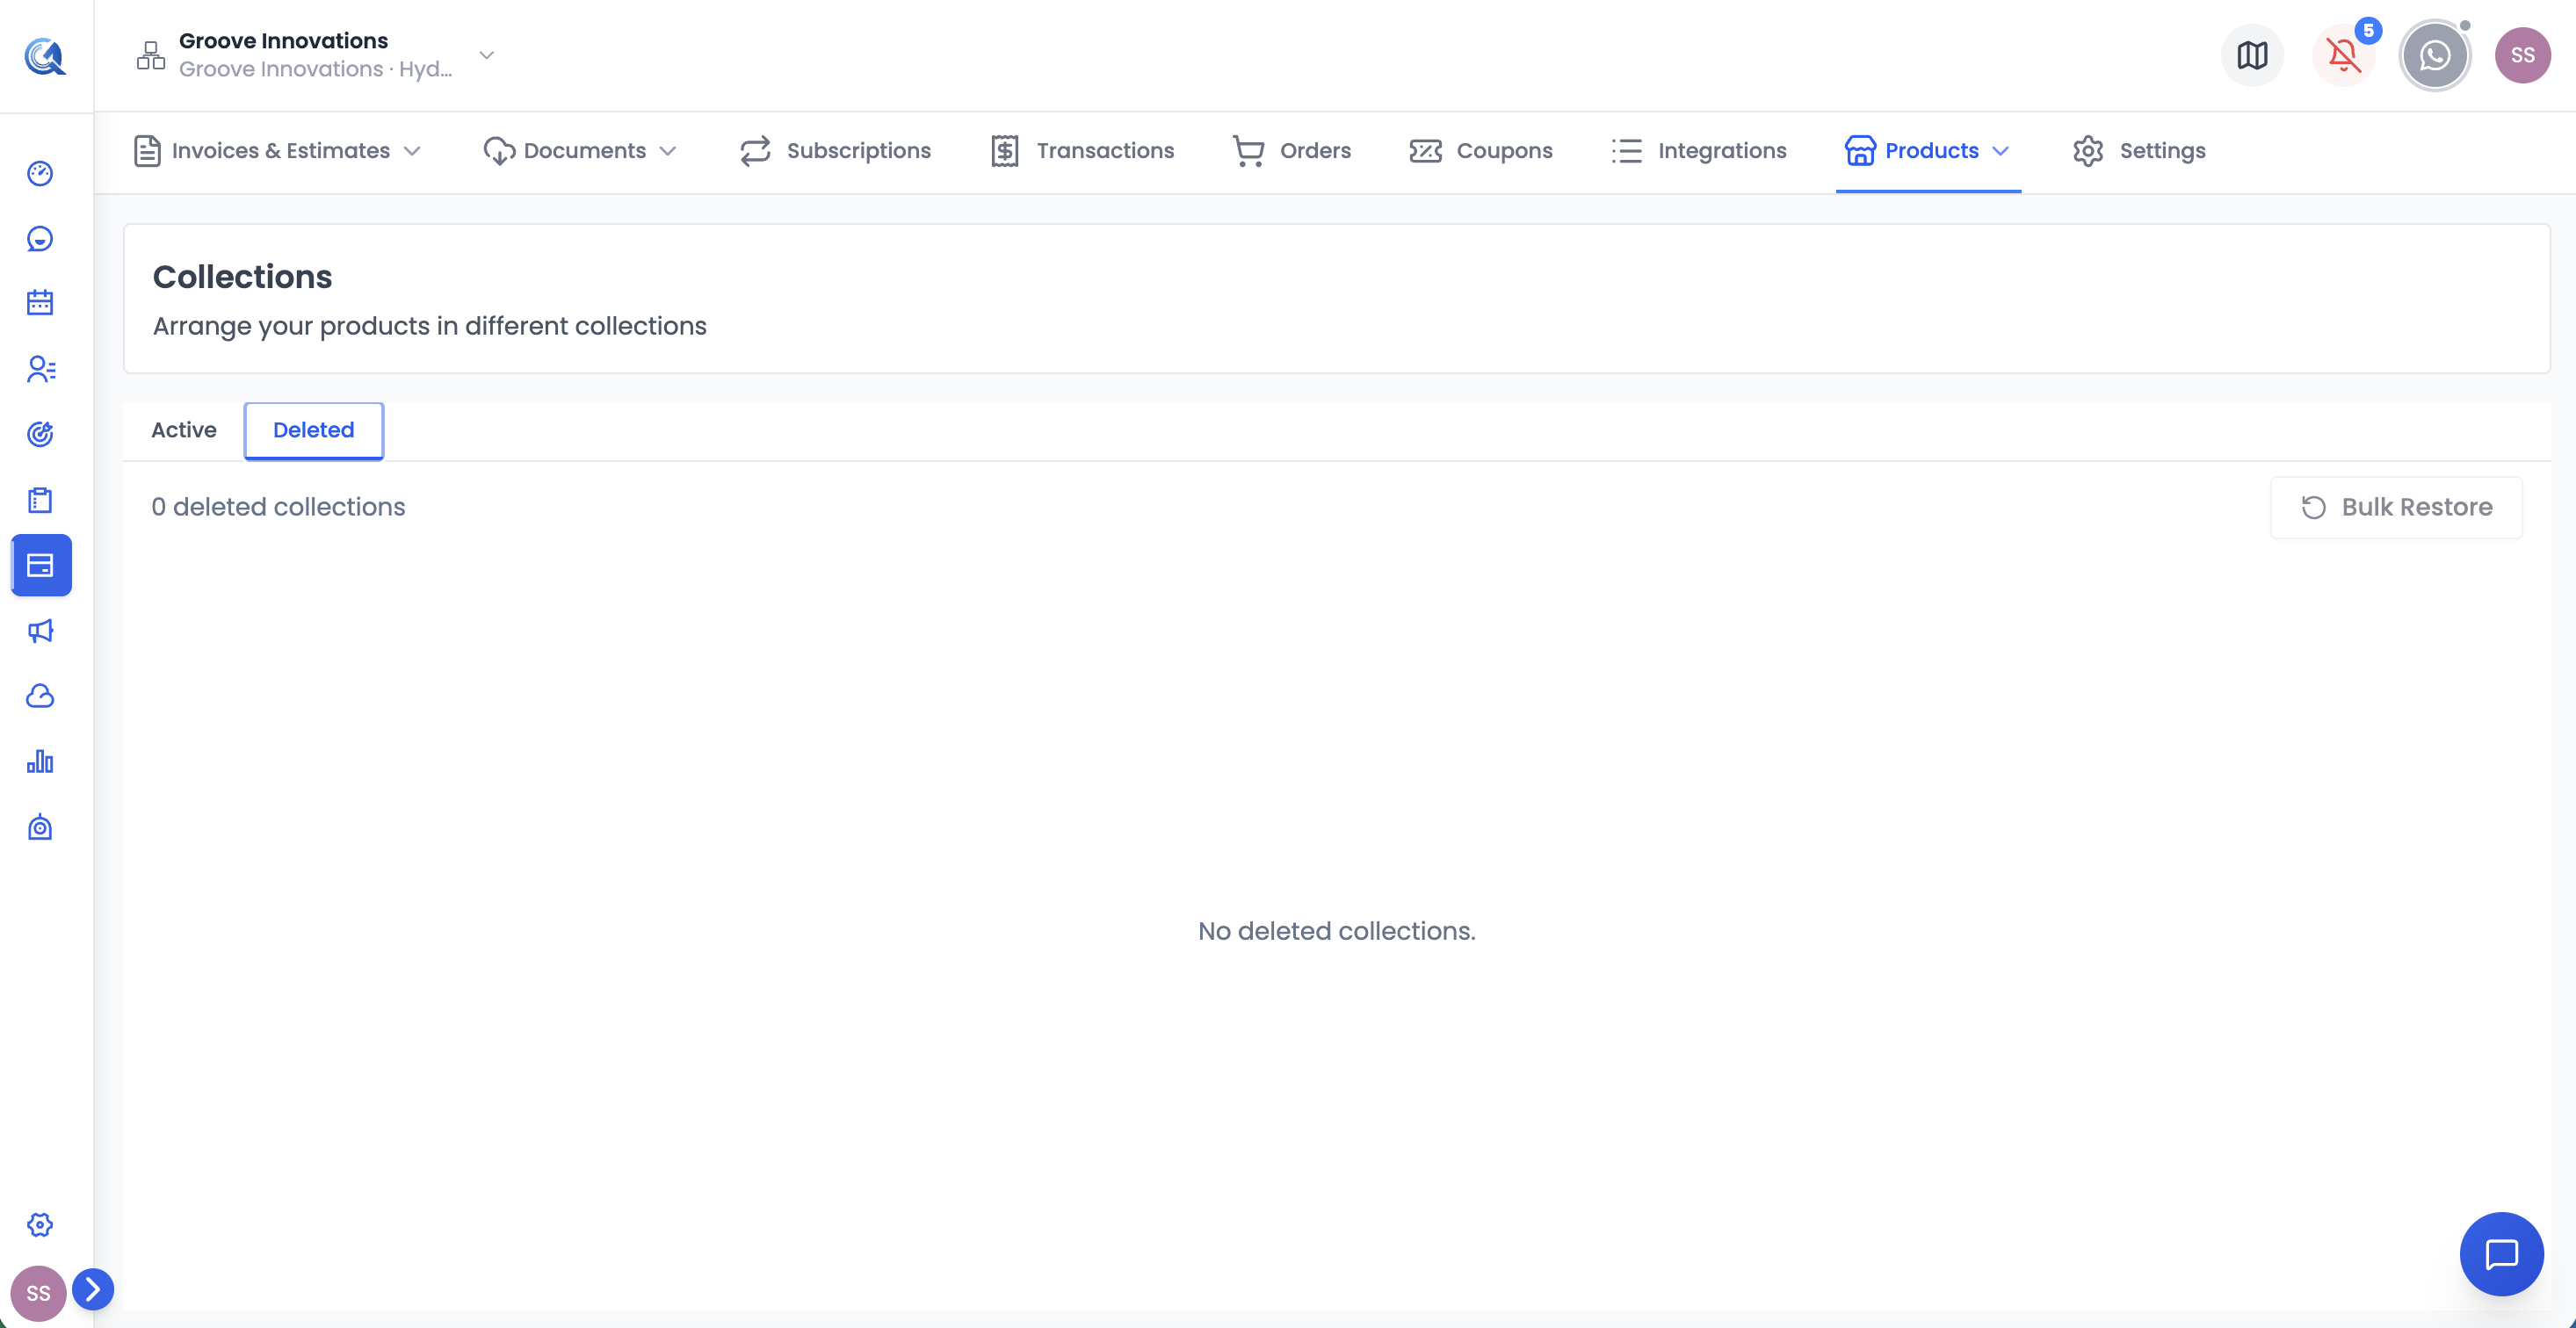 The Deleted tab. Each row shows the collection name and type with a Restore action. Restored collections immediately become available in product pickers again.
| Action | Description |
|---|---|
| Restore | Moves the collection back to Active. Immediately available in product pickers again. |
There is no permanent delete option — deleted collections can only be restored.
Bulk Delete
Check the checkboxes on multiple collection rows. A bulk action toolbar appears at the top of the list. Click Delete to soft-delete all selected collections in one step.
Video Walkthrough
Watch the complete walkthrough below.