Creating a Template
Creating a WhatsApp template involves filling in the template details, writing the message content with optional variables and buttons, and submitting it to Meta for approval. Approval typically takes a few minutes to a few hours.
Starting a New Template
- Go to Conversations → Templates → WhatsApp.
- Click + New Template.
- In the dialog, choose Start from Scratch or Use AI Generator (see AI Template Generator).
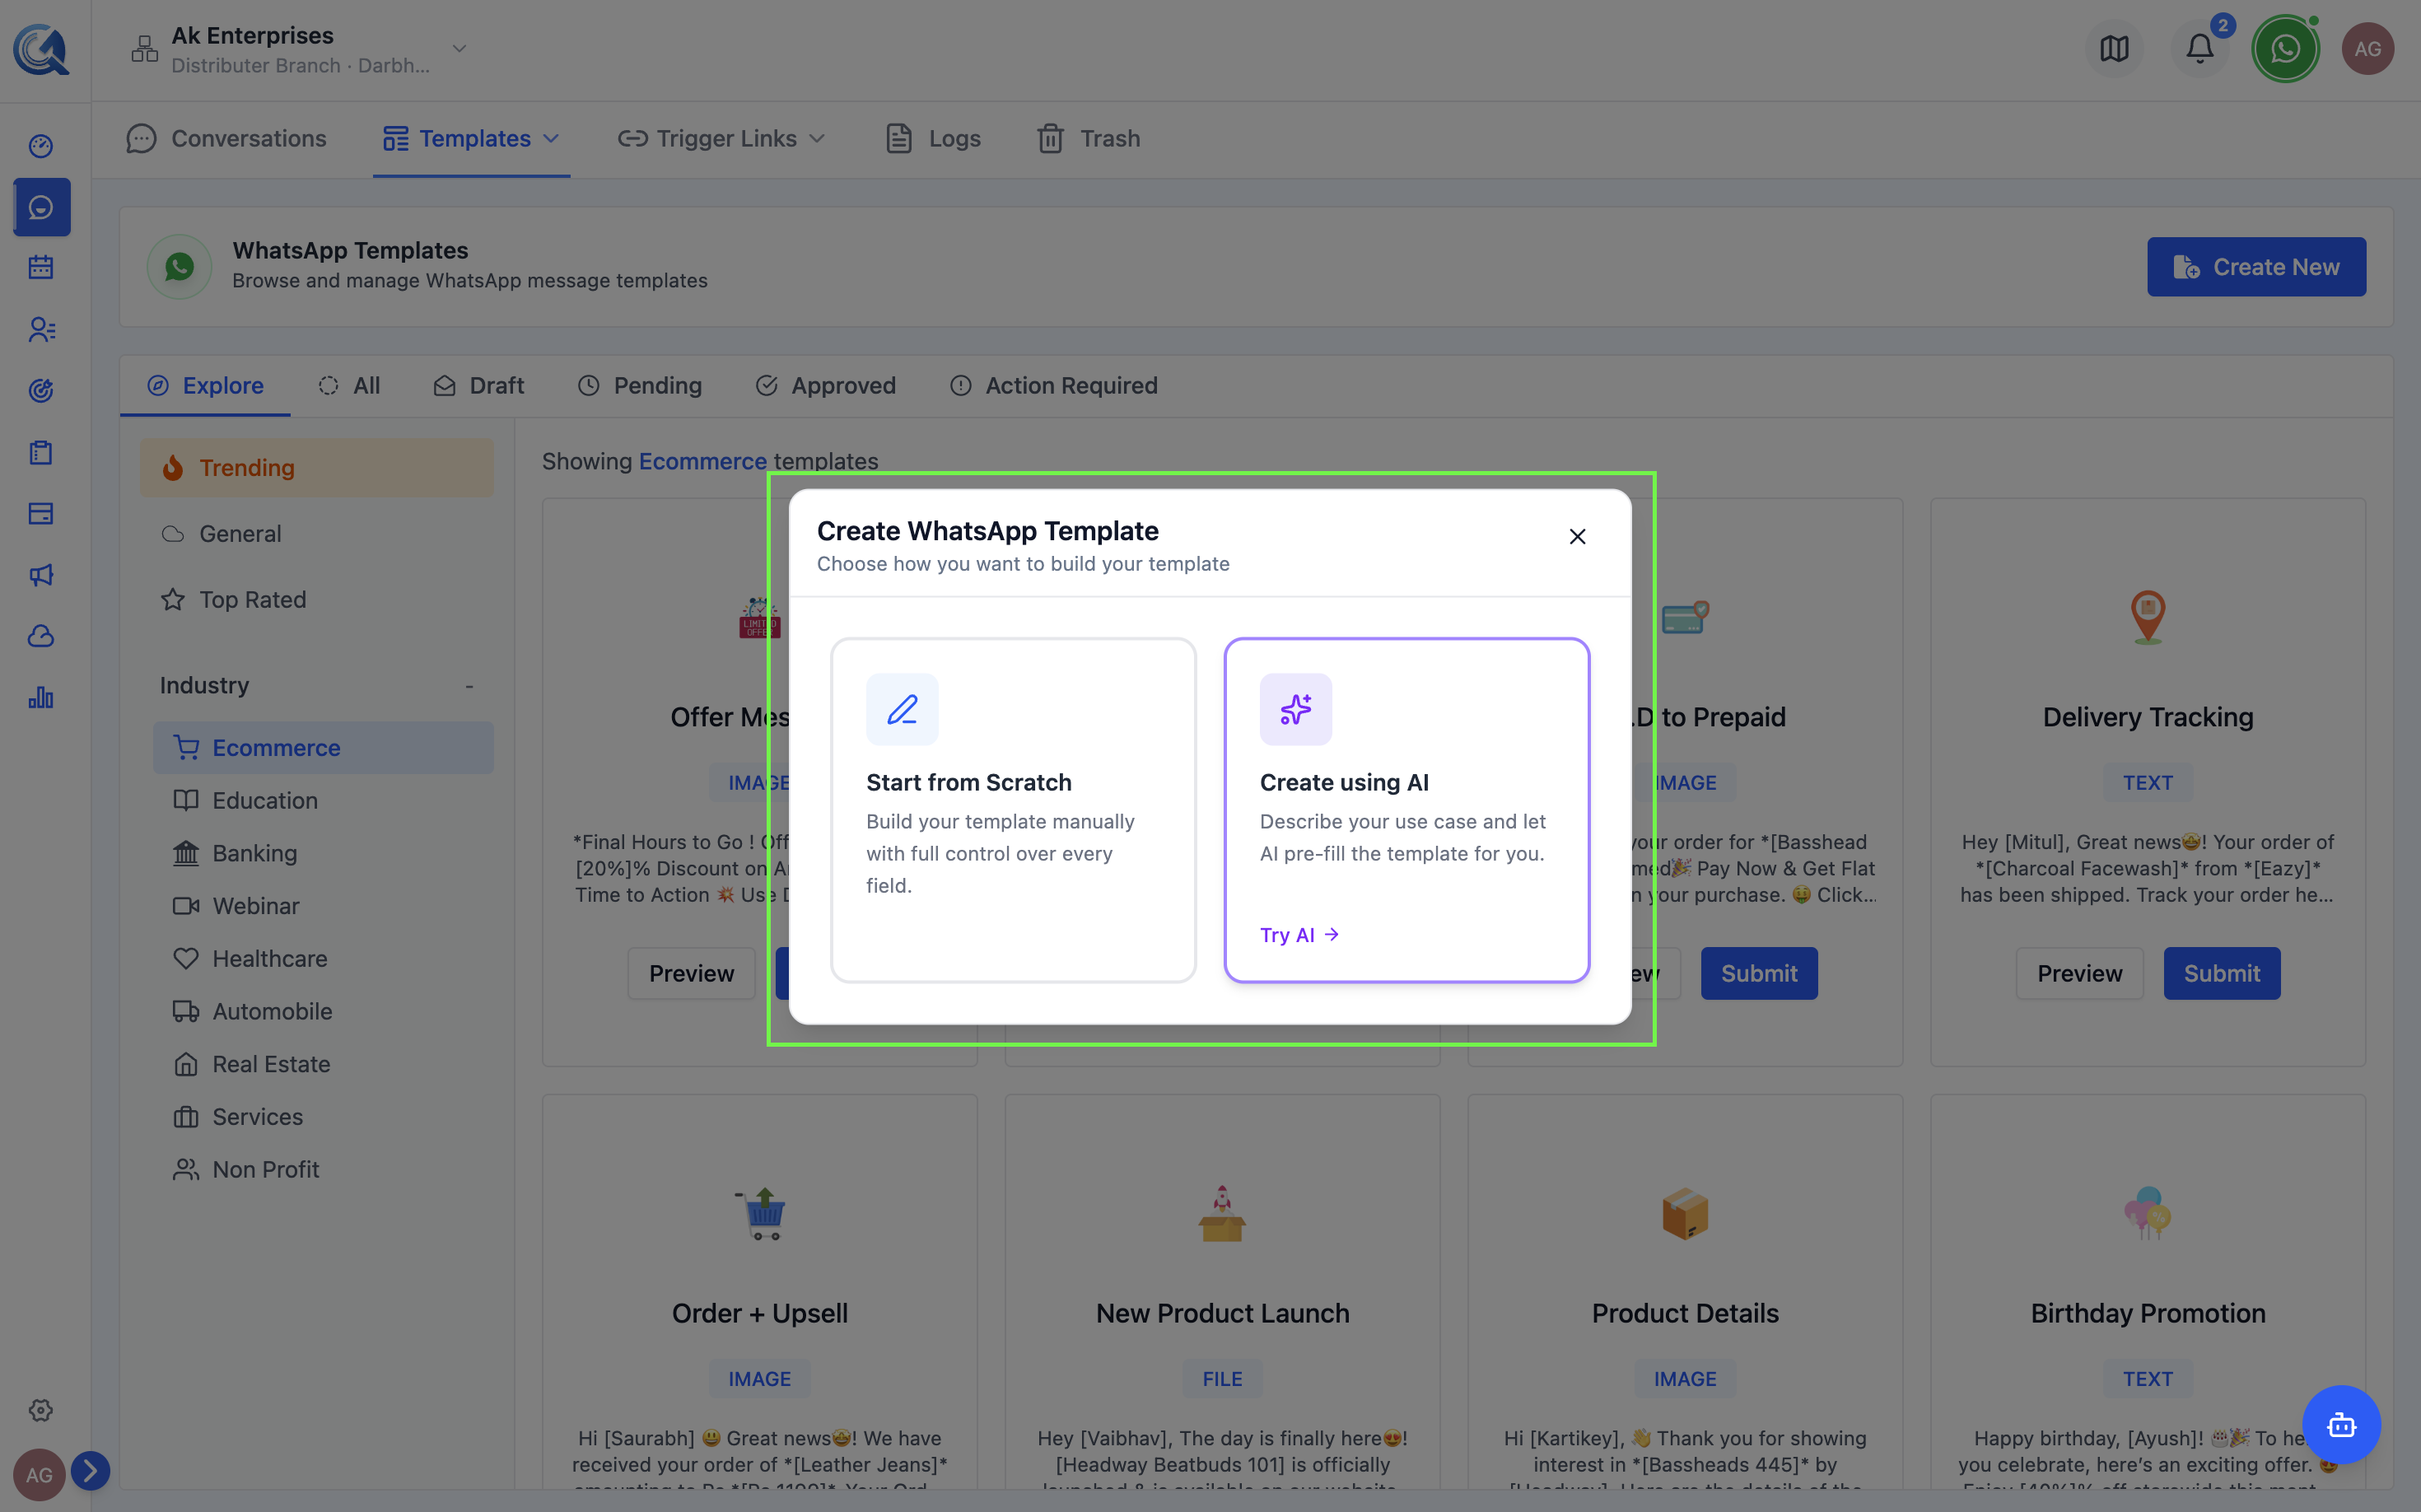 Choose how you want to start building the template.
Basic Information
Fill in the template's basic details:
| Field | Notes |
|---|---|
| Template Name | Lowercase letters, numbers, and underscores only (e.g., order_confirmation). Cannot be changed after creation. |
Once saved, the template name cannot be edited. If you need a different name, you must delete the template and create a new one. Use a clear, descriptive name from the start (e.g., appointment_reminder_v2).
| Category | UTILITY, MARKETING, or AUTHENTICATION | | Language | The language of the template content (e.g., English US, Hindi IN) |
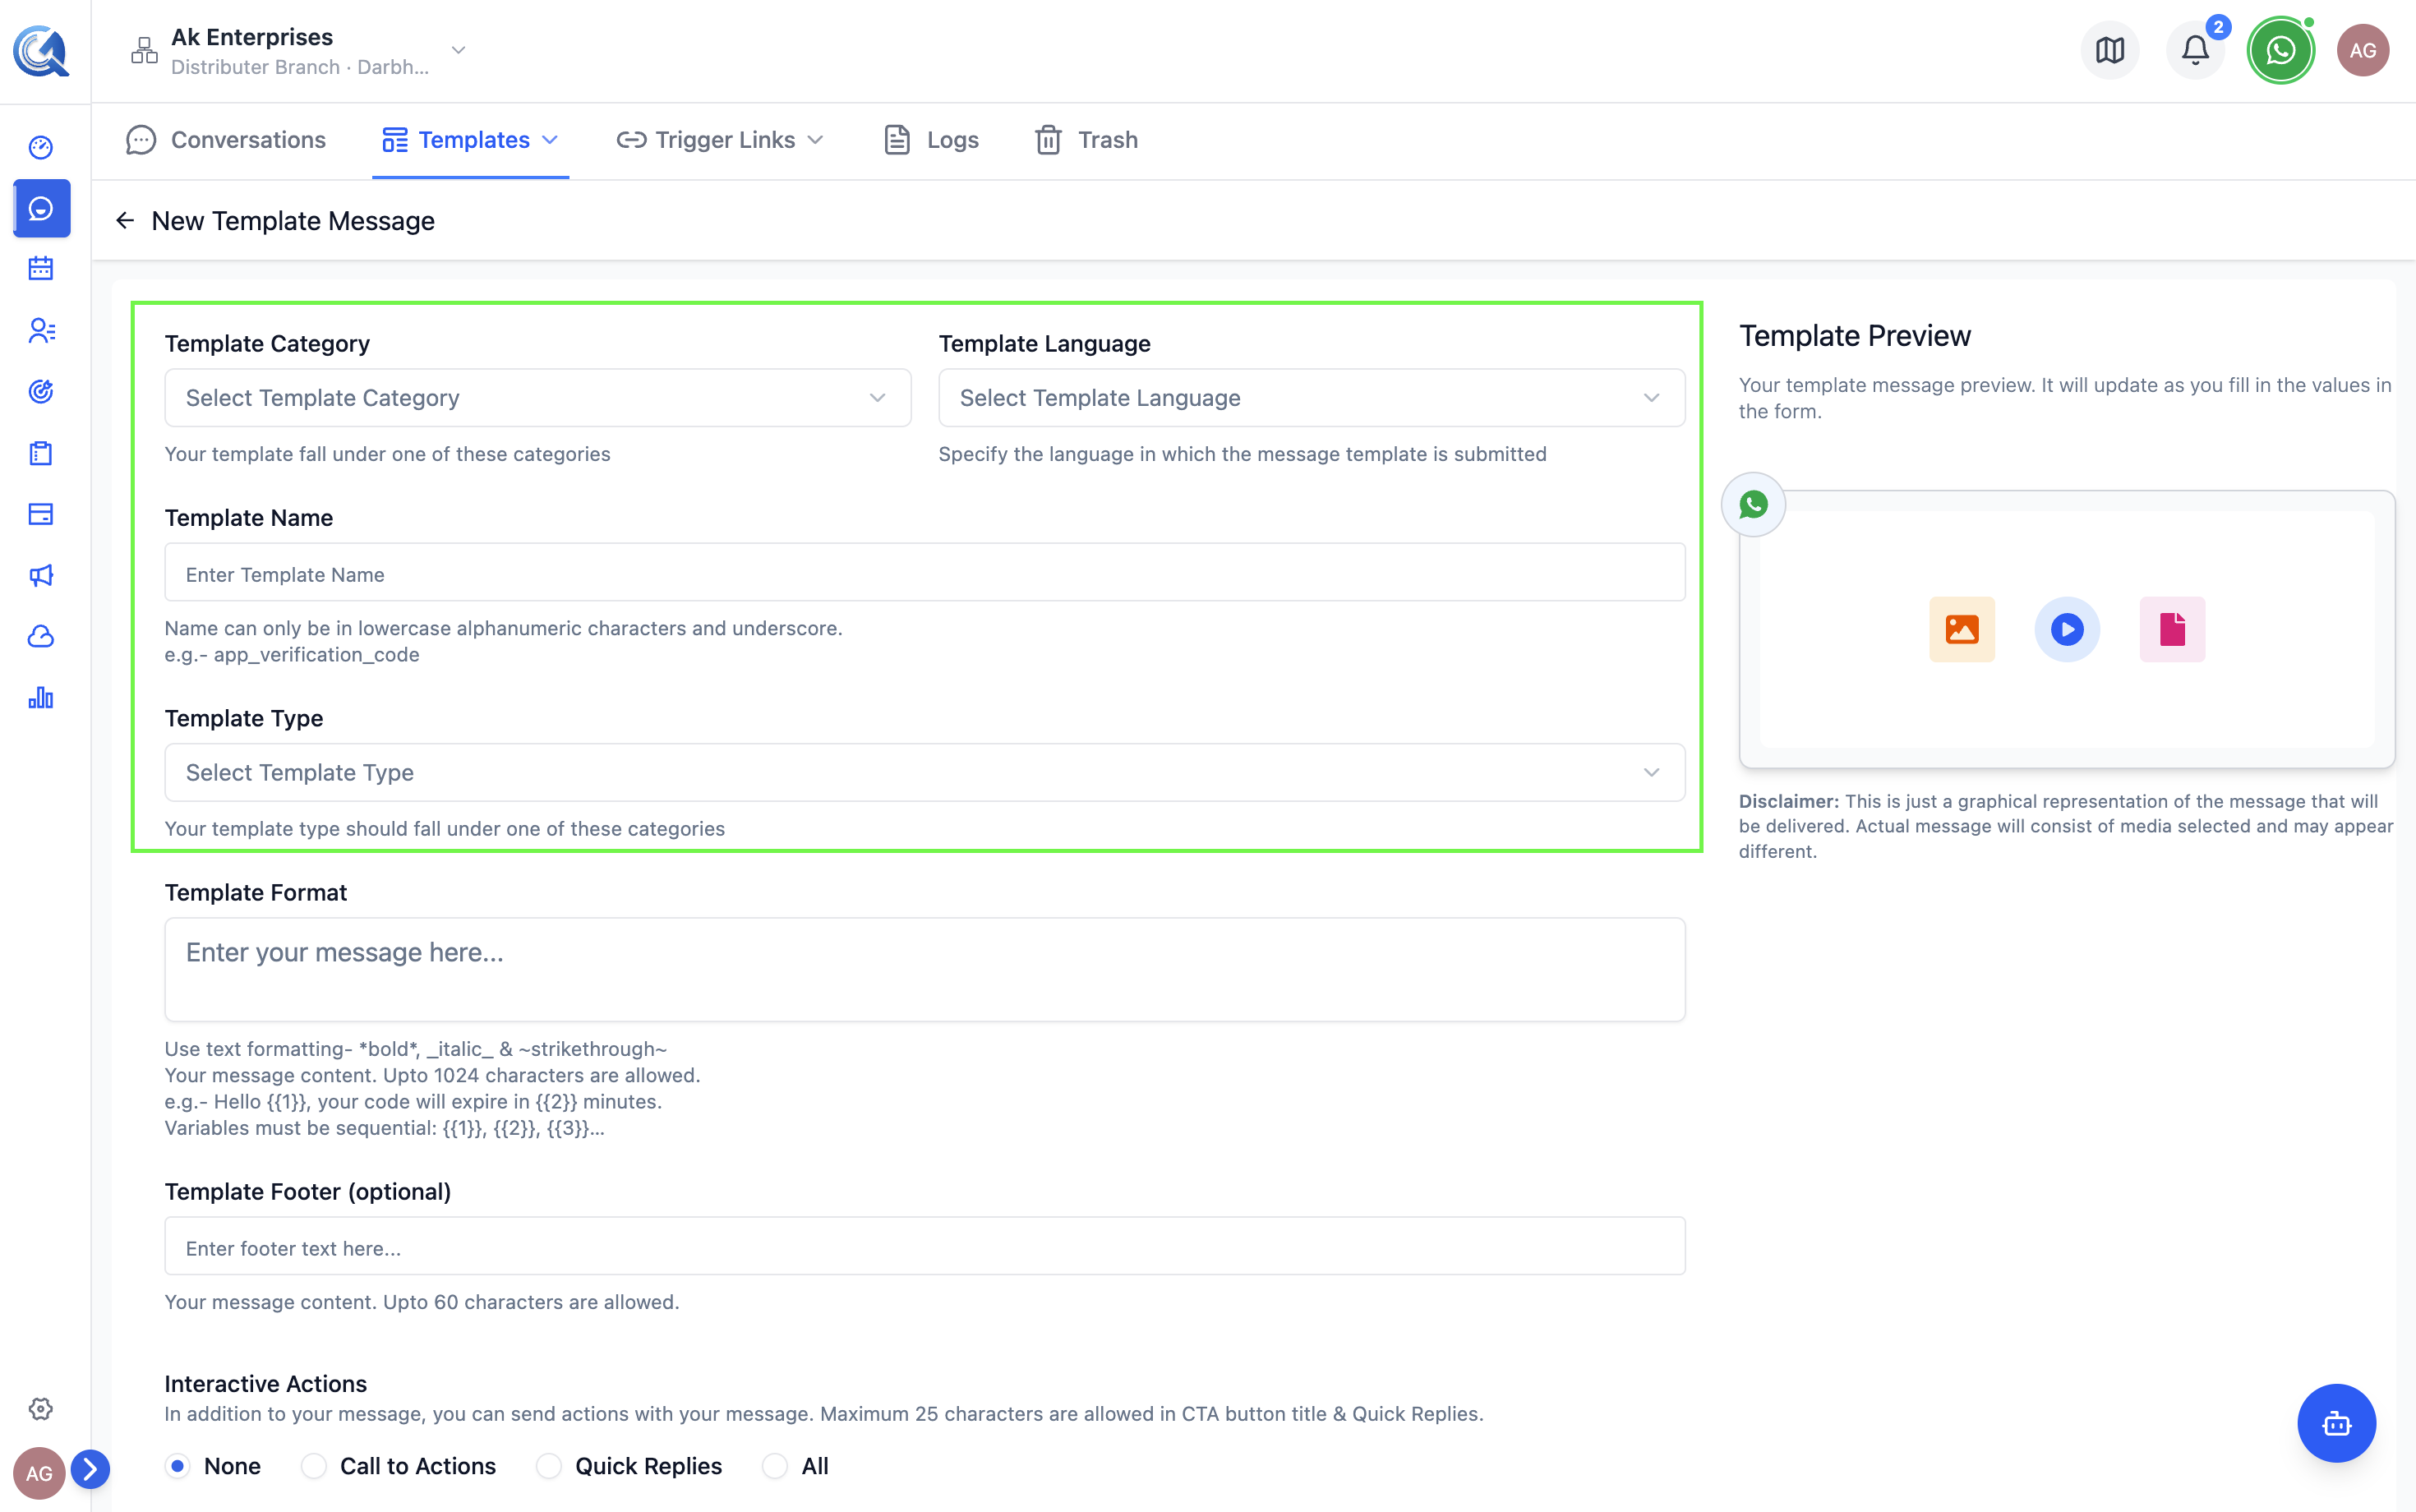 Enter a unique name, pick the correct category, and select the language.
Header (Optional)
Choose a header type and content:
| Header Type | Description |
|---|---|
| None | No header |
| Text | A short bold line above the body (max 60 characters, supports one variable) |
| Image | Upload an image or enter a URL |
| Video | Upload a video or enter a URL |
| Document | Upload a PDF |
| Location | Show a location pin (no variable support) |
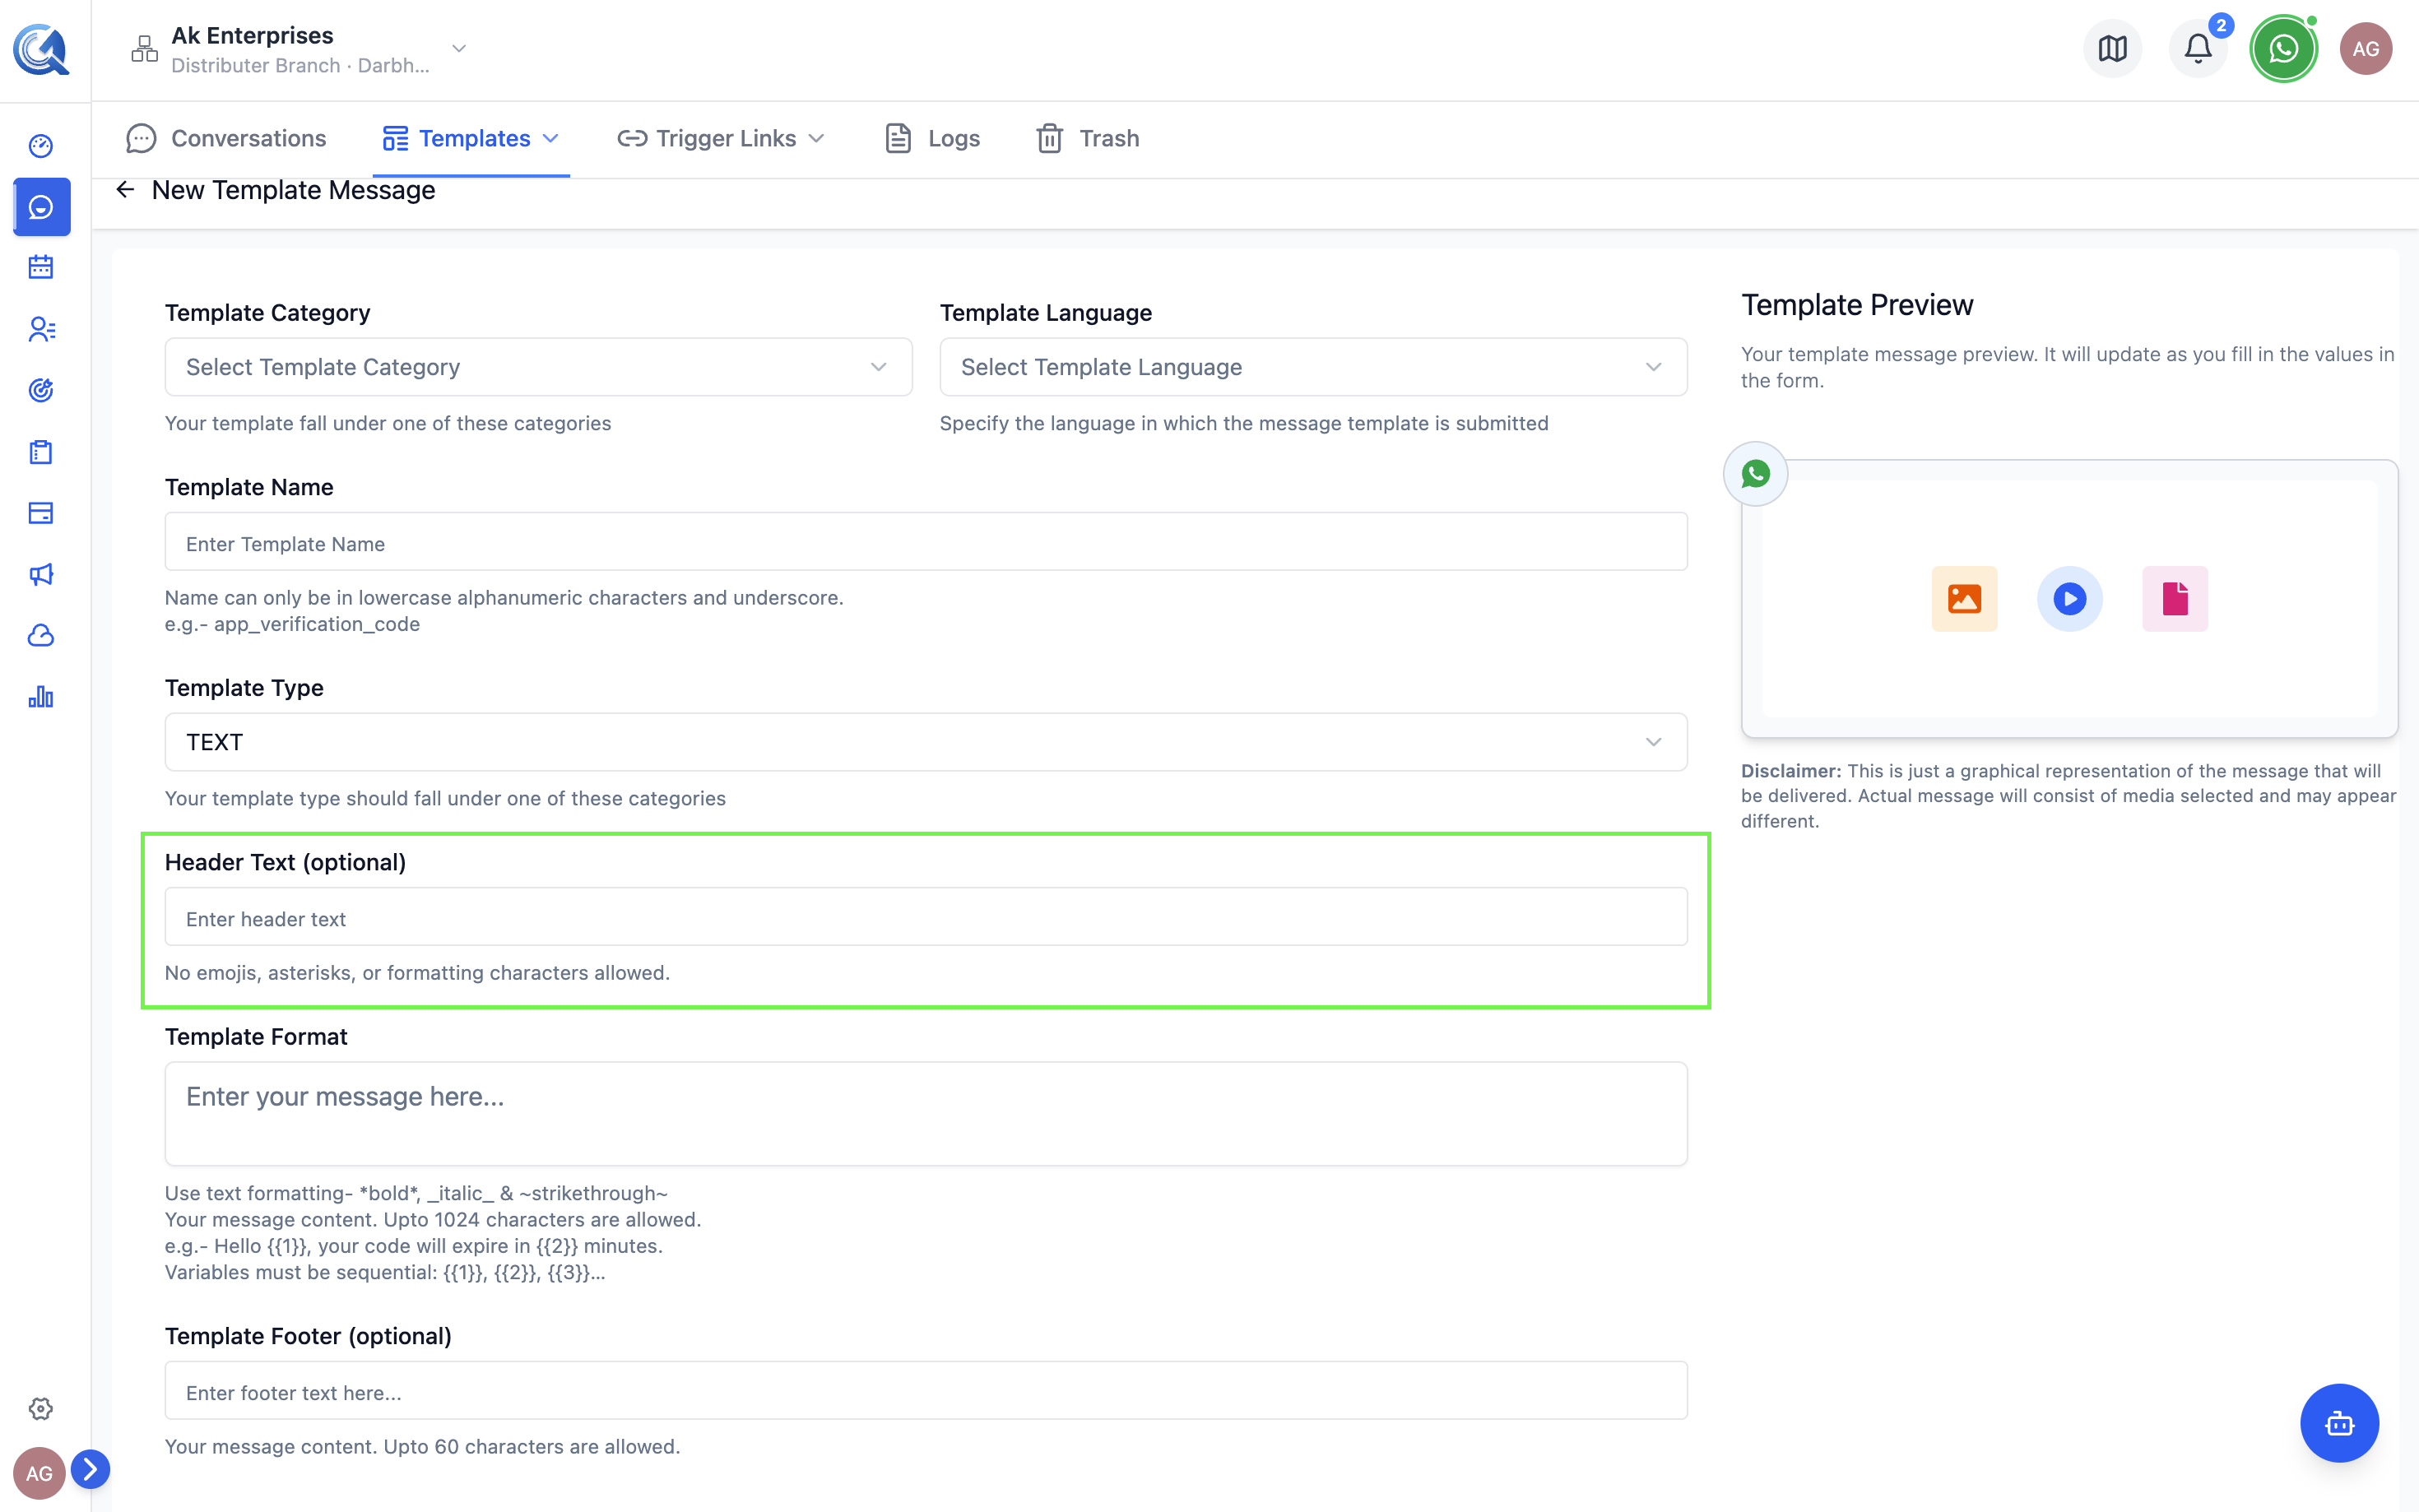 Select the header type and provide the content or media.
Body (Required)
Write the main message in the Body text area. The body supports:
- Bold:
*your text* - Italic:
_your text_ - Strikethrough:
~your text~ - Monospace:
```your text``` - Variables:
{{1}},{{2}},{{3}}— must be sequential, cannot appear at the very start or end
Meta reviewers use your example values to judge the template's intent. Use real-looking values (e.g., "John", "#ORD-4821") rather than placeholders like "test" or "abc" — vague examples increase the chance of rejection.
For each variable, provide an example value to help Meta review the template.
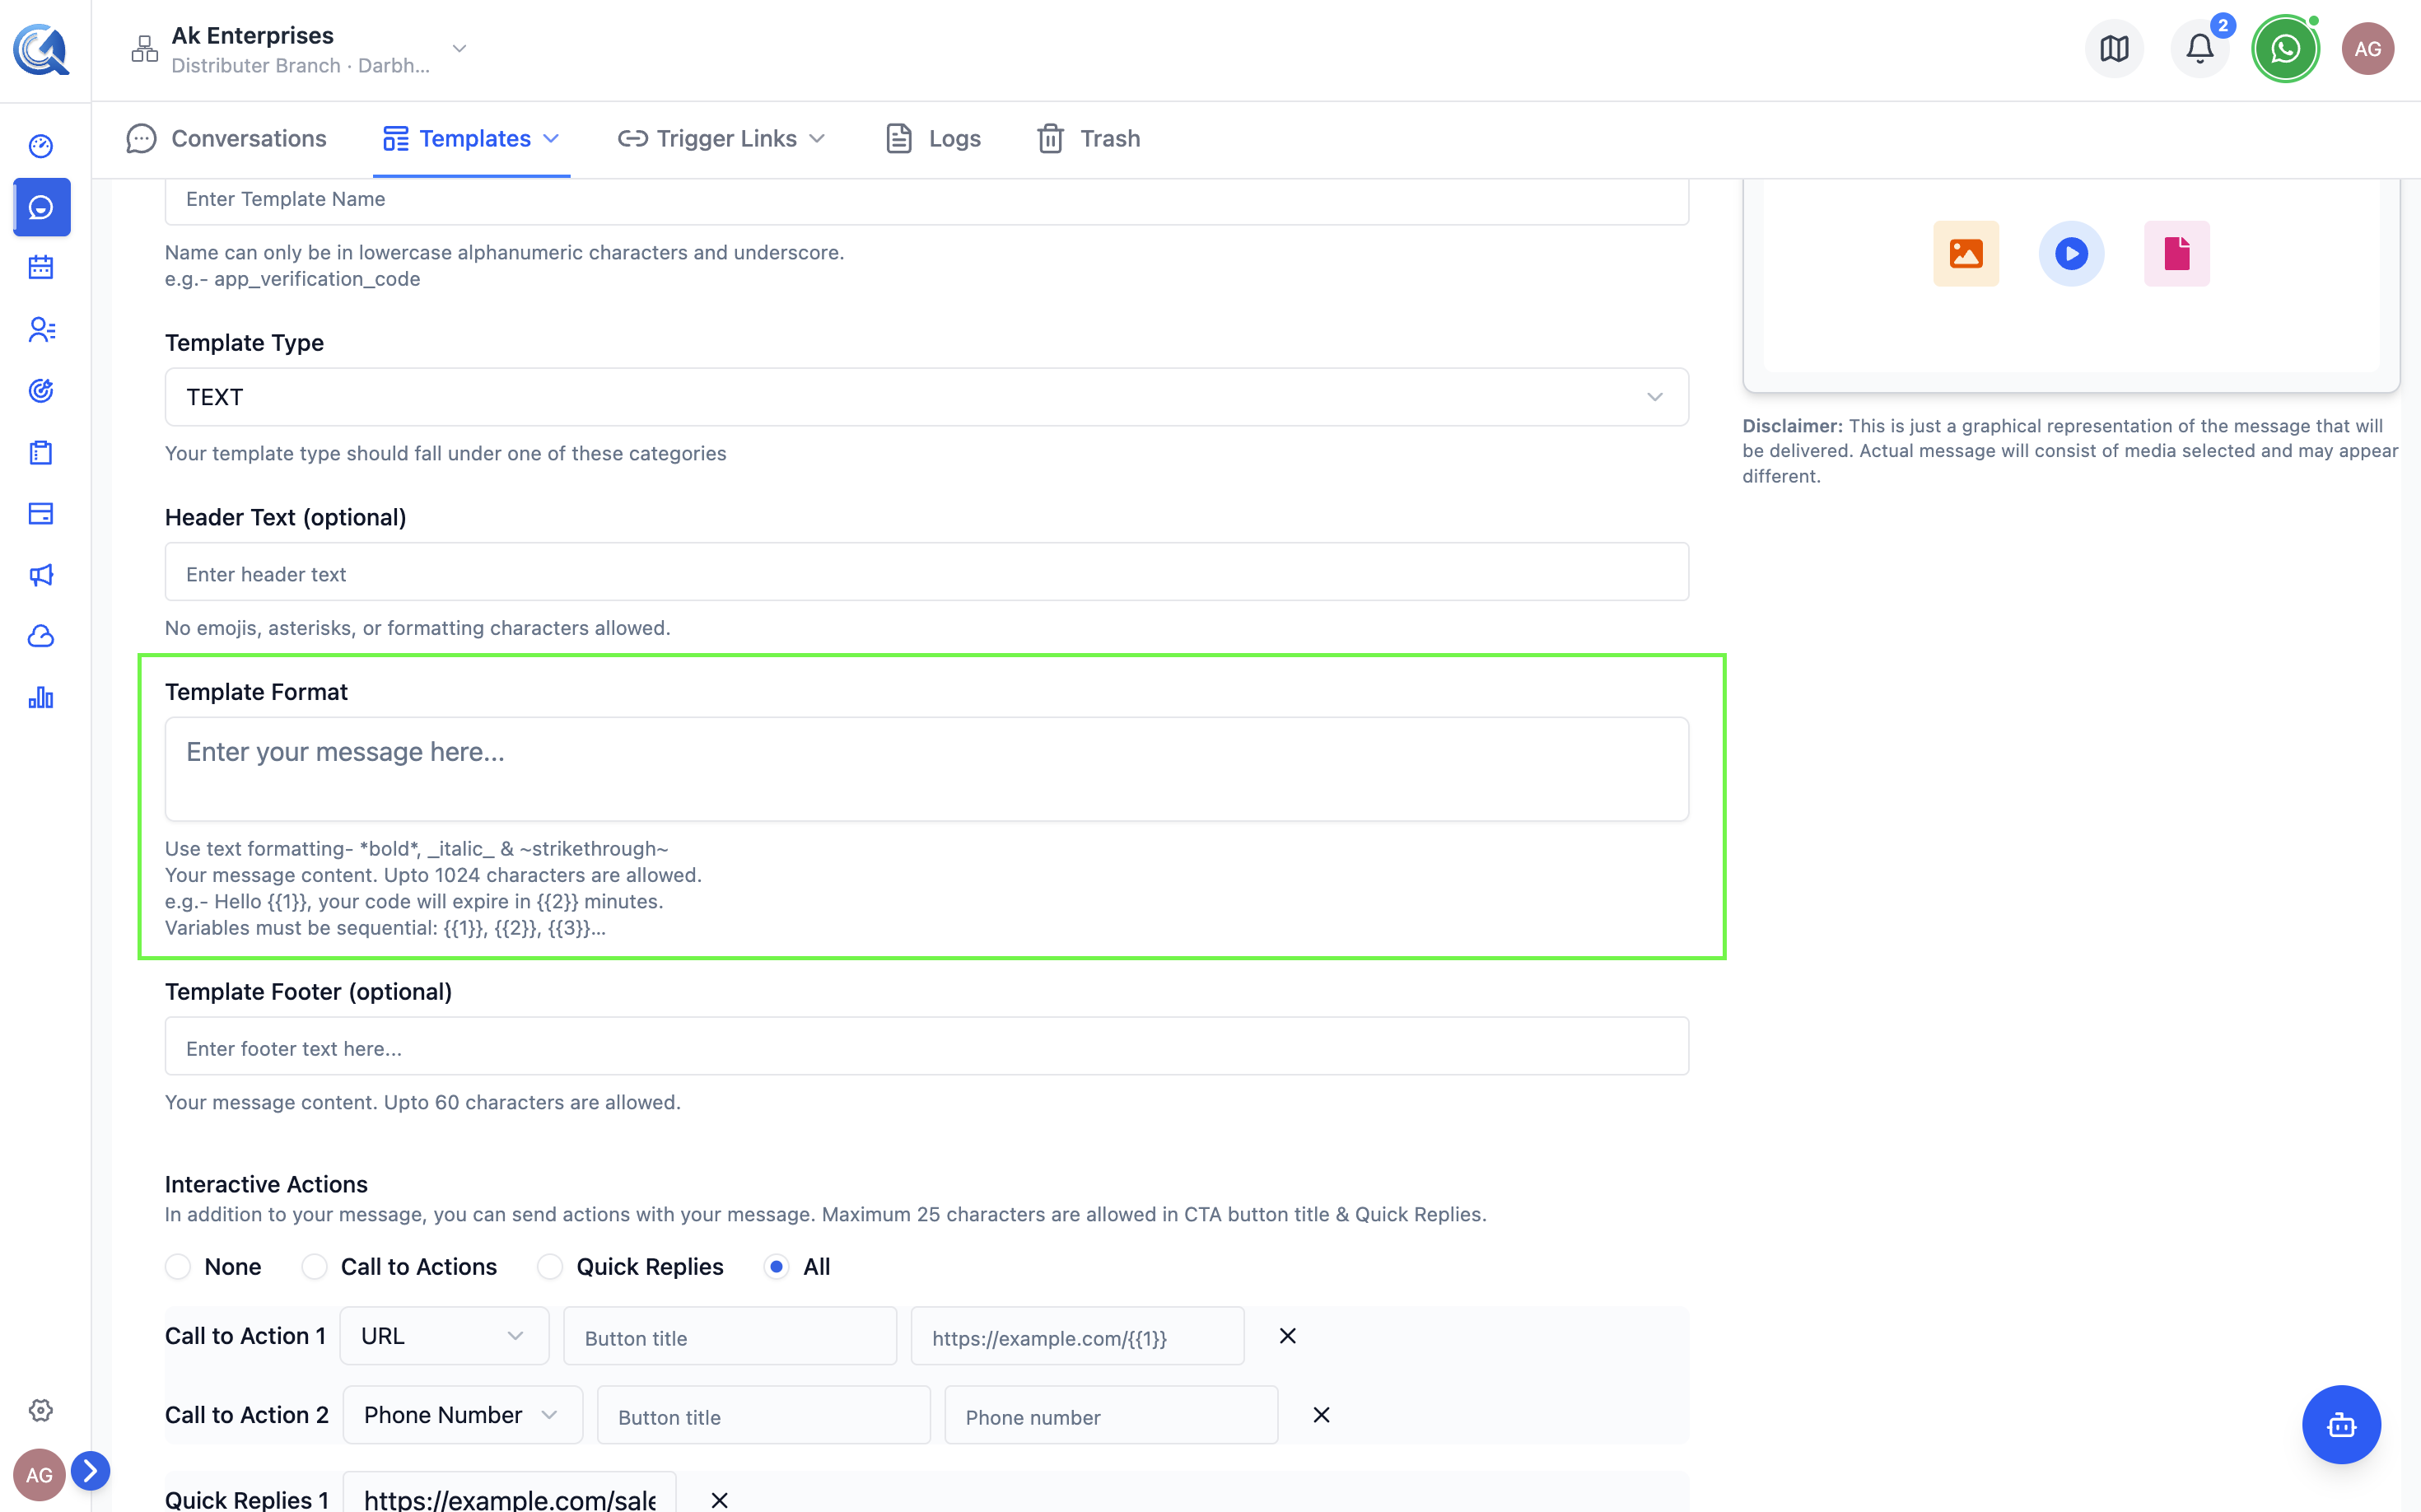 Write the body, add formatting marks, and provide example values for all variables.
Footer (Optional)
Add a short footer line (max 60 characters) below the body. Typically used for disclaimers like "Reply STOP to unsubscribe".
Buttons (Optional)
Add up to 10 buttons in total. Supported types:
| Button Type | Max Count | Description |
|---|---|---|
| Quick Reply | 10 | Preset text the contact can tap to reply |
| URL | 2 | Opens a web link; supports one variable at the end of the URL |
| Phone Number | 1 | Dials a phone number when tapped |
| Copy Code | 1 | Copies a discount or verification code to clipboard |
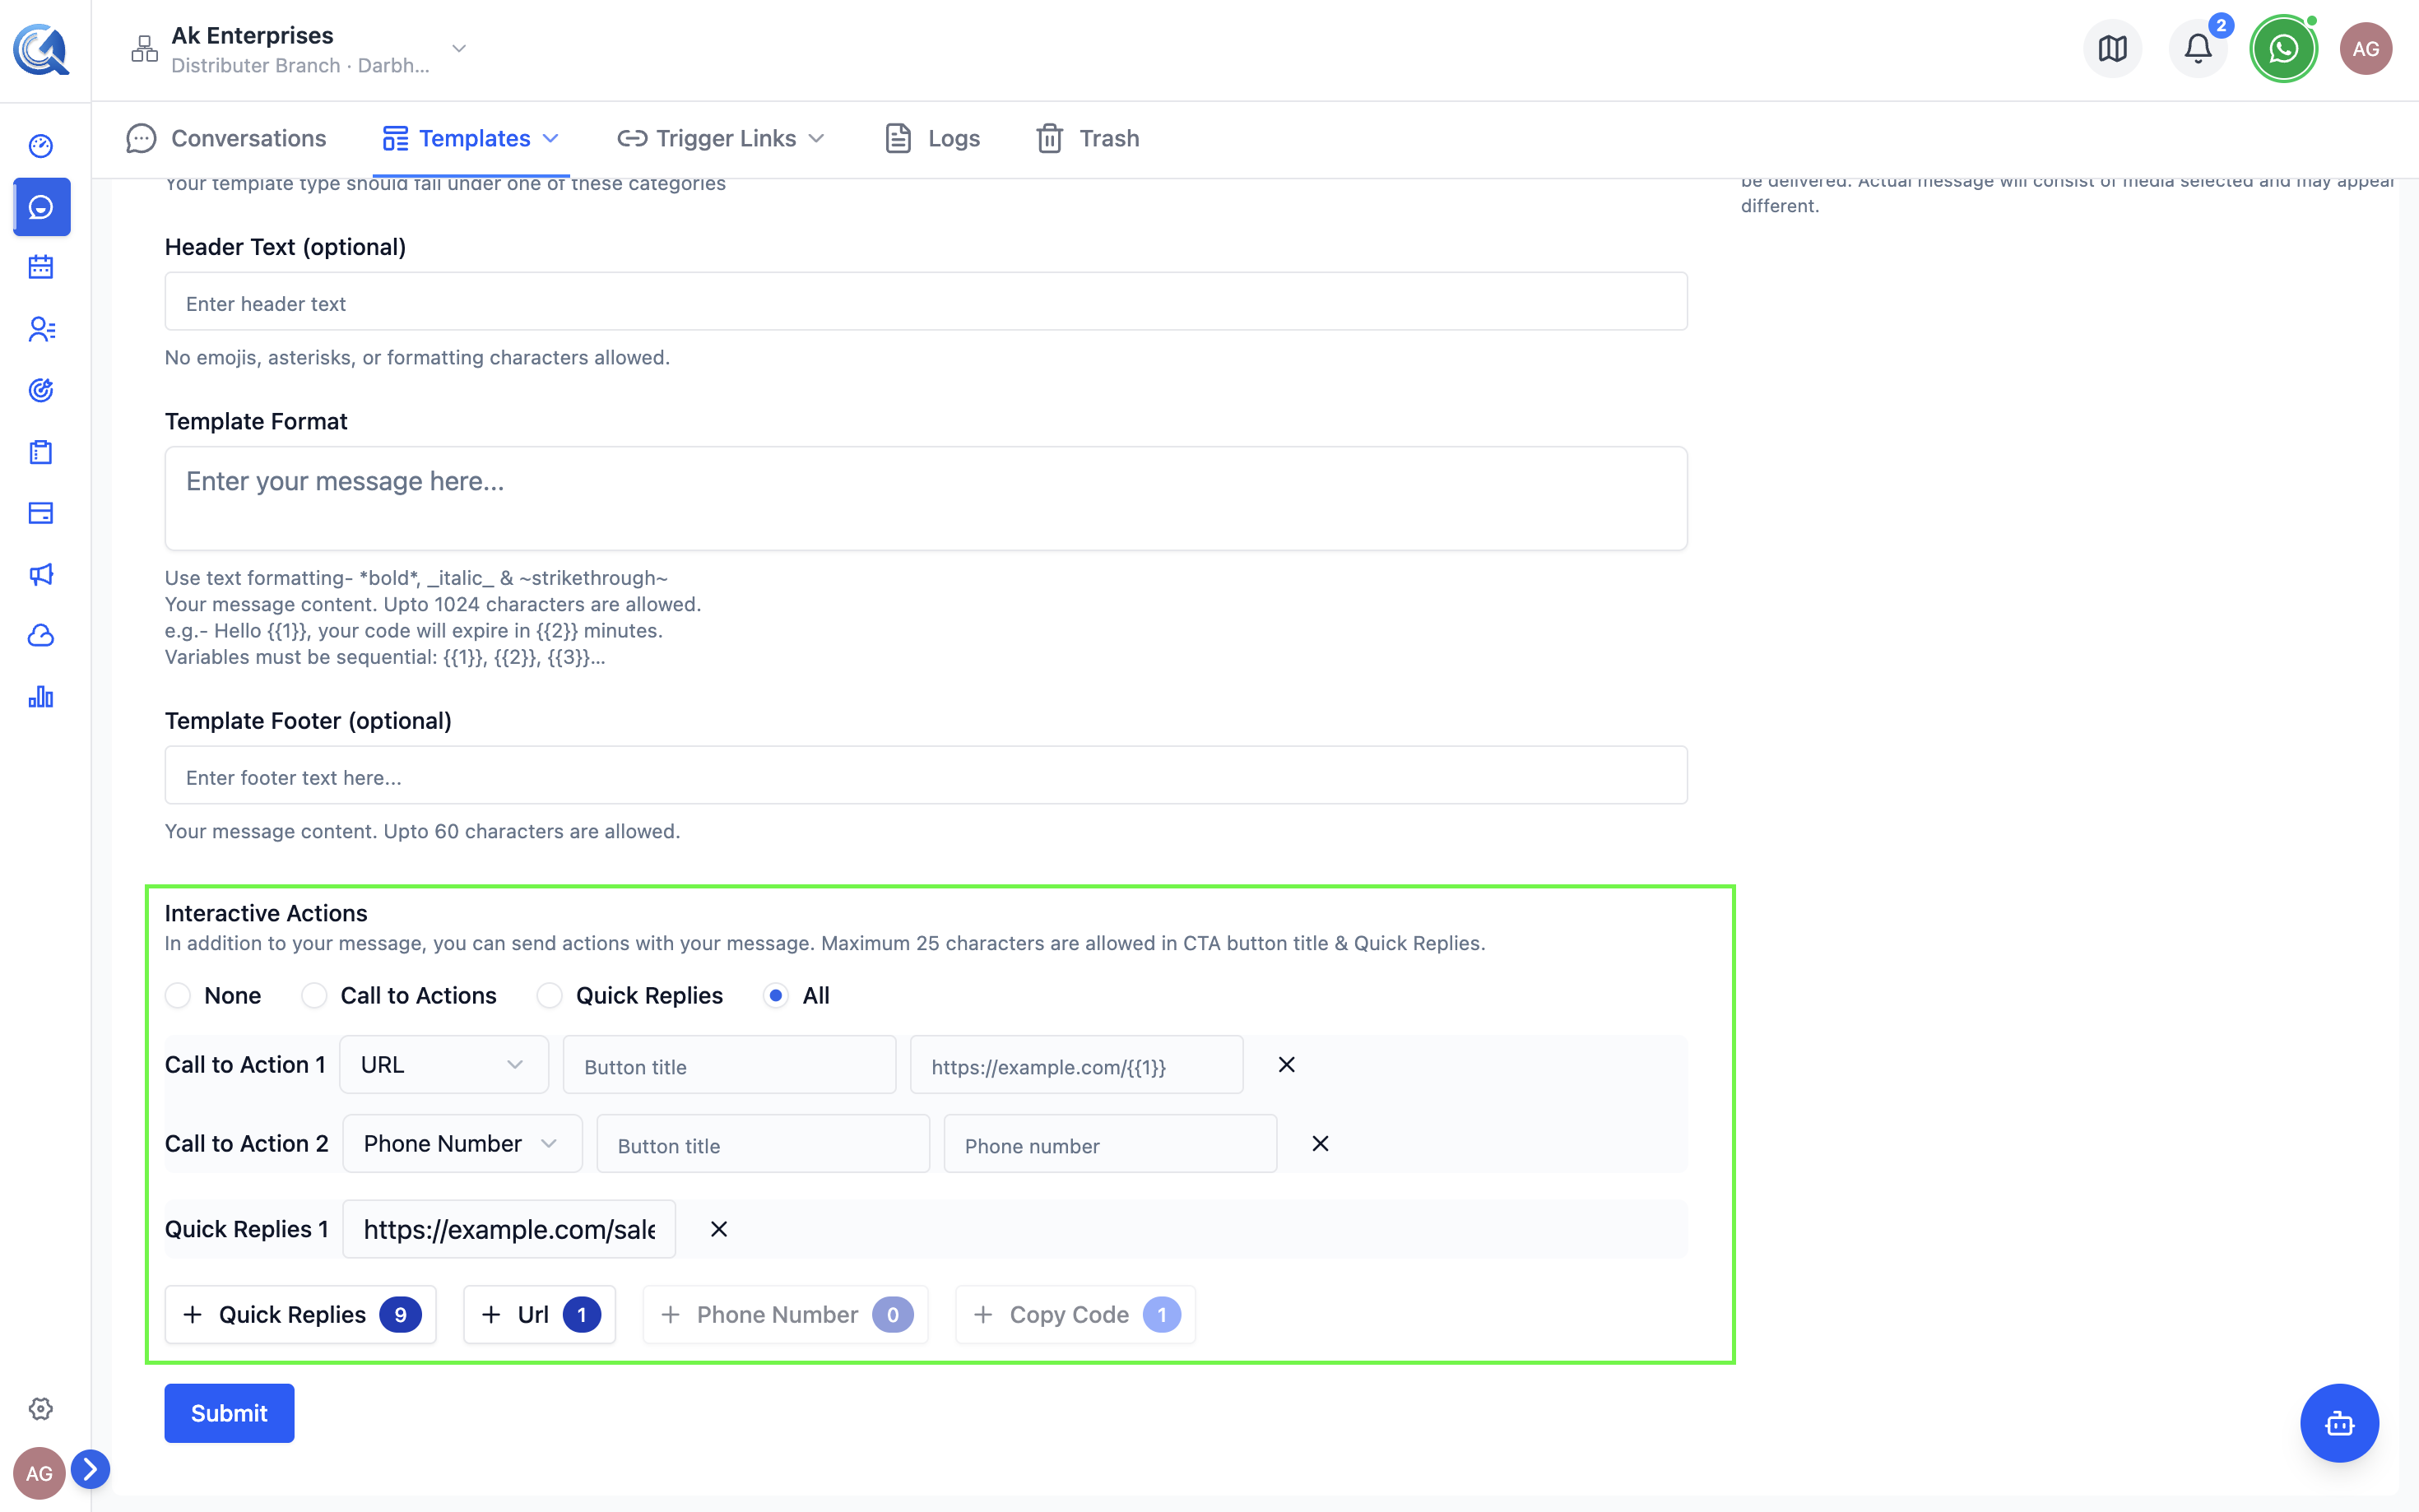 Add buttons to make your template interactive.
Submitting for Approval
Once all required fields are filled:
- Click Submit for Approval.
- The template status changes to Pending.
- Meta reviews the template — typically within a few minutes to several hours.
- You will see the status update to Approved or Action Required in the template list.